I am having my family for Sunday dinner this week. Nothing fancy. We are having shake and bake pork chops, scalloped potatoes and vegetables. Probably carrots and beans. I might make some biscuits. We will see.
The heart wants what the heart wants and the men in our family are meat and potatoes men with simple tastes. They don't like anything too fancy or out of the ordinary. Especially my dad. Shake and bake pork chops are a favorite!
One of my favorite comfort foods has always been Boston Brown Bread. At the weekend, with baked beans, soup, stews, etc. there is nothing more delicious.
I can remember when I was a child you could buy it ready made in the can. It was so good, especially with the Saturday night supper.
Homemade Boston Brown Bread can sometimes be a bit of a hassle to make however because it does need to be steamed. You don't always have the energy or the time to go to all of that trouble.
These Brown Bread Muffins are the perfect solution! I discovered this recipe in a cookbook I have had for a very long time by Marion Cunningham (the cookbook author not the mother of Richie).
The title of the book is The Supper Book. I have had it for a very long time. Everything I have ever baked from it has been wowzah! Seriously. But then again, I would expect nothing less from Marion Cunningham.
She is the chef/author who was responsible for the 12th and 13th editions of the Fanny Farmer Cooking School cookbook. That is my all time favorite cookbook. I can't begin to tell you how many copies of that book I have worn out.
Too many to count. Its an excellent book and something I like to give as a wedding gift to all young Brides. You cannot go wrong with it. You can't go wrong with any book Marion worked on.
This is actually a recipe I have had flagged (page turned over) for a very long time. I have always wanted to try it. I can't think of why I waited so long! Its fabulous!
I think the fact that the original recipe made 18 muffins kind of was a bit of a put off for me actually. That was far too much muffin for just myself and my ex, and certainly it is a bit too much muffin for just me.
Today I decided to go for it and small batch the recipe with absolutely wonderful results. I am so happy that I did! These are excellent muffins.
There is no steaming involved. Just a simple muffin recipe, using simple ingredients, and very low in fat.
There is only 1 TBS of melted butter in the recipe and it makes 9 nicely sized muffins. There healthy and nutritious, using a combination of flours and grains.
Whole wheat flour, plain flour and yellow cornmeal. The whole wheat flour makes them hearty and the cornmeal adds a tiny bit of texture and crunch.
They are sweetened with a bit of molasses. That's all. The original recipe called for 3/4 cup, but how do you cut that in half? I figured it out to be approxmately 6 TBS.
I love molasses. It is one of my favourite things to cook with. If you are in the UK, however, it can be somewhat hard to come by.
When I was there I combatted that problem by using half golden syrup and half treacle. It always worked a charm.
A bit more sweet comes from the use of raisins in the batter. I love raisins, so that is not a problem with me. I think, however if you really hate raisins, you could replace then here with dried cranberries or blueberries.
Chopped dried dates. Dried currants, etc. All would work well.
Brown Bread is an Eastern Canada/Us thing, a maritime thing. Traditionally it would have been served on Saturday night with baked beans and the like.
There was nothing like a Saturday night baked bean supper with plenty of brown bread and ham or wieners, scalloped potatoes, coleslaw, or sliced cucumbers and tomatoes . . . this is nirvana to me!
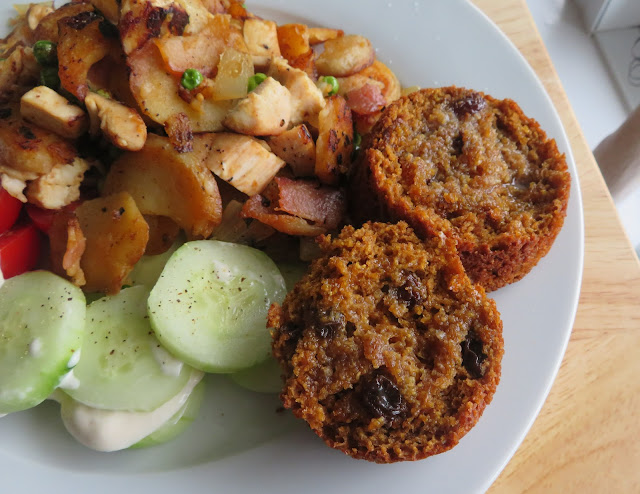
I didn't want to open a can of beans today and I had no homemade beans, so I made do with what I did have.
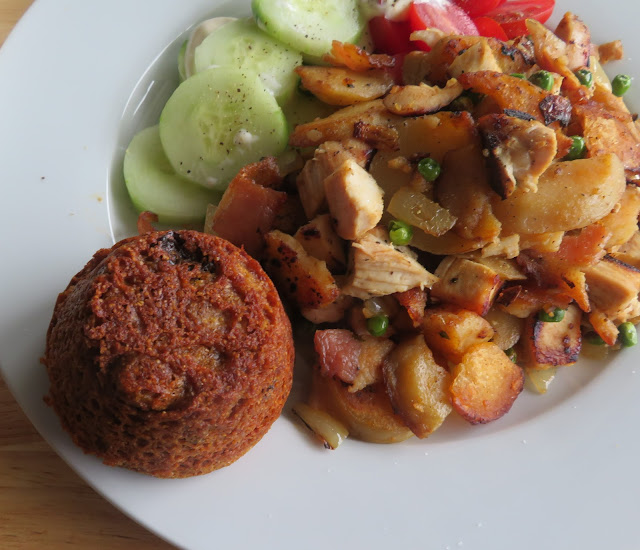
I had some leftover cooked chicken breast and leftover fried potatoes. I combined the two to make a tasty hash for one.
I chopped the potatoes and the chicken. I also had a slice of cooked bacon, which I chopped as well.
I added half a small onion chopped and a couple of tablespoons of frozen baby peas.
This all went into a non-stick skillet. I didn't need to add any oil or butter because the potatoes had already been fried in butter a few days ago and of course there was the rasher of bacon.
I did season it a bit with some Montreal steak seasoning. I know, not steak, but it worked well.
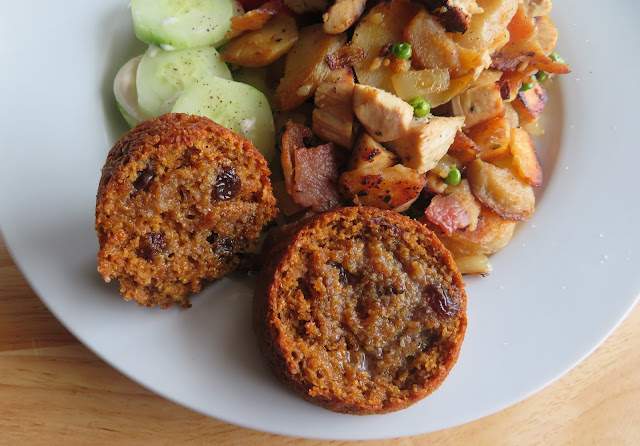
It worked out to be delicious! I was really pleased with it. I had some sliced cucumber with it and halved cherry tomatoes, and one of those delicious muffins of course.
Oh yes, I did butter the muffin. I could not resist.
I was not too surprised actually! These would go well with just about anything. Baked beans, stews, soups, chicken salad, etc. I can't really think about anything that wouldn't go with them, and in all truth, they pretty special all on their own.
I know. I am incorrigible, but one of these warmed for breakfast, buttered and served with a cold glass of orange juice is a real treat!
You can't go wrong with baking some of these and they do freeze well. I say go for it!
 This content (written and photography) is the sole property of The English Kitchen. Any reposting or misuse is not permitted. If you are reading this elsewhere, please know that it is stolen content and you may report it to me at mariealicejoan at aol dot com.

Brown Bread Muffins
Yield: makes 9 muffins
Author: Marie Rayner
Prep time: 8 MinCook time: 12 MinTotal time: 20 Min
Incredibly moist, flavor-filled and delicious. Fabulous with baked beans, soups, hash, salads, etc. In short, everything!
Ingredients
- 1/2 cup (70g) all purpose plain flour
- 1/2 cup (70g) whole wheat flour
- 1/2 cup (85g) yellow cornmeal
- 3/4 tsp baking soda
- 3/4 tsp salt
- 6 TBS molasses
- 2 TBS cider vinegar
- 3/4 cup (180ml) milk
- 1 TBS butter, melted
- 1/2 cup (75g) raisins
Instructions
- Preheat the oven to 400*F/200*C/ gas mark 6. Butter 9 muffin cups well. Set aside.
- Whisk both flours, cornmeal, soda and salt together in a bowl.
- Whisk the milk, molasses, vinegar and butter together in another bowl. Add all at once to the dry ingredients, and quickly mix to combine. Stir in the raisins. Spoon into the prepared muffin tin, filling them 3/4 full.
- Bake in the preheated oven for about 12 minutes, or until a toothpick inserted in the center comes out clean.
- Serve warm. These can also be frozen.
Did you make this recipe?
Tag @marierayner5530 on instagram and hashtag it #marierayner5530
Created using The Recipes Generator
Follow my blog with Bloglovin
With this weekend being Memorial Day in America and the grilling season being upon us, I thought it would be fun to share a quick and easy dessert with you that I think the whole family will love.
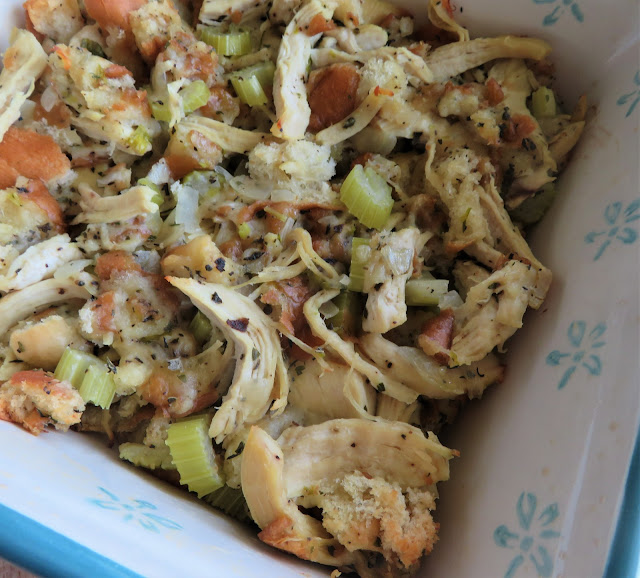
It had to happen. You probably knew it was going to. Yep, I have downsized one of my favorite casseroles, Amish Chicken & Stuffing Casserole.
The original recipe served 6 to 8 people. This version serves only two. You can find that original recipe here. I appreciate that some of you are larger families and will want the full deal.
As I said, this is one of my absolute favourite chicken casserole recipes! That is for a number of reasons. One, I love chicken, and I totally adore chicken and stuffing together.
Two, I love anything Amish and anything to do with the Amish. I love their culture and way of life and I totally love their food. Simple ingredients done really well.
And finally because this is a simple and easy recipe, that is a great way to use up stale bread or rolls. You can also use leftover cooked chicken in it, but generally I will poach chicken specifically to use in this.
Poaching your own chicken is not that hard to do. Just pop it into a saucepan and cover it with some chicken or vegetable stock, a few peppercorns and a bay leaf. Bring to the boil. Allow it to simmer for about 10 minutes and then set it aside to cool in the broth until you can easily handle it with your hands.
It ends up moist and tender every time. Ready to shred and use in whatever way you want. You can use it to make casseroles such as this one, or you can cube it and make chicken salad with it. Whatever you like.
And you can poach as many chicken breasts as you can conceivably use. I often buy full packs of chicken breasts, poach them and then freeze them in individual containers, each one holding about a cup of cooked chicken.
Ready to take out and use as and when I need cooked chicken!
For me when I am cooking a roast chicken (or turkey for that matter) dinner, the stuffing is my most favorite part of the meal. It's no stretch then to imagine why this would be my favorite casserole!
It contains all the elements of my favorite meal! Tender pieces of chicken. Buttery, crisp edged bits of stuffing, flavored perfectly with onion and celery, and all of those beautiful stuffing flavors!
It was really only a matter of time before I downsized it and I thought I would get it in before the weather starts to turn really hot. Yep, its almost salad weather!
We are actually having the odd day where the temperatures are in the mid to high 20's which is fairly warm. You don't want to be heating up your kitchen cooking casseroles when that happens! So this was one of my last hurrah's before the hot weather descends upon us!
I love celery. Its one of my favorite hot weather vegetables and you will always find a bunch of it in my refrigerator. I love to eat it raw as sticks, with or without dip. Sometimes I stuff it with cheese or peanut butter. It has such a lovely crunch.
Mom always said it was impossible to eat celery politely. Raw celery is such a noisy thing to eat. I say just eat away. Enjoy. Manga! Celery is an integral part of most salads and actually things like casseroles and stuffings like this one!
I normally de-string my celery. I hate the strings getting caught in my teeth. To do that you need to grab the strings with a sharp knife at one end, and just pull them down the length of the stalk. Easy peasy.
You can just throw the strings away. Celery strings can sometimes be exceedingly chewy. De-stringing it can make even the most unpalatable piece of celery a pleasure to eat.
The celery and onion for this recipe are cooked slowly in a small amount of butter. You only want to soften them, not brown them. They are then used to help moisten the stuffing along with the butter you have sautéed them in.
You can of course add other vegetables if you wish. Chopped carrot goes well as do chopped mushrooms, which I know are technically not a vegetable but meh. They work well.
Today I used some stale hotdog buns for my bread. You can use any kind of bread you wish, but the hot dog buns worked beautifully. Stale bread rolls would also work. You will want about 3 heaped cups of bread.
This forms the basis of your stuffing. Mmmm . . . stuffing.
Sorry! I got distracted. Aside from that you will need a variety of good dried herbs. Summer savory, thyme, sage, parsley. Celery seed. I know that not everyone has access to summer savory. If you can't get that then use a bit of poultry seasoning.
That reminds me, I need to replace my Bell's Seasoning that got left in the UK. I love Bell's poultry seasoning and I always make my own. Its the best poultry seasoning.
It is great in stuffings, on chicken, fish, etc. I use it all the time. It has a lovely zippy flavour that I just love.
Once you get this all mixed together, the sautéed vegetable and butter mixture. The shredded chicken. The bread. You need to add some stock just to moisten it a bit.
Bear in mind I said moisten. You want it to be moist and not dry without being soggy. Nobody wants soggy stuffing.
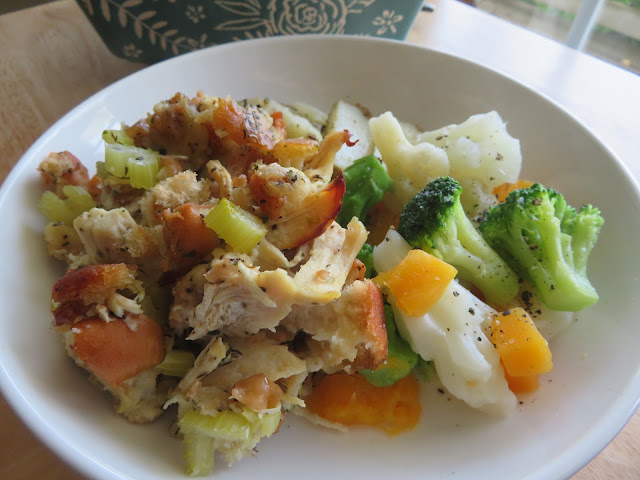
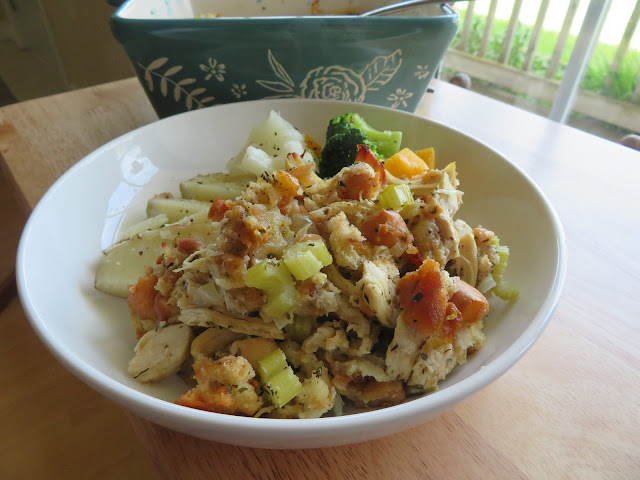
This makes just enough for two people, or for one person with one meal and then a leftover meal. I served it with a boiled new potato and some broccoli, cauliflower and butternut squash. It was perfect.
Stale bread, butter softened celery and onion, a variety of herbs, seasoning and tender poached chicken mixed with a tiny bit of stock and baked to give you one very delicious and simple entrée. What's not to love about that!

Amish Chicken & Stuffing (small batch)
Yield: Serves 2
Author: Marie Rayner
Prep time: 10 MinCook time: 45 MinTotal time: 55 Min
I downsized my favorite chicken bake to feed only two people. Its fabulously tasty and easy to make. Just throw it together and pop it into the oven.
Ingredients
- 1 large chicken breast fillet, poached in some chicken stock and cooled (reserve the stock)
- 4 stale hotdog buns
- 1/4 cup (60g) butter
- 1 small onion, peeled and chopped
- 1 stick of celery, including some leaves, washed, trimmed and chopped
- 1/2 tsp salt
- 1/4 tsp black pepper
- 1/4 tsp celery seed
- 1/4 tsp dried parsley
- 1/4 tsp crumbled dry sage
- 1/4 tsp dried thyme
- 1/4 tsp summer savory (or savory)
- butter to dot
Instructions
- Preheat the oven to 350*F/180*C/ gas mark 4. Butter a small (7-incn square) casserole dish. Set aside.
- Melt the butter in a saucepan. Add the celery and onion. Cook over medium low heat to soften without browning. Stir in the salt, pepper, celery seeds and all the herbs. Set aside.
- Crumble the hot dog buns into a bowl. Shred the chicken and add. Pour the butter mixture over all and toss together to combine. Add a bit of your reserved stock, taking care not to make it soggy. You just want it to be moist,
- Pile into the prepared baking dish and dot with butter. Cover tightly with a lightly greased sheet of aluminum foil.
- Bake in the preheated oven for 30 to 45 minutes. Delicious!
Did you make this recipe?
Tag @marierayner5530 on instagram and hashtag it #marierayner5530
Created using The Recipes Generator
Follow my blog with Bloglovin
One of my absolute favorite dessert cakes has to be the good old fashioned hot-milk sponge cake. This is the cake I grew up. This cake was the cake my mother made for all of our special occasions.
I am sure it is the cake her mother made for all of their special occasions as well. This is a recipe which has been around for ages and ages. And no small wonder. It is excellent!
Of course there is no way I will be eating one of these cakes on my own now. It is simply too large and so today I set out to small batch my mothers recipe. Happy to say, successfully.
So what is it that appeals so much about this cake? It is one of the simplest cakes you could ever want to bake.
It is nothing spectacular to look at, and yet . . . it is spectacular! It is composed of simple ingredients. Nothing out of the ordinary.
Just things that every cook has in their larder and refrigerator. Flour, baking powder, sugar, salt, milk, eggs and butter. Simple.
Have you every found yourself wondering just who was it that invented cake? I read somewhere that it was probably the ancient Egyptians who baked the first cakes.
They often baked honey sweetened breads, which were likely the first versions of cake. However it got invented, I am sure of one thing and that is that it was a good thing, because I love cake.
I love cake of all kinds and I love this delicious cake most of all. It is fabulous on its own, with no embellishments.
It is fantastic split in two and filled with jam, which is how my mother used to serve it and how my father liked it.
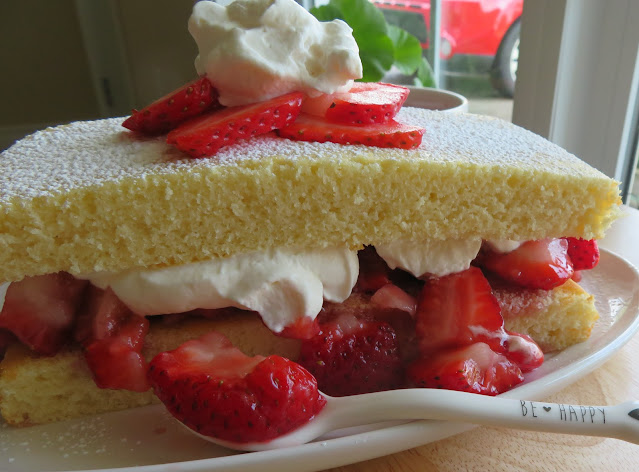
It is beautiful split and filled with a layer of jam and a layer of whipped cream. Its gorgeous split and filled with a layer of crushed berries and a layer of whipped cream.
In short it is delicious. Simply delicious.
Today I cut all of the ingredients in half and baked a much smaller sponge. I like to have all of the elements of the cake together and ready to go before I start.
This means sifting the flour, baking powder and salt together. It also means heating the milk and butter together so that the butter melts. This is easiest done in the microwave I find.
It doesn't take long, only about 30 seconds in mine. You don't want the milk to boil. You only want it warm enough to melt the butter.
Once that has happened you can stir in the vanilla.
A part of what gives it its beautiful crumb and texture is the beating together of the sugar and eggs.
I always use my electric mixer and I put them both into a clean glass bowl and then I start beating them at a high speed. You should beat the until they reach the ribbon stage.
The ribbon stage is an indication that the beaten eggs and sugar will be beaten until quite voluminous. In fact the eggs should double in size.
The batter at this point should be thick enough that it folds back on itself when you lift the beaters from the pan. Does this make sense?
The batter will fall from the beaters in a thick trail, like a ribbon. Once you have achieved that, you can then fold in the remaining ingredients, the dry and the liquid.
I like to add the dry in three additions with two additions of liquid in between. In short, you begin and you end with the dry ingredients.
For a full version of this cake I would bake it in either a round or a square nine-inch pan. For this smaller version I baked it in a 9X4-inch loaf tin.
I butter the tin first and then line it with paper. It should be done in about 25 minutes. It may take longer, depending on your oven.
In any case it is done when a toothpick inserted in the center comes out clean and the top springs back when lightly touched with your fingertip.
Now you could stop right there and you would have a lovely cake. Nice and light with a tender crumb. Very enjoyable with a hot cup of something or a scoop of ice cream on top.
Mom always split it in two and filled it. Usually with strawberry jam. Normally that was the only kind of jam we had in the house. Mom always made her own every year and it was good.
Its also very good split and filled with lemon curd. Lemon curd is one of my favorite things on the planet.
Split and filled with lemon curd, this becomes a very dangerous thing to me because I cannot leave it alone! Yes, I just cannot be trusted with lemon curd. Cannot!
For really special occasions however, you want to split and fill it with whipped cream and fresh fruit. Strawberries immediately come to mind because it is almost strawberry season.
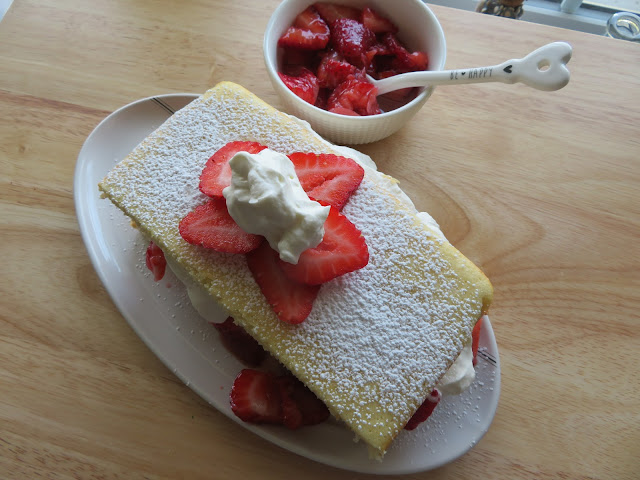
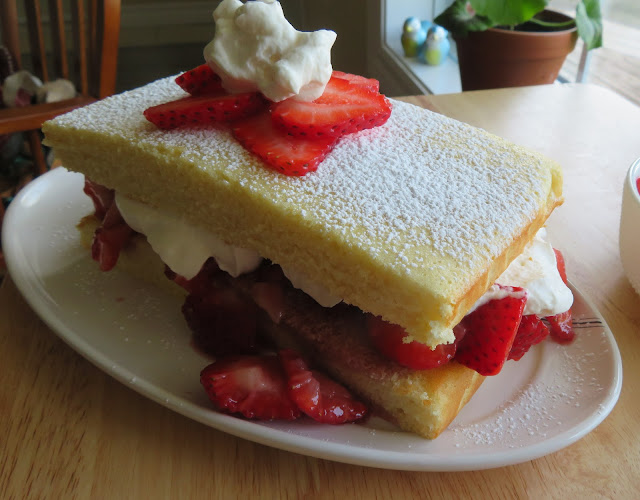
Fresh, red, sweet, plump berries. I crush half and slice the other half, combining the two together. I layer half of them in the middle of the split cake with a layer of whipped cream. You can sweeten the cream or not as you wish.
I quite got used to enjoying unsweetened whipped cream when I was in the UK. You don't really need the sugar and it tastes just as nice without it.
This is a dessert made in heaven. I don't want to call it strawberry shortcake because to my way of thinking that is always made with baking powder biscuits. This is just a lovely cake, deliciously filled with sweet berries and rich cream.
I can't think of anyone who might turn down a slice of this! Its just lovely!

Hot Milk Sponge Cake
Yield: Serves 2
Author: Marie Rayner
Prep time: 10 MinCook time: 25 MinTotal time: 35 Min
This hot milk sponge is perfectly sized for two. Filled with some whipped cream and berries it makes the ideal summer dessert. (see note below) On its own, split and filled with jam, or just plain and cut into squares, it always goes down a real treat.
Ingredients
For the cake:
- 70g (1/2 cup) plain all purpose flour
- 1/2 tsp baking powder
- pinch of salt
- 1/4 cup (60ml) whole fat milk
- 1/2 TBS butter
- 1/2 tsp vanilla extract
- 1 large free range egg
- 100g (1/2 cup) granulated sugar
To top and fill:
- 2 cups (1 pint) fresh strawberries
- 1 TBS strawberry jam
- 1/2 cup (120ml) whipping cream whipped until stiff
- Icing sugar to dust
Instructions
- Preheat the oven to 350*F/180*C/ gas mark 4. Butter a 9 by 4 inch loaf tin and line with baking paper.
- Heat the milk along with the butter for about 30 seconds in the microwave to melt the butter. Stir in the vanilla. Set aside.
- Sift together the flour, baking powder and salt. Set aside.
- Beat the egg and the sugar together until it doubles in volume and forms a ribbon when the beaters are lifted from the bowl.
- Add the flour mixture alternating with the milk, making three dry and two wet additions, combining well, but trying to not knock any air from the eggs.
- Pour into the prepared baking tin.
- Bake in the preheated oven for 20 to 25 minutes, until risen and golden brown.
- Leave in the tin for five minutes and then unmold onto a wire rack to cool completely.
- If you are filling with berries and cream: Wash and slice your berries, crushing half of them. Mix together in a bowl with the jam and leave to sit for a few minutes while you whip the cream.
- Whip the cream with or without a pinch of sugar until thick and it holds its shape.
- Slice the cake carefully into two pieces lengthwise. Place one piece, cut side up, onto a serving plate. Top with 1/2 of the berries. Dollop the cream over top and place the other half the cake right side up over the cream.
- Dust with icing sugar and serve with the remaining berries on the side.
Notes:
If filling with berries and cream, do not fill until shortly before serving.
Did you make this recipe?
Tag @marierayner5530 on instagram and hashtag it #marierayner5530
Created using The Recipes Generator
Follow my blog with Bloglovin
Subscribe to:
Posts (Atom)


















Social Icons