Fresh English Strawberries, nothing says summer better than these brilliant sweet & fresh garden berries. We grow our own, and they are somewhat smaller than the ones you will see in the shops, with an exemplary flavour. Almost condensed and so sweet and delicious! They are coming fast and furious at the moment, due to all of this lovely hot weather we are having and so I thought I would bake some Strawberry Cupcakes with some of them! These are the perfect bake to end the month of June on!
Its a recipe which I have adapted from a cookery book entitled "Screen Doors & Sweet Teas! by Martha Hall Foose. I love this book and don't use it near often enough. I spied it in my book case the other day and pulled it and these lovely cupcakes immediately caught my eye.
It also gave me the perfect excuse to use some of those Dr Oetker cake sprinkles I was sent the other day, not to mention some of the pink food colour gel for the frosting.
The frosting is a cream cheese butter frosting, and actually didn't call for any food colouring. The cupcakes in the book had brilliant pink frosting . . . but in all honesty mine did not. (I strongly suspect that some literary licence was taken with the food photography for the book and they did add colouring for presentation purposes, and so I did too!) Even so, I probably could have used more as they were only pale pink.
It is a lovely frosting however and quite different as you use mashed berries cooked together with some lemon juice and strawberry jam, so you really do get a lovely berry flavour which is really nice and a bit of a surprise when you bite into them!
I find the cream cheese over here in the UK to be a bit more liquid than the American variety, so try to drain it if you can, and you may also need a bit more icing sugar to get the right consistency for spreading. It also helps if you chill it for a while.
I dug out my favourite cupcake papers for these. A variety of florals by Eddingtons. They are nice and thick and very pretty.
I could have used brighter sprinkles, but these Glamour and Sparkle Dr Oetker ones were just perfect for these. I didn't want them to look overly garish.
A mix of mashed fresh berries and orange zest is mixed into the cake batter, so you have a lovely berry flavour throughout along with little bits of berries.
Its a buttermilk cake batter also, which makes for really lovely and moist cupcakes.
I couldn't resist having a bite. They are so delicious! Dangerous even. I cut the recipe in half because there are only two of us, so I made 12 of them. After one bite I knew it was a bad idea to keep 12 of them in this house, so I immediately sent six next door.
There were NO complaints. But raves! I love it when that happens.
These are the perfect way to celebrate the delicious taste of British Strawberry Season I think! Yum!!
*Strawberry Cupcakes*
Makes 24
One of the things I love most about strawberry season.
For the cakes:
350g cake flour (2 1/2 cups)
(see my recipe below for how to make your own)
1 tsp baking soda
1/4 tsp salt
80ml buttermilk (1/3 cup)
60ml canola oil (1/4 cup)
1/2 tsp almond extract
1 tsp vanilla extract
125g butter, at room temperature
285g granulated sugar (1 1/2 cups)
2 large free range eggs
200g mashed fresh or frozen strawberries (1 cup, mashed)
1 tsp freshly grated orange zest
For the frosting:
100g chopped fresh or frozen strawberries (1/2 cup)
2 TBS strawberry jam
1 tsp fresh lemon juice
1 (250g) pack cream cheese, softened (8 ounces)
375g butter, softened (1 1/2 cups)
520g icing sugar, sifted (4 cups)
Preheat the oven to 180*C/350*F/ gas mark 4. Line 24 muffin cups with paper liners. Set aside.
Sift
the flour together with the soda and salt. Set aside. Whisk together
the buttermilk, oil and both extracts. Set aside. Mix the mashed
berries for the cakes with the orange zest. Set aside.
Using
an electric whisk, beat the butter and sugar together until light and
fluffy. Beat in the buttermilk mixture a bit at a time. Once it has
all been beaten in, beat together for a further minute at medium speed.
Beat in the flour mixture, on low, just until combined. Stir in the
mashed berry mixture. Spoon into the prepared muffin cups, filling them
only 2/3 full.
Bake for 18 to 20 minutes until
risen, golden brown, and a toothpick inserted in the centre comes out
clean. The tops should spring back when lightly touched. Cool in the tin
for 10 minutes then remove to a wire rack to cool completely.
To
make the frosting, combine the berries, jam and lemon juice in a small
saucepan over medium heat. Cook and stir for 5 minutes, until the jam
is melted and the berries are soft. Press any larger pieces with the
back of a spoon to make sure they are well mashed. Let cool completely.
Using
the paddle attachment of your mixer, beat the cream cheese and butter
at medium speed until creamy. Add the confectioners sugar, slowly, at
low speed until thoroughly combined. Blend in the strawberries, also at
low speed. Spread onto the cupcakes when they are completely cold.
To make your own Cake flour:
Measure
out the flour for your recipe. For every 140g/1 cup of flour remove 2
TBS and replace it with 2 TBS of cornflour (corn starch). Sift 5 to 6
times.
I really hope you bake these delicious cupcakes. With their double whammy of beautiful strawberry flavour your family is sure to love them! They would be perfect for your summer cookouts and holiday celebrations this weekend! (Happy Canada Day and 4th of July!) Bon Appetit!
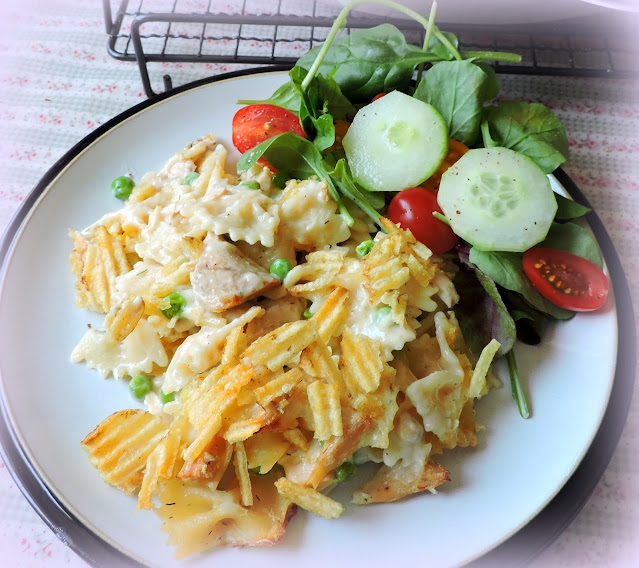
Every once in a while I feel very nostalgic and I crave something from my childhood. Mom's Tuna Casserole is just such a dish.
If you are a purist and don't like recipes which use cream of whatever soup, look away now. As for myself, I feel they have their time & place, and Mom's Tuna Casserole is just such a time & place!

It wasn't fancy eating. My mother wasn't a fancy cook. Her food was simple and it was delicious. End of.
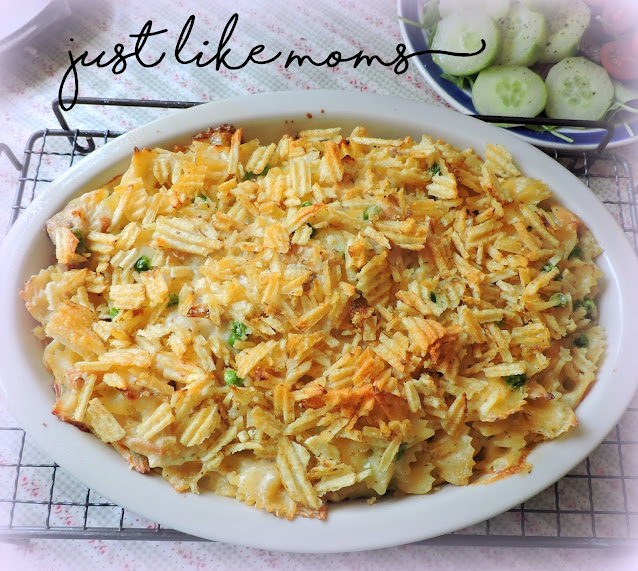
My mother always topped her casseroles with something crunchy, buttered cracker crumbs, or bread crumbs or potato chips. In our family we loved potato chips, or crisps as they are called over here in the UK.
When we had potato chips in our house that was a real treat to us. They were reserved for special occasions, such as when Hockey Night (Saturday nights) was on the telly, or for parties.
My mother would give us each a small bowl of them and I can tell you we savoured every bite!
We all loved potato chips so much that she used to keep them hidden away, behind my father's dresser in their bedroom.
When we got older we sussed out exactly where they were, and we used to take turns sneaking in and stealing a couple.
We were always careful to make sure we didn't take too many so that their loss didn't get noticed.
However with three children doing that, and probably my father too, eventually it would be noticed and my father was the one who always copped the blame.
Probably because he was always on a diet, and he was semi-guilty as charged. We children kept pretty schtum about our participation in the same heist of potato chips.
We had more to lose . . . like our allowance. ☺
I still adore potato chips, so much so that I don't dare have them in the house very often as I find myself picking at them all the time.
I am not totally sure what their allure is . . . but it probably has something to do with the naughtiness of their fat and calorie count combined with that wonderful crunch.
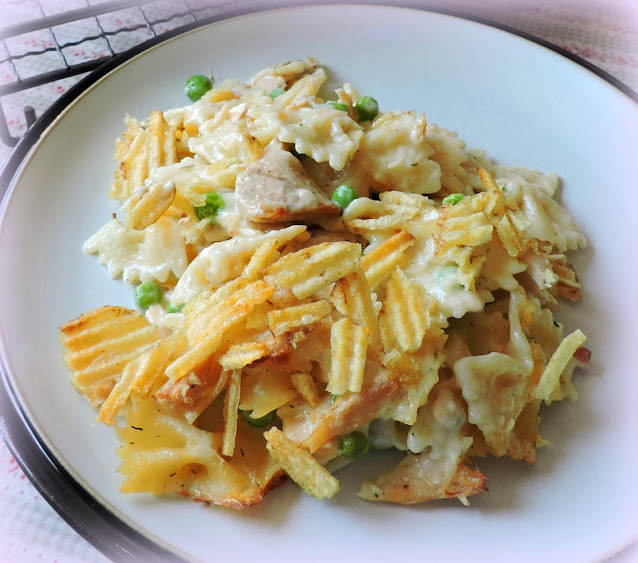
I just adore food that crunches. Don't you? The crunch of potato chips on this very nostalgic casserole is its crowning glory. I just use plain lightly salted.
Salt and vinegar would also be nice but then so would cheese and onion. Pick your own poison on that score! Just remember they are meant to enhance the casserole, not overcome it.
Mom never used cheese in hers. It was plain soup and milk. Through the years I have added cheese because we like it.
Not a lot, just enough to add a little special something. I use a mix of Parmesan and strong cheddar. You don't need a lot of either one to add a flavour impact.
You can use any old tuna you like for this, but I like white albacore tuna. Its not quite as fishy I don't think as the other kind . . .
Its like the Filet Mignon of the tuna world, and (in my opinion) well worth the extra cost in both flavour and texture.
We don't get the flat egg noodles over here, so I have used bow-tie pasta (Farfalle) because I quite like it, and it's flat and it's attractive.
I also like to use frozen baby peas (mom would have used tinned). I like frozen baby peas and cannot abide tinned peas. NOT. At. All. In any case I really enjoyed this lovely trip back in time today and I hope you will too.
*Mom's Tuna Casserole*
Serves 4
Purists
look away now. There is cream soup in this. Never killed me as a child
and is a wonderful taste of nostalgia as an adult.
295g tin of condensed cream of chicken soup (10.5 oz tin) undiluted
80ml whole milk (1/3 cup)
120g grated cheddar cheese (1 cup)
2 TBS grated Parmesan cheese
220g jar albacore tuna in spring water, drained and flaked (2 5-oz tins, drained and flaked)
150g frozen peas (1 cup)
1/2 tsp seasoning salt
1/4 tsp dried dillweed
the juice of 1/2 lemon
180g of noodles, partially cooked and drained (2 cups)
35g crushed potato chips (1 cup)
Preheat the oven to 180*C/350*F/ gas mark 4. Butter a shallow casserole dish and set aside.
Cook
the noodles al dente according to package directions. Drain well and
rinse. Drain again. Mix together the soup, milk, both cheeses, the
tuna, frozen peas, seasoning salt, dillweed and lemon juice. Pour into
the prepared casserole dish. Top with the crushed potato chips.
Bake in the preheated oven for 30 minutes, until bubbling and heated through. Serve hot.
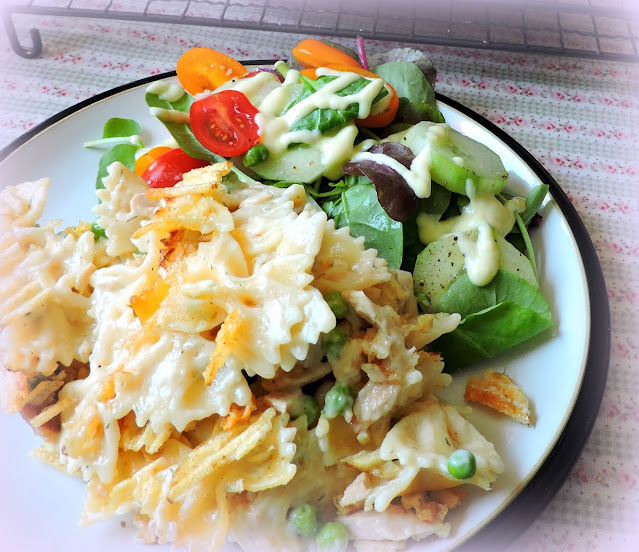
I always like to have a salad on the side with a casserole such as this. Today for nostalgia's sake I chose to drizzle it with good old fashioned Salad Cream. Bon Appetit!
We really are having the most beautiful weather here in the UK. This is the type of summer we all dream of but only very rarely get. It's just lovely. Its grilling weather, the type of weather you want to be enjoying out of doors. We get so much rain over here, that when the sun shines, we really do make hay!
Or at least cook and eat Al Fresco if we can. Oh, I do love a good BBQ, don't you?
I took full advantage of our new BBQ grill and temperatures in the 30's yesterday to grill our chicken out of doors. I love our new BBQ. Its the nicest BBQ Grill we have ever had, and I can't say enough about it! But first the chicken!
This lovely dish was adapted from two that I found in a cookery book I have by Clodagh McKenna entitled Homemade. I love this book. Its a book I picked up a few years ago in a garden centre for next to nothing.
There was a recipe in the book for a Moroccan roasted chicken. The flavours sounded lovely and I thought they would adapt very well to grilled chicken pieces. I was right. ☺ I love it when that happens.
First I created a very simple spice paste/marinade. I put some boneless chicken thighs into a zip lock baggie and added the paste and rubbed it in really well and then popped the bag into the refrigerator to marinate for about an hour or so. I am sure you could leave it overnight if you wanted to. I wouldn't do it for less than an hour if you want the flavour to penetrate the chicken well.
While the chicken was marinating I made the couscous salad. It also has Moroccan flavours . . . I love Moroccan flavours . . . cumin, coriander, cinnamon, garlic . . . lemon . . . olive oil . . . so delicious.
Middle Eastern food also often has fruit in it, dried fruit, so I added sultanas and you could certainly add chopped dried apricots as well, and maybe a few pine nuts for crunch. There are chickpeas in the salad also . . . plus parsley, red onions and a punchy lemon/olive oil dressing. I love chickpeas (garbanzo beans) but they don't always like me! 'Nuff said!
This salad would also be great in vegetarian style sandwiches or wraps mixed with goats cheese, and would be positively lovely served on a bed of rocket greens. I did not have any yesterday.
The chicken was grilled on the new BBQ over a medium high heat and was done perfectly in about 20 minutes. I used boneless, skinless chicken thighs, and they were beautiful, with slightly crisped edges, along with succulent, well flavoured and tender meat. Altogether this was quite, quite delicious!
*Moroccan Spiced Grilled Chicken & Couscous Salad*
Serves 4
This
is simple and delicious. (I know I always say that, but its true.) You
can cook the chicken on the BBQ or in the oven. Its up to you. You will
need to marinate the chicken pieces for at least an hour.
For the chicken:
2 tsp ground cumin
1 tsp ground coriander
1 tsp mild chili powder
1 tsp sweet paprika
1/2 tsp ground cinnamon
2 cloves of garlic, peeled and crushed
2 TBS lemon juice
2 TBS light olive oil
8 - 10 boneless, skinless chicken thighs
fine sea salt and freshly ground black pepper to taste
For the couscous:
200g couscous (1 cup)
40g raisins (1/3 cup)
1 tsp ground cumin
1 tsp ground coriander
1/2 tsp ground cinnamon
350ml hot chicken stock (1 1/2 cups)
100g tinned chick peas, drained and rinsed (about 1/2 cup)
2 TBS fresh lemon juice
3 TBS extra virgin olive oil
1/2 red onion, peeled and finely chopped
2 TBS finely chopped flat leaf parsley
fine sea salt and freshly ground black pepper to taste
First make the chicken and get it marinading. Combine all of the
spices, the olive oil, lemon juice and seasoning. Put the chicken into a
bowl or a zip lock bag. Pour in the spice mixture and mix to coat
generously. Place in the refrigerator to marinate for at least an hour.
Meanwhile
make the couscous. Place the spices in a dry skillet and heat gently,
stirring until quite fragrant. Tip into a bowl. Add the dry couscous
and raisins. Stir together. Add the chicken stock, stir and cover with
plastic cling film or a plate. Leave to stand for 10 minutes. Stir in
the drained chick peas, lemon juice, olive oil, onions, parsley and
seasoning. Cover and chill until ready to serve. Bring to room
temperature before serving.
To cook the
chicken, heat the grill or BBQ to medium high. Place the chicken thighs
onto the grill, top side down. Grill for 10 minutes, then flip over
and grill for an additional 5 to 10 minutes (depending on size) until
the juices run clear.
Serve the cooked chicken with the couscous.
The Grill/BBQ we are using is the Space Grill 1800 3-Burner Gas Grill. The stainless steel Space Grill is a revolutionary idea for modern families with a unique fold-away design which is perfect for garden patio grilling or even the high rise balcony. It fits in perfectly every where, and is as truly versatile as it is beautiful! You can either mount it on an existing load bearing wall, or you can buy a specifically designed stand to mount it on.
It arrived almost completely assembled. In fact, it took Todd longer to break down our old BBQ for disposal, than it did for him to assemble the Space grill. Because we don't own our own home, but are in a rental property, we opted to have the separate stand, rather than using a wall mount. Todd found putting the stand together very easy to do. Once the stand/or wall are ready, mounting the grill on it is a very simple process.
This revolutionary, Australian designed, Chef Grade Stainless Steel grill folds out in about 10 seconds. There is no need for super human strength. Even I have found it quite easy. A simple pivot system changes space into a grill. It is really that easy!
I can't stress enough how simple it is to install, with the lid doubling as a splash back it is perfect
for those small spaces. Simply light the (independently ignited)
burners and start cooking. It has two sides, with a stainless steel grill and a cast iron griddle plate that is flat on one side and ridged on the other. What
more could anyone ask for?
• Folds away in seconds
• Sleek modern design
• Stainless Steel for rust resistance
• Massive cooking surface (640mm x 480mm)
• Patented auto fold-down drip tray
• 3 separate individual-ignition burners
• Perfect for apartments to mansions
• Lid doubles as a splash-back
• Fast to install
• Multiple cooking plates
• Reversible cast iron flat / grill main plate
• Includes stainless flame grill plate
• No more ugly BBQ's on the deck
Jose and Ariana came over to help us get it up and running. (Todd has a hernia and I didn't want him lifting anything heavy!) It really was very simple to assemble and get ready for use. As Spaniards, they are no strangers to the art of BBQ/Grilling, and they fell right in love with it. I predict after baby comes they might be buying one for their own home! Its sleek and attractive, folds away conveniently after use and comes with a fabulous cover to keep it safe from the elements. I can also attest to the fact that it cleans up like a dream! The parts come off very easily for wiping clean, and that patented drip tray also removes very easily for wiping out and cleaning. No fuss, no muss! (And you know how much I like that concept!) We are ever so pleased with it! If you would like to know more about it, or perhaps even to purchase one for your own use, do check out the Space Grill Site.
I really hope this lovely weather continues as I am keen to use this BBQ/Grill as much as I can this summer. Our old BBQ really didn't perform near as well and was a real faff to get lit and use. Not so this nifty piece of kit. We are having all the Missionaries over on Monday for a BBQ to celebrate the combination 1st and 4th of July holidays and I can't wait to show it to them! In the meantime, I am sure we will be using it a few times before them. With this gorgeous weather and its ease of use, there is really NO excuse not to! Bon Appetit!
Subscribe to:
Posts (Atom)


Social Icons