Wednesday, 29 November 2023

Just like Mom's for Vintage Menu Madness


Meat Loaf & Scalloped Potatoes


After taking last week off due to my son being here, I am back this week with another Vintage Menu to Share with you.  I hope that you enjoy it as much as I enjoyed planning and preparing it.


I have always had a great love of Vintage Cookbooks and Vintage Recipes. I had quite a few vintage books when I was in the U.K, but had to leave them there when I came back to Canada. I have been trying to replace some of them since my return.


What is the point of having these books, however, if you never use them and so I am on a quest to cook a full menu from at least one of those books every week, and then share it with you on here.   These old recipes remind me very much of my childhood and my mother's and grandmother's cooking!  Maybe they will do the same thing for you!


Good Housekeeping Cookbook


I have taken the recipes for this week's menu from The Good Housekeeping Cookbook. I had ordered the 1955 version as that was the year I was born, but ended up receiving the 1963 version.  Its a good book. 


I was a bit disappointed that it wasn't the 1955 version, but I am happy with it and it is in excellent shape.  I will keep looking for the earlier version and hope that I can find it. Usually Thrift Books are pretty accurate in the books that they send.  


In any case it is in excellent shape for a book published 60 years ago!  I was only 8 years old when this book came out! 


Meat Loaf Menu


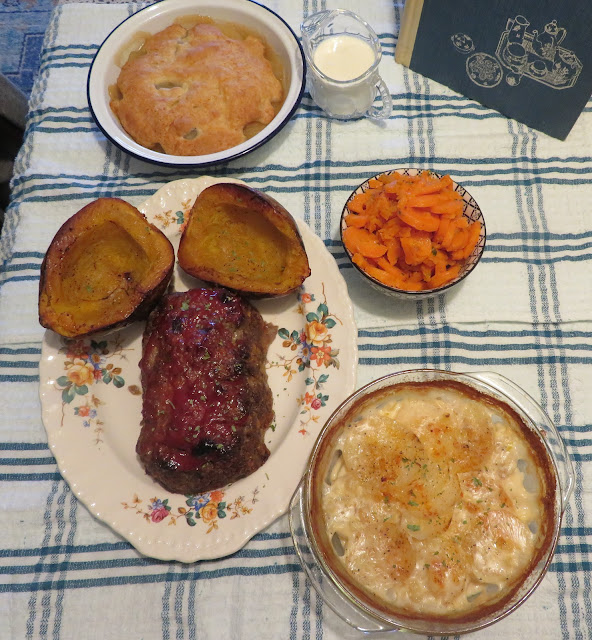
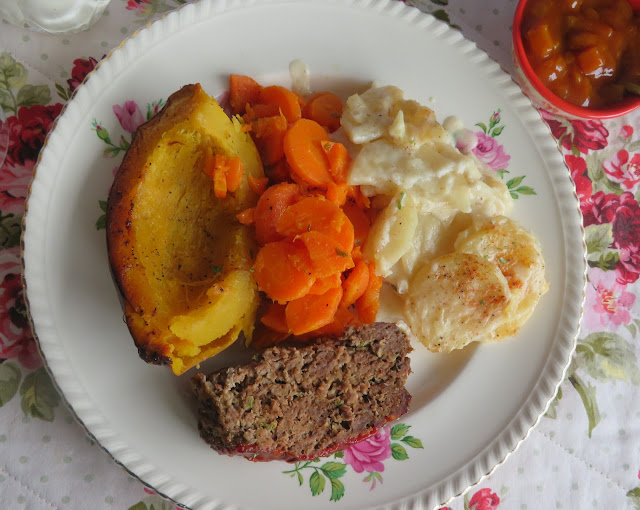
I tried to put together a real family meal this week, in fitting with what my mother would have made for us when I was a child.  This week's menu consisted of:


SUSAN'S MEAT LOAF
SCALLOPED POTATOES
BAKED ACORN SQUASH
BUTTERED CARROTS
FRUITFUL COBBLER WITH CREAM


Do you remember in the old Good Housekeeping magazine they used to have a section dedicated to Susan's recipes? They were always excellent recipes. So just who was Susan?


From the book:


""Who is Susan? What is she.  That all our readers love her" is Good Housekeeping's paraphrase of the famous old song. Susan is our perennial teenage cook. For nineteen years she has led by the hand, not only teenagers, but cooks and would-be cooks of all ages, through her step by step recipes make cooking a joy with dependable results."


Meat Loaf Menu


I figured most people, at least on this side of the pond, would be quite tired of turkey by now and so I picked something which I thought would make a nice change from turkey or a roast dinner of any kind, and be comforting and delicious and a real family meal.


It doesn't more comforting or familial than Meat Loaf!  The recipe for this meat loaf was noted inside the cover in the original owners handwriting, and the recipe itself was annotated with the words "very good."  I don't think you can get a much better accolade than that!


Meat Loaf


The original recipe made 8 servings. I did not need 8 servings and so I cut the recipe in half to make four servings.  It is your pretty basic meatloaf recipe, but with a few tasty twists. You can double this recipe to feed more people if you wish. It will take slightly longer to bake in that case.


My sister makes very good meatloaf. Hers uses Bisquick. That is her secret ingredient. My father loves it.  I confess now that meatloaf was never my favorite meal when I was growing up.   I was not fond of ground beef at all.


I did make it for my children when they were growing up, but I always used the recipe from the Fanny Farmer Cookbook. That one I kind of liked.  This version here today is very similar to that one and it is very good actually!  I rather liked it a lot!


Meat Loaf


HINTS AND TIPS FOR MAKING MEATLOAF


1. Handle the meat mixture the least amount as possible. Your loaf will be juicier and more tender. Use a gentle touch when mixing and do not pack it tightly into the pan.


2. If you want a soft, moist exterior, bake the meatloaf in a loaf tin. Any juices accumulated can be used to make a gravy.


Yield: 4
Author: Marie Rayner
Meat Loaf

Meat Loaf

Prep time: 10 MinCook time: 45 MinTotal time: 55 Min
Very good. This is a smaller sized recipe from the original. It is lovely served hot on the day and can be sliced to use for sandwiches the day afterwards.

Ingredients

  • 1 cup (60g) fresh soft bread crumbs
  • 1/2 medium onion, peeled and finely minced
  • 2 heaped spoons of green pepper, finely minced
  • 1 large free range egg
  • 1 lb. (453g) ground chuck
  • 1 TBS of prepared horseradish
  • 1 1/4 tsp salt
  • 1/2 tsp dry mustard powder
  • 1/8 cup (30ml) whole milk or evaporated milk
  • 1/2 cup (123g) tomato ketchup, divided

Instructions

  1. Preheat the oven to 400*F/200*C/ gas mark 6. Have ready a small roasting tin.
  2. Beat the egg slightly in a medium bowl. Add the hamburger meat and mix lightly together. Mix in the bread crumbs, onion and green pepper.
  3. Add the horseradish, salt, mustard, milk and 1/8 cup (32g) of the tomato ketchup. Mix lightly together and then shape into a loaf or oval shape in the roasting tin. Spread the remaining ketchup on top of the loaf.
  4. Bake in the preheated oven for 40 to 45 minutes. Cut into slices to serve.
Did you make this recipe?
Tag @marierayner5530 on instagram and hashtag it #TheEnglishKitchen

Scalloped Potatoes


I thought scalloped potatoes would make an excellent side dish for the meatloaf. My mother would have either served them or she would have served mash. It would have always been potatoes of some sort.


When my children were growing up I always made mashed potatoes with meatloaf, or we might have fried or baked potatoes. Again some sort of potato.  Occasionally I would make macaroni and cheese.  This Stove Top Macaroni and Cheese recipe is very good.


Scalloped Potatoes


Today I chose scalloped potatoes because the recipe in the book was very similar to my mother's recipe.  She used to make hers in the same way. Layering sliced potatoes, onion, salt, pepper, flour and butter in a pan and then pouring milk over top.


Sometimes she would add creamed corn and then we would have corn scallop.  That was a real family favorite! This was something that my own children loved as well.


This recipe today is not a corn scallop, but simply a potato scallop. Made in the old fashioned way. There is no need to make a sauce. This dish makes its own as you can see. Just layer everything up and bake! 


Yield: 4
Author: Marie Rayner
Old Time Scalloped Potatoes

Old Time Scalloped Potatoes

Prep time: 10 MinCook time: 55 MinTotal time: 1 H & 5 M
You can halve the ingredients and use a 1 QT/1 liter casserole dish in it's place. Its really a very simple recipe and very delicious.

Ingredients

  • 4 cups (927g) pared and thinly sliced potatoes
  • 1 medium onion, peeled and minced (2/3 cup/about 40g)
  • 2 TBS plain all purpose flour
  • 1 tsp salt
  • 1/8 tsp black pepper
  • 2 TBS butter
  • 1 1/2 cups (360ml) scalded milk
  • paprika to sprinkle on top

Instructions

  1. Preheat your oven to 400*F/200*C/ gas mark 6. Butter a 2 QT/liter casserole dish really well.
  2. Arrange a layer of potatoes in the dish. Top with some of the onions. Mix the salt, pepper and flour together. Sprinkle some of this on top and then dot with butter. Repeat layers until you have used everything up, ending with butter.
  3. Scald the milk by heating it in the microwave for 1 minute. (in 1963 they would have used a saucepan) Milk is scalded when there are bubbles around the edge of the cup. Pour this over the potatoes in the dish.
  4. Sprinkle with paprika and cover tightly. Bake for 40 minutes, uncover and bake for 10 to 15 minutes longer until the potatoes are tender and the top is beginning to brown a bit. Serve hot.
Did you make this recipe?
Tag @marierayner5530 on instagram and hashtag it #TheEnglishKitchen
Baked Acorn Squash 

Because everything pretty much for this menu was baking in the oven at the same time I decided to do some Baked Acorn Squash to go along with the rest of the meal.  If you time things right, everything should be finished about the same time!


You will need your oven preheated to 400*F/200*C/ gas mark 6.  Wash your squash, remove the hard stem and then cut the squash in half through the middle horizontally.  Use a metal spoon to scrape out the seeds and any stringy bits, discarding them.


Brush the cut sides of the squash with some melted butter and season with salt and black pepper.  Place cut sides down into a baking dish and pop into the oven. Bake for 30 minutes.


Remove from the oven and turn cut sides up. Brush with more melted butter and drizzle with some corn syrup, maple syrup or golden syrup.  Bake for an additional 30 minutes until tender.


Buttered Carrots


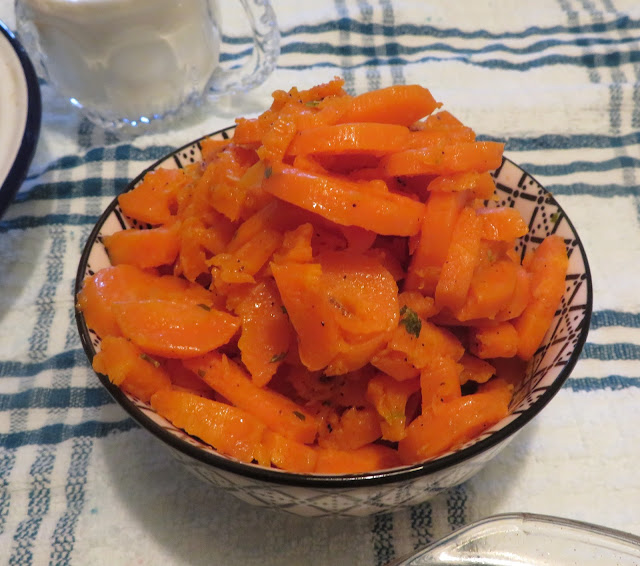
I thought carrots would go very well with everything else.  For four people you will need 1 pound/453g of carrots.  Wash and peel the carrots.  Cut into 1/4 inch coins.  Place into a saucepan and cover with water. Bring to the boil.


For large carrots, boil  for 15 to 20 minutes. For smaller carrots, boil for 6 to 10 minutes. The tip of a sharp knife should insert easily when done.  For well done carrots use the longer cook time, for crispy tender use the shorter time.


Drain well and return to the heat of the burner, giving them a good shake over the residual heat.  Add a knob of butter and season to taste with salt, pepper, freshly grated nutmeg and a pinch of sugar.


My children always liked it if I chopped the carrots up a bit which I would do while the butter was melting. I had a special round metal chopper but the cut edge of a tin can works very well also.  The nutmeg gives these carrots a really lovely flavor.


Fruitful Cobbler


What family meal would be complete without a dessert/pudding to finish things off. My father always looks for something sweet to finish. Most of the time he gets sugar free jello with squirty cream.


When we were children my mother would give us tinned fruit and a cookie for dessert, or a dish of applesauce. On Sunday nights we would sometimes get ice cream or maybe even pie.


Fruitful Cobbler


One of my good friend's mother always served them cantaloupe with ice cream for dessert on Sundays. If I got there in time she would always  give me some dessert as well. I would gum boot it over on my bicycle as soon as my mother would let me out so as not to miss out on this exotic treat.


Cantaloupe was not anything that my mother ever served us at home.  I was in love with it. Eating that on Sunday nights with Susan's family was a bit like eating some forbidden fruit!  So tasty!


Fruitful Cobbler


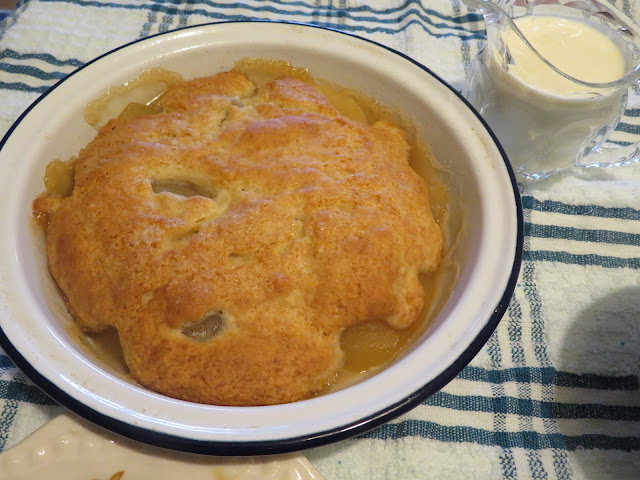
Today's dessert for this menu is a Fruitful Cobbler.  It is simple and delicious. Feel free to use peaches, apples or plums.  Today I used apples.


It does require a packaged baking mix, which makes for added convenience.  You can use Bisquick, or in the UK a scone mix, or you can make up my own recipe for a baking mix and use that. You can find that here.   Or you can simply put together a scone or biscuit (North America) mix and drop it over top.


Either way it will be delicious!  I like to serve it warm with lashings of pouring cream, custard or ice cream on top!


Yield: 4
Author: Marie Rayner
Fruitful Cobbler

Fruitful Cobbler

Prep time: 15 MinCook time: 35 MinTotal time: 50 Min
The original recipe made 8 servings. I cut the recipe in half to make four. To serve more, simply double all the ingredients.

Ingredients

  • 1 pint (2 cups/453g) peeled and sliced peeled peaches, sliced, pared and cored apples or sliced pitted plums
  • 1/4 tsp salt
  • 1/2 TBS plain all purpose flour
  • 1/4 cup (60g) corn syrup or honey
  • 1/2 cup (60g) packaged baking mix such as Bisquick
  • 1 TBS sugar
  • 1/4 cup (60ml) milk or water
  • 3/4 tsp sugar

Instructions

  1. Preheat your oven to 400*F/200*C/ gas mark 6. Butter a 1/2 QT/liter casserole dish.
  2. Toss the fruit together with the flour, salt and corn syrup/honey. Pour into the baking dish.
  3. Whisk together the baking mix, milk, and 1 TBS sugar. Pour or dot this mixture over top. Sprinkle with the remaining sugar.
  4. Bake uncovered in the preheated oven for 30 to 35 minutes until golden brown and the fruit is tender.

Notes

You can make a cherry variation on this by using 1 pint of drained canned red sour cherries for the fruit in the recipe. Use honey instead of corn syrup.

Did you make this recipe?
Tag @marierayner5530 on instagram and hashtag it #TheEnglishKitchen


If you wanted to be really fancy you could start off your meal with a glass of chilled tomato juice. I did serve my meatloaf with a chili sauce/chutney.  It was really delicious.  


I really hope that you will be inspired to give this vintage menu a go and that if you do you enjoy it as much as I did!  The only thing in my opinion that could make this any better would be if I had someone to share it with! Maybe if the kids come home for Christmas!


Tune in next week to see what's on my vintage menu next!


This content (written and photography) is the sole property of The English Kitchen. Any reposting or misuse is not permitted. If you are reading this elsewhere, please know that it is stolen content and you may report it to me at: mariealicejoan@aol.com 


 Thanks so much for visiting! Do come again! 


Tuesday, 28 November 2023

Lemon & Yogurt Mixed Berry Muffins (small batch)


Lemon & Yogurt Mixed Berry Muffins 


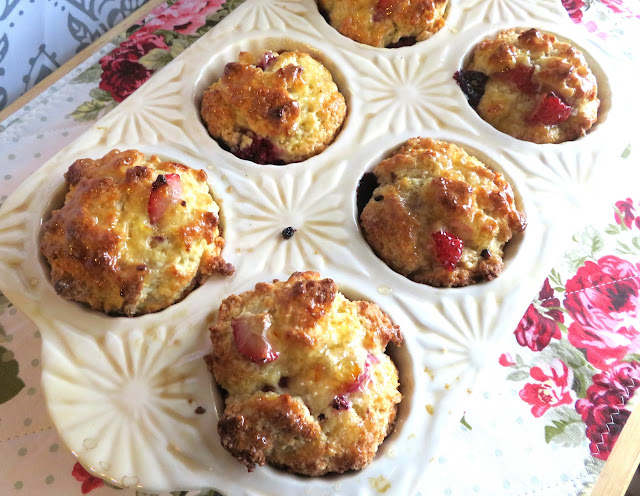
I am going to apologize upfront for my photos today. The weather outside is pants.  It is raining sideways and is very dark.  A very gloomy wet day.  Not so good for photographing anything.


I was wanting to bake a muffin to use up some mixed berries that I had picked up at the shops on Saturday.   It was just a small punnet of blueberries, blackberries and strawberries.  I had only eaten a few but did not want to have to throw any of them away. Waste not want not and all that.


Lemon & Yogurt Mixed Berry Muffins 


I found this recipe in a cookbook that I have by Dorie Greenspan entitled Baking with Dorie, Sweet, Salty & Simple.   I confess this is the first recipe I have baked from this book.


I have baked loads of Dorie's recipes in the past however.  I used to belong to a baking group called Tuesdays with Dorie.  We baked recipes from two of her books, Baking with Julia and Baking Chez Moi. I had all of her cookbooks when I was in the U.K. I am slowly working at collecting them again.


Lemon & Yogurt Mixed Berry Muffins


The original recipe made 12 muffins. I just don't need 12 muffins.  I cut the recipe in half to make only 6 muffins. If you want to make more you will need to double everything.


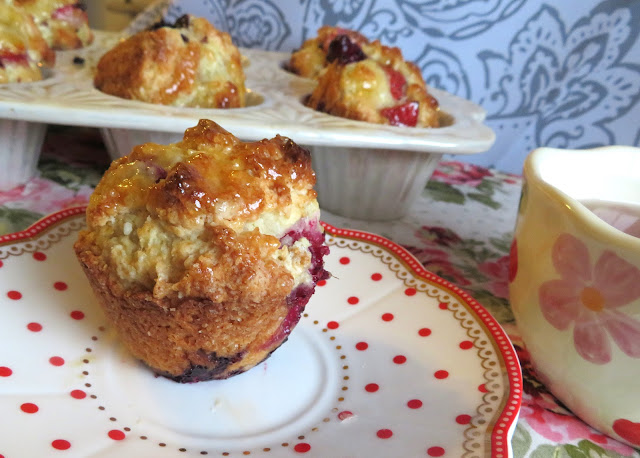
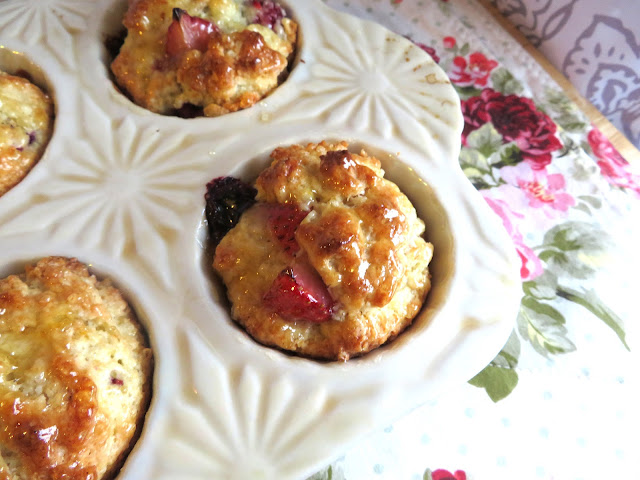
My batter was a bit stiff. In retrospect I probably could have added a bit of milk to loosen it a bit and the muffins would have been tidier looking.  But having said that, they were still one very delicious muffin, as rough and craggy as they turned out.


Lemon & Yogurt Mixed Berry Muffins 


I expect the difference comes from my using Greek Yogurt which is quite a bit thicker than regular yogurt.  They still worked however and they were still incredibly delicious.


She suggested brushing the tops of the finished muffins with warmed lemon marmalade or lemon curd, or dusting with some icing sugar.  I chose to brush mine with some warmed lemon marmalade.  It was the perfect choice and carried on the lemon flavor from the muffins themselves!


Lemon & Yogurt Mixed Berry Muffins


WHAT YOU NEED TO MAKE LEMON & YOGURT MIXED BERRY MUFFINS


Simple everyday baking ingredients. Dorie used only blueberry muffins. I used mix. Use whatever berries you wish. I think chopped cranberries would also be very nice, in which case I would use orange zest.


  • 1 cup (140g) plain all purpose flour
  • 1 1/8 tsp baking powder
  • 1/8 tsp baking soda
  • 1/8 tsp fine sea salt
  • 1/3 cup (70g) granulated sugar
  • the finely grated zest of 1/2 lemon
  • 1/3 cup +1 1/2 tsp (93g) plain yogurt, room temperature
  • 1 large free range egg, room temperature
  • 4 TBS (57g) butter, melted and cooled
  • 3/4 cup (145g) berries (chop larger berries into smaller bits)
  • warmed marmalade to brush on top (optional)


Lemon & Yogurt Mixed Berry Muffins 


Make sure you assemble all of your ingredients before you start. It is so easy to leave something out when you are making something like this.


There may only be 1/8 tsp of baking soda in these but don't leave it out. Baking soda works with the acidity of the yogurt to give you a good rise in the muffins. Also make sure all of your ingredients are at room temperature.


Lemon & Yogurt Mixed Berry Muffins 


HINTS AND TIPS FOR THE BEST MUFFINS


Here are my hints and tips for making sure that your muffins turn out beautifully every time:

1. Mix wet and dry ingredients separately. To prevent the mix from being overworked, first mix the wet ingredients together in one bowl and mix the dry ingredients in another. Make a well in the dry ingredients, carefully pour in the wet ingredients, then stir the mix a couple of times to roughly combine. 

 2. Don't over mix your muffins. The most important rule of muffin making is to not over stir the mix. What you really want is to just moisten the ingredients. Do not stir or beat the batter until it is smooth and lump free. You want the final mix to be lumpy, and thick with a few floury streaks.

 3. Add your flavors last.  While spices should be added with all the other dry ingredients, additions like fruit and nuts should be added last. Give the batter one more light-handed stir once you've added them in just to combine.  

4. Line the pans. You can choose to either grease the muffin tin or line it with paper liners. If you choose to forgo the liners, make sure you grease the base and sides of the cups with oil spray or a little melted butter. If you're not going to eat the muffins for a while, do use paper liners as these will keep the muffins fresher for longer. 

 5. Don't overfill your pans. Aim to fill the cups ¾ full to get muffins with nice round tops and to prevent them from spilling out over the top of the cups.  Often if your tins are over filled the muffins will rise to the top and then collapse on themselves.

 6. For extra interest, add a flavorful sprinkle on top.  Once the muffin cups are all filled, you can choose to sprinkle the tops with more fruit, nuts or a crumble topping, even sanding sugar or cinnamon sugar, for even more taste and or crunch. As the muffins rise these toppings will cook into the tops of the muffin.  

7. Protect your baking pan.  If there isn't enough batter to fill all the cups, half fill the empty ones with water. This will help the muffins bake evenly and will help to protect your pan from buckling. 

8. Cooling them down. Once you remove the muffins from the oven, let them sit in their pan for a few minutes before removing to a wire rack. This is especially important for muffins that aren't in a paper liner, as it will help them from falling apart. However, remove them after five minutes otherwise you risk them going soggy as they cool in the pan. 

9. Freeze extras for later. Muffins freeze beautifully, so if you can't enjoy them all on the day they're baked, wrap them in plastic wrap  tightly,  and put them in the freezer for later. They will keep for about 3 months and reheat wonderfully in the microwave for about 30 seconds on high from frozen. 


Lemon & Yogurt Mixed Berry Muffins 


HOW TO MAKE LEMON & YOGURT MIXED BERRY MUFFIN


Like any muffin these are very simple to make. Mix the dry. Mix the wet. Fold together just to combine.  Don't play with the batter too much as  your results will not be as nice  if you overmix these.


Preheat the oven to 400*F/200*C/ gas mark 6. Butter a six cup muffin tin (medium size) really well or line with paper liners.


Measure the sugar and lemon zest into a bowl. Rub together until very fragrant. Add the flour, soda, baking powder and salt and mix well together to combine.


Whisk the egg, yogurt and melted butter together to combine and then add to the dry ingredients, folding together just to combine. A few lumps and dry streaks are acceptable. Fold in the berries.


Divide the batter evenly between the prepared muffin cups.


Lemon & Yogurt Mixed Berry Muffins 


Bake in the preheated oven for 18 to 20 minutes or until golden brown and well risen. A toothpick inserted in the center of one should come out clean.


Transfer to a wire rack and leave for five minutes. Brush with some warmed marmalade (if using) and remove from the pan completely.


Best eaten warm and on the day. They may not be the prettiest muffin but they are incredibly tasty.


Lemon & Yogurt Mixed Berry Muffins 


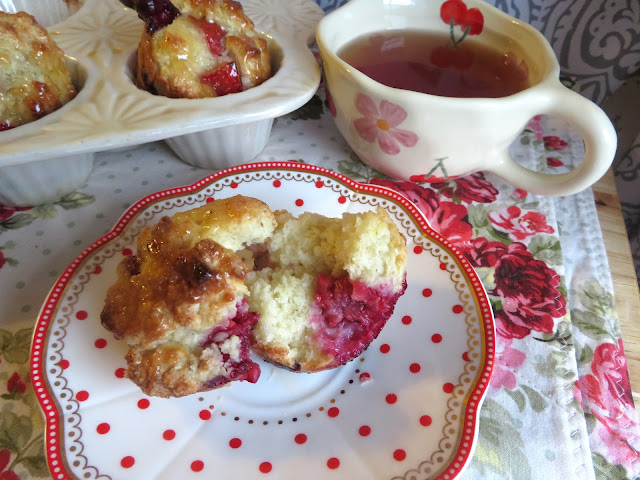
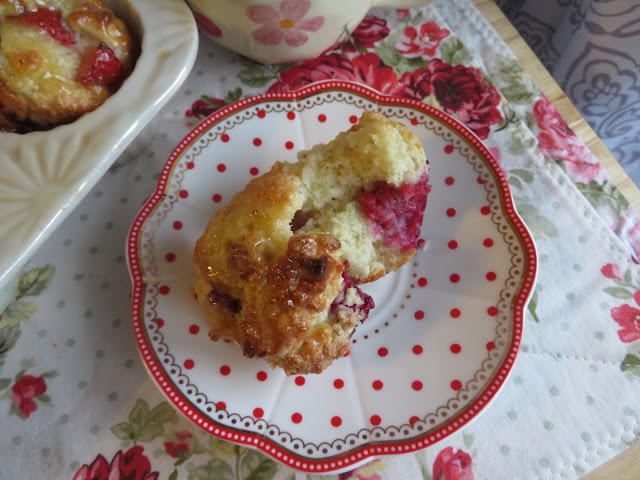
Despite looking rather plain and homely, these are a really delicious muffin with a beautiful tender crumb and lovely lemon flavor.  The yogurt ensures that they are moist with just a tiny bit of a tang.


I really enjoyed them with the  mix of berries, but they would be excellent with just one berry as well. Do brush the tops with some warmed marmalade or even lemon curd for an extra special finish!


Lemon & Yogurt Mixed Berry Muffins


Some other muffin recipes which I have baked and enjoyed in The English Kitchen are:


SPECIAL K BREAKFAST MUFFINS These are the PERFECT breakfast muffins. Quick and easy to make. Delicious. I highly recommend.  Simple and filled with fiber. You can use ordinary Special K cereal, or you can be a bit more extravagant and use one of the varieties which contain fruit.  This recipe makes half a dozen fabulous muffins. 


GINGERBREAD MUFFINS - I am a hug fan of gingerbread anything. I think gingerbread is probably one of my favorite things to bake and eat! They are moist and delicious with a lovely crumb and beautiful ginger/cinnamon flavor. The recipe makes a full batch of 12 fabulous muffins! These smell amazing. 


Yield: 6 medium muffins
Author: Marie Rayner
Lemon & Yogurt Mixed Berry Muffins (small batch)

Lemon & Yogurt Mixed Berry Muffins (small batch)

Prep time: 10 MinCook time: 20 MinTotal time: 30 Min
A plain and simple everyday muffin. You can use mixed berries or all one berry. They are delicious either way.

Ingredients

  • 1 cup (140g) plain all purpose flour
  • 1 1/8 tsp baking powder
  • 1/8 tsp baking soda
  • 1/8 tsp fine sea salt
  • 1/3 cup (70g) granulated sugar
  • the finely grated zest of 1/2 lemon
  • 1/3 cup +1 1/2 tsp (93g) plain yogurt, room temperature
  • 1 large free range egg, room temperature
  • 4 TBS (57g) butter, melted and cooled
  • 3/4 cup (145g) berries (chop larger berries into smaller bits)
  • warmed marmalade to brush on top (optional)

Instructions

  1. Preheat the oven to 400*F/200*C/ gas mark 6. Butter a six cup muffin tin (medium size) really well or line with paper liners.
  2. Measure the sugar and lemon zest into a bowl. Rub together until very fragrant. Add the flour, soda, baking powder and salt and mix well together to combine.
  3. Whisk the egg, yogurt and melted butter together to combine and then add to the dry ingredients, folding together just to combine. A few lumps and dry streaks are acceptable. Fold in the berries.
  4. Divide the batter evenly between the prepared muffin cups.
  5. Bake in the preheated oven for 18 to 20 minutes or until golden brown and well risen. A toothpick inserted in the center of one should come out clean.
  6. Transfer to a wire rack and leave for five minutes. Brush with some warmed marmalade (if using) and remove from the pan completely.
  7. Best eaten warm and on the day. They may not be the prettiest muffin but they are incredibly tasty.
Did you make this recipe?
Tag @marierayner5530 on instagram and hashtag it #TheEnglishKitchen

Lemon & Yogurt Mixed Berry Muffins 

This content (written and photography) is the sole property of The English Kitchen. Any reposting or misuse is not permitted. If you are reading this elsewhere, please know that it is stolen content and you may report it to me at: mariealicejoan at aol dot com 


Thanks so much for visiting. Do come again! 


Follow me on Bloglovin