I have a bread machine and I have to say I make good use of it. I bake myself one or two loaves of bread in my machine just about every week. Sometimes if I am invited out for supper I will bake a loaf of bread to take with me as a Hostess gift. I can assure you it is always very welcome!
For years and years I struggled with baking a decent loaf of bread from scratch. My ex husband used to make beautiful bread for the family when my children were growing up. With five children we went through a LOT of bread!
He used to make the kitchen table dance across the floor when he was kneading it. Bread making day was always a really popular day in our home. I think the first loaf always got inhaled as soon as it came out of the oven. He would make at least a dozen loaves every week and they all got eaten.
Nobody minded taking homemade bread sandwiches to school either. Yes. It was that good. It was his mother's recipe and a bread he had grown up with. Good. Good. Good.
I was only ever very good at producing door stops. Heavy leaden door stops. It was not until I purchased a bread machine that I started producing really good bread.
My friend Jo inspired me to get one when I was in the UK. I bought for myself a Panasonic bread machine, which is what she had. I can tell you I wore the first one out and had to buy a new one after 18 years of almost daily use. And then I had to leave that one behind when I moved back to Canada in 2020.
I hadn't been going to get another one when I moved back to Canada, but after having to eat the bread available in the shops here for about six months, I decided I couldn't stand it any longer. I just had to buy myself a bread machine and I have baking my own bread ever since.
Once again I purchased myself a Panasonic Bread machine. Model # SD-RD 250. It has been serving me well for over 20 years and I expect that this newer one will also serve me very well. I have had no problems with it thus far. It bakes great bread!
As a Canadian I love Maple Syrup. When I first moved over to the UK I brought a 4-liter can of Maple Syrup with me. This was pre 9/11 and I was able to bring it right onto the aircraft. I was not going to live without my Maple Syrup!
Of course it is widely available there now, but when I first got to the UK it was a very rare find indeed. Hence the 4-liter can! My fingers were quite sore from carrying it through three airports, but it was worth all the effort.
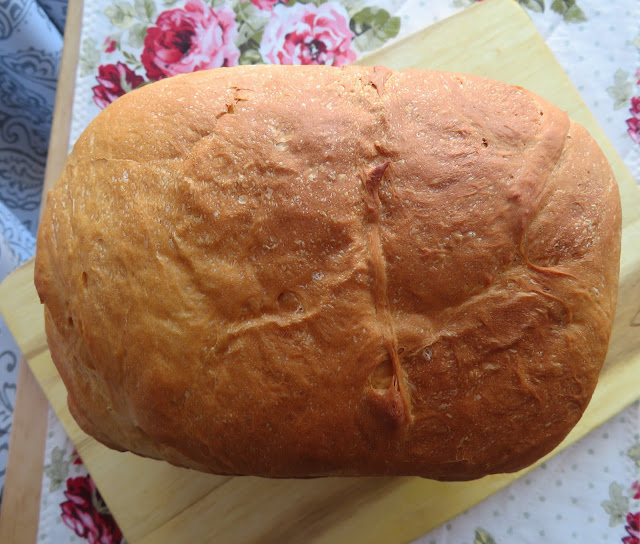
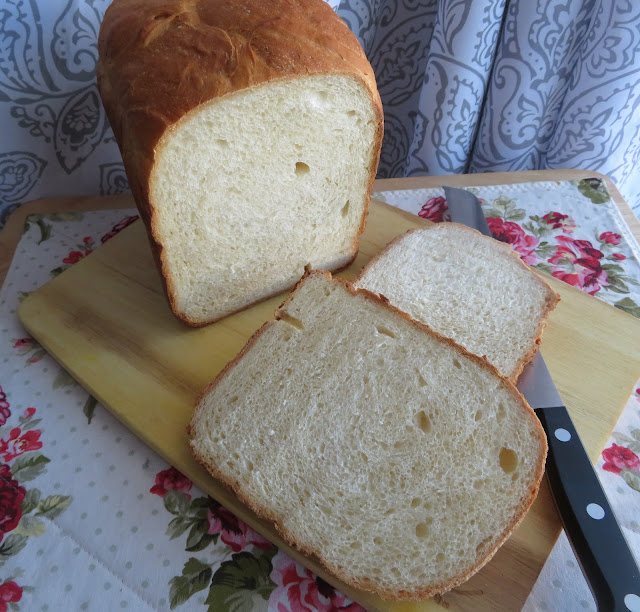
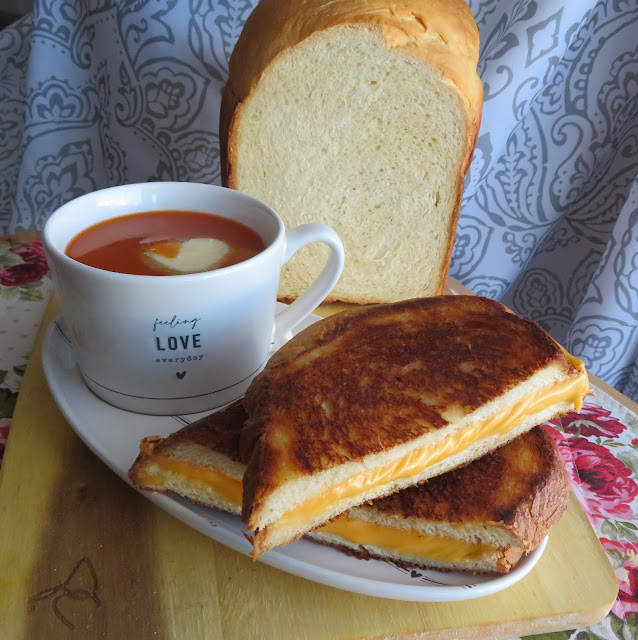
This Maple Buttermilk Bread is a truly beautiful loaf of bread. It is slightly sweet from the use of Maple Syrup and has a beautiful tang from the buttermilk. It has a lovely tight crumb as you can see, and a beautiful crisp crust.
I adapted the recipe from a cookbook I have entitled, The Bread Lovers Bread Machine Cookbook, by Beth Hensperger. If you have a bread machine and you don't have this book, I highly recommend it. Every recipe I have baked from it is exceptional!
WHAT YOU NEED TO MAKE MAPLE BUTTERMILK BREAD
There is nothing complicated here.
- 2 1/4 tsp bread machine yeast (1 3/4 tsp SAF yeast)
- 3 cups (420g) strong bread flour
- 1/3 cup (82g) buttermilk powder
- 1 TBS vital wheat gluten
- 1 1/2 tsp salt
- 3 TBS maple syrup
- 1 1/2 TBS melted butter
- 1 cup plus 1 TBS cold water (240ml plus 1 TBS)
I am not sure what SAF yeast is. I just always use bread machine yeast. It serves me quite well.
If you cannot find buttermilk powder (I buy mine on Amazon) feel free to replace the water and dry buttermilk powder in the recipe with regular liquid buttermilk. In this case you will need 1 cup plus 1 TBS of buttermilk (240ml plus 1 TBS).
Vital Wheat Gluten is a product that helps to boost the protein content of the bread. It is not absolutely essential, but it does make a much nicer loaf. I buy mine again on Amazon. I store it in the freezer so it will last longer.
Simply follow the instructions for a basic loaf of bread as per your particular model of bread machine.
- Place all of the ingredients into your bread machine according to your bread machine's manufacturers instructions. (Mine puts the dry first and wet last.)
- Set the crust on medium and the program to basic. Press start.
- As soon as the bake cycle ends, remove the bread from the pan and place onto a rack to cool to room temperature prior to slicing.
- Store in an airtight bag or container. You can also freeze it.
HINTS AND TIPS FOR MAKING THE BEST BREAD IN THE BREAD MACHINE
Really if you follow the directions on your particular bread machine your bread should work out perfectly, but there are a few things you can do that will give you an even better loaf of bread.
1. Measure by weight and not volume. Weight is a much more precise way to measure. You can't go wrong. I have a set of digital scales that I use. I just pop the bread pan onto them and measure away. My scales measure in grams, Kg, pounds and ounces, milliliters, etc. I started baking by weight when I lived in the UK and I would now never bake any other way.
2. Bread machine loaves work best with bread flour. Bread flour can also be labeled "Best for Bread" or "High Gluten flour."
3. You can use regular flour, but if you do I recommend adding Vital Wheat Gluten to the recipe. This helps to boost the protein content of the bread.
4. Measure very carefully. If you don't add enough flour, no matter the type of flour you use, the bread will collapse and is often uncooked in the center. If you add too much flour, you will end up with a dense, hard heavy ball.
5. I add Vital Wheat Gluten to all of my recipes for bread making in a bread machine. You can purchase it online. It helps to yield a much better loaf, helping the loaf to rise higher with a nicer texture than without.
Vital wheat gluten is best stored in the refrigerator (for up to one year), but you can store it on the counter if you think you will use it up within two months (highly unlikely for the home baker.)
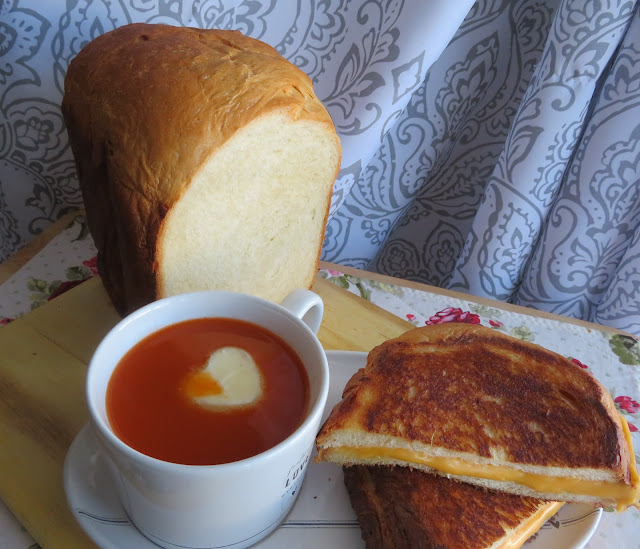
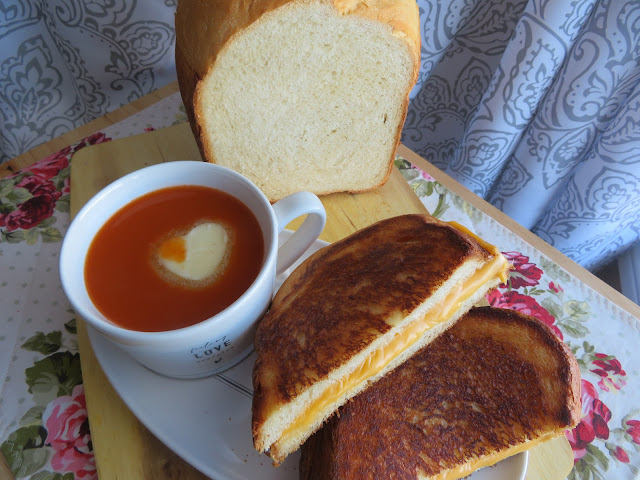
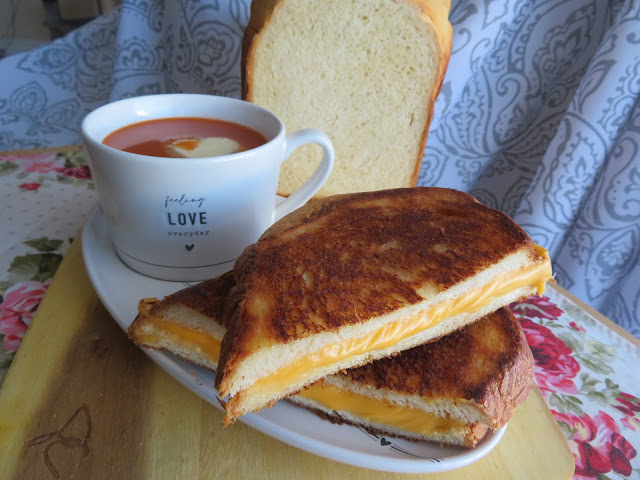
This truly is a beautiful loaf of bread. A new favorite here. I used some today to make my favorite grilled cheese sandwich to serve with a cup of hot tomato soup. Is there anything more comforting than tomato soup and a grilled cheese? I think not!! This is the ultimate comfort food meal!!
This bread made an excellent grilled cheese. Yes, I am a total glutton. I like to melt a pat of butter on the top of my tomato soup. It has been ever so!
BREAD MACHINE PARKER HOUSE ROLLS - These are beautiful rolls and well deserving of being served at your holiday meal, or at any meal for that matter. Using the Bread Machine makes them quick and very simple to make.
BUTTERMILK WHOLEWHEAT BREAD - With a mixture of both whole wheat and white bread flours, and sweetened with maple syrup. Then there is the addition of buttermilk. Together these things make for a really delicious wholesome loaf of bread.
Yield: 1 medium loaf
Maple Buttermilk Bread
Prep time: 10 MinCook time: 4 HourTotal time: 4 H & 10 M
This is a basic white bread recipe that is a delicious combination of the sweetness of Maple syrup and tangy buttermilk. It makes for lovely sandwiches and toast.
Ingredients
- 2 1/4 tsp bread machine yeast (1 3/4 tsp SAF yeast)
- 3 cups (420g) strong bread flour
- 1/3 cup (82g) buttermilk powder
- 1 TBS vital wheat gluten
- 1 1/2 tsp salt
- 3 TBS maple syrup
- 1 1/2 TBS melted butter
- 1 cup plus 1 TBS cold water (240ml plus 1 TBS)
Instructions
- Place all of the ingredients into your bread machine according to your bread machine's manufacturers instructions. (Mine puts the dry first and wet last.)
- Set the crust on medium and the program to basic. Press start.
- As soon as the bake cycle ends, remove the bread from the pan and place onto a rack to cool to room temperature prior to slicing.
- Store in an airtight bag or container.
Thank you so much for visiting! Do come again!


