Saturday, 31 October 2020

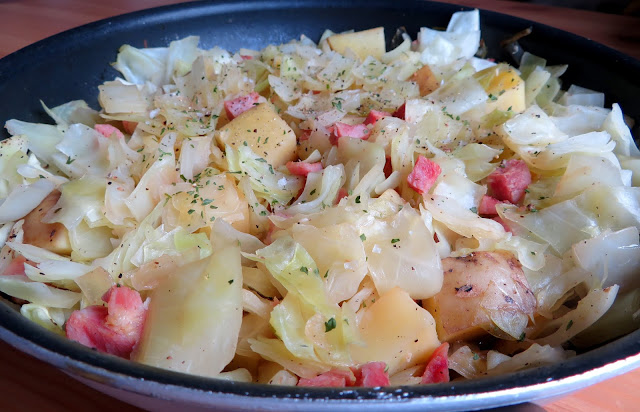
Smothered Cabbage with Ham

Smothered Cabbage with Ham


I have to say that, next to potatoes, cabbage is one of my favourite vegetables. I come by this love honestly. It is something which my mother cooked for us fairly often. Admittedly not as often as she would have liked to, as my father was not overly fond. 


He did not mind the flavour that it imparted into things like stews and such, but he was not fond of the vegetable itself. This worked well for me, actually as he would just give me his cabbage to eat, which I did not  mind one little bit.


Smothered Cabbage with Ham


My mom used to make lovely cabbage rolls. She would wrap up ground beef and onion in cabbage leaves and simmer them in a large pot with peeled potatoes, carrots and canned tomatoes.


My father loved the meat in them. I did not, but I loved the cabbage.  We would swap. My meat for his cabbage.


More meat for him. More cabbage for me. It was a happy collaboration. If I was really lucky my mom would put in a little wedge of cabbage just for me. Even better! 


This recipe I am sharing today, Smothered Cabbage with Ham, comes from the Eating Well website. I get a Diabetic Newsletter from them every couple of days. This was one of the recipes in the newsletter I got this morning. I immediately wanted to cook it.


It looked delicious!  I also had everything in the house to make it. Bonus!  I just did not want to make 8 servings of it, and so I cut the recipe in half.


I find it is very easy to cut most recipes in half, especially things like this. Its not like baking where your measurements need to be exact and precise.  When you are talking things like vegetables, it is a very simple matter.


Smothered Cabbage with Ham


So this recipe makes four servings instead of 8. Which is still quite a lot, but when you love cabbage as much as I do, I know that I will really enjoy the leftovers.


Maybe even more so than the original recipe. Cabbage is one of those vegetables I find that tastes even better reheated the day after.  Or maybe I am just so in love with this vegetable that it doesn't matter when I eat it!


Smothered Cabbage with Ham


What I loved about this dish is that it is combined with my other favourite vegetable. The humble potato.  But not in such a high quantity that it messes with my carbs. As a diabetic I do have to watch my carb intake.


But with there only being one baking potato in the dish, divided between four people, its not a huge problem. This means that I get a little taste of potato without the risk of going over the top!


Smothered Cabbage with Ham


And if you love potatoes as much as I do, there is a real risk of going over the top.  Dishes like this are perfect for me. 


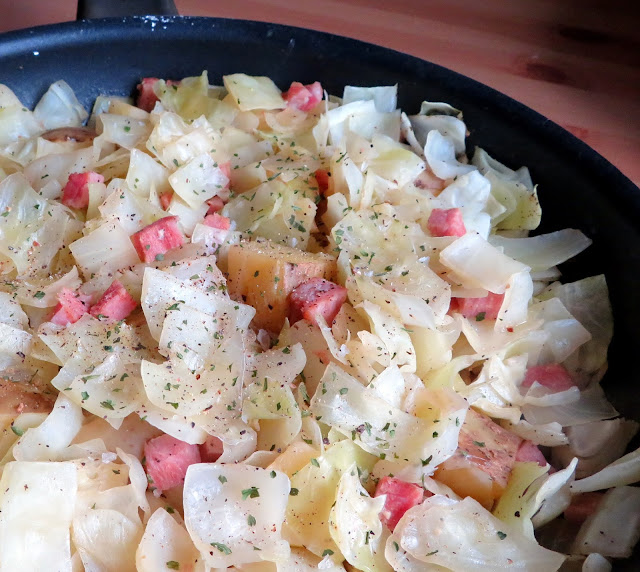
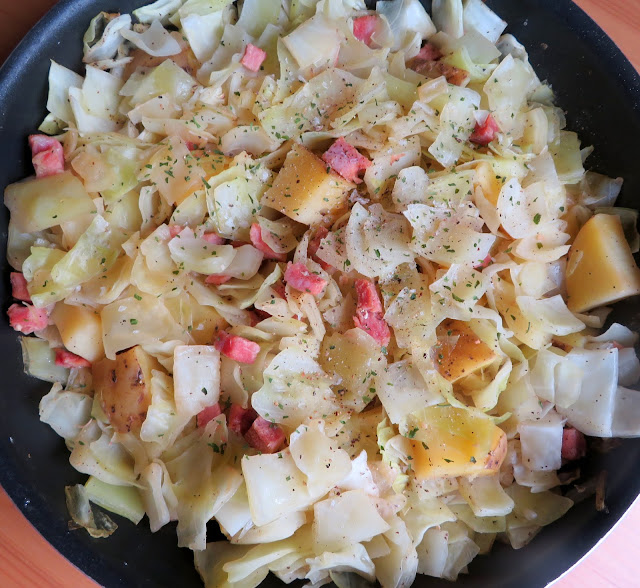
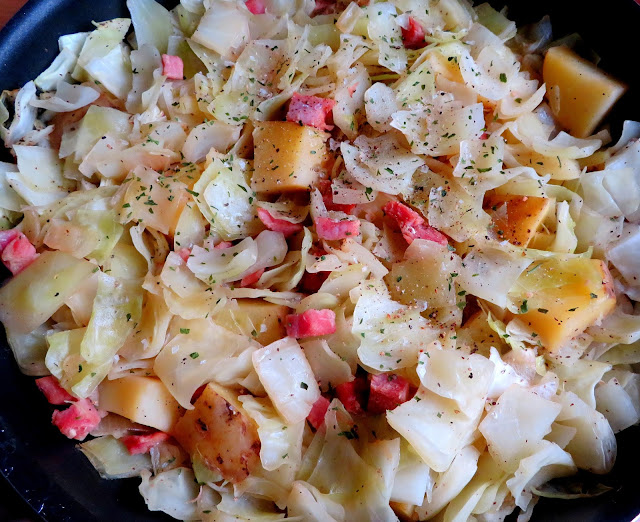
I loved the addition of the ham to this. It gives a bit of smokiness which goes very well with cabbage.  There isn't a lot of it. I had a chunk of ham in the freezer leftover from Easter. (Don't judge me, lol)


Smothered Cabbage with Ham


You could use thick sliced boiled ham from the shops or even a chopped up ham steak if you wanted to. You just want a bit of smokiness.  


It also uses an onion and some garlic.  You begin by sauteeing the onion in  a bit of oil. I cut the amount of oil way down.


Smothered Cabbage with Ham


Most recipes call for far too much oil. Even Eating Well recipes. I have always cut back on the amount without any problem. I also used light olive oil rather than canola oil. 


I had a medium sized cabbage in the refrigerator that needed using up.  I used about half of it which means that I have another half to get rid of before next Friday. Maybe I will make my favourite dish, Noodles and Cabbage to enjoy!


You can use any kind of cabbage in that recipe.  White, savoy, green, etc.  even kale or Swiss chard. I have used them all with delicious results.


Noodles and Cabbage is a supper dish my family always love LOVED! I learned how to make it in High School Economics. My children still make it.  It is considered to be a family recipe, even though it really isn't!


Smothered Cabbage with Ham


 Back to this one.  Its simple and quick to make and very delicious. You could jazz it up a bit if you wanted to, by adding some chili flakes, but I'll be honest it is pretty perfect just as it is. 


I have posted a lot of cabbage recipes on here through the years that you might enjoy. Creamed Cabbage is really lovely. Tender pieces of cabbage baked to perfection in a lush cream sauce. 


Another favourite is Cabbage and Tomato Soup.  Cabbage and tomatoes have a wonderful affinity for each other.


Indian Spiced Cabbage is a beautiful side dish for when you are enjoying a good curry. It uses fairly simple ingredients that most people have in their homes, with the exception of the Garam Masala, but I am fairly certain that if you don't have the Garam Masala in your home, you would have at least the ingredients to make your own. 


I have my own recipe for Cabbage Rolls that I have been making for years and years. I got the recipe from a friend at church back in the early 1980's and it has been pleasing my family ever since! When I take them to potlucks I always come home with an empty dish.


A favourite soup is Cabbage and Ham Soup with Cheese Dumplings. Oh it is some lush. Who doesn't love dumplings???  Not me!   Stuffed Cabbage Trou Style offers layers of butter soft cabbage and rich sausage meat.  Oh my, another one of my favourites. 


Let's face it, I just love cabbage.  Any way. Any how. Any time. I even love the smell of it cooking.  Call me crazy but I do!  I hope you will give this recipe for Smothered Cabbage a go at any rate, and that you enjoy it!


Smothered Cabbage with Ham
Print

Smothered Cabbage with Ham

Yield: 4
Author: Marie Rayner
prep time: 15 Mincook time: 30 Mintotal time: 45 Min
This is the perfect way to use up little bits of ham. It cooks all in one dish, with salty pieces of ham, onion, tender chunks of potato, and buttery cabbage. This makes an excellent side dish to serve with roast chicken or pork! Quick, easy and delicious!

Ingredients

  • 1 TBS canola oil
  • 1 small onion, peeled and chopped
  • 1/2 cup  (65g)diced smoked ham
  • 1 fat clove of garlic, peeled and minced
  • 5 cups (450g) coarsely chopped green cabbage
  • 1/2 cup (120ml) low sodium chicken stock
  • 1 large baking potato, washed and cut into chunks
  • salt and black pepper to taste
  • 1/2 TBS cider vinegar

Instructions

  1. Heat the oil in a large skillet over medium-high heat.  Add the onion and cook, stirring frequently, just until the onion begins to brown and caramelise a bit.
  2. Add the ham and garlic.  Cook for a further minute.
  3. Add the cabbage, chicken stock, potatoes and season lightly. Bring to the boil and cover tightly.
  4. Simmer over low heat, stirring occasionally, until the potatoes are tender, about 15 minutes.
  5. Remove the lid. Turn up the heat to medium high and cook, stirring until most of the liquid has been evaporated, another 10 to 12 minutes.  Stir in the cider vinegar.  Taste and adjust seasoning as desired. 
  6. Serve hot.
Did you make this recipe?
Tag @marierayner5530 on instagram and hashtag it #EnglishKitchen
Created using The Recipes Generator
Smothered Cabbage with Ham  


So what is your favourite way to cook cabbage? Do you even like cabbage? Are there any family favourites or suggestions for cooking it that you would like to share with us today?  Do tell!! 

This content (written and photography) is the sole property of The English Kitchen. Any reposting or misuse is not permitted. If you are reading this elsewhere, please know that it is stolen content and you may report it to me at: mariealicejoan at aol dot com 


Thanks so much for visiting. Do come again! 


 Follow my blog with Bloglovin

Friday, 30 October 2020

Mary Berry's Lemon Drizzle Cake


When I think of cakes that I love, top of my list has to be a good old fashioned Lemon Drizzle Cake! First of all I love lemon flavoured desserts more than anything, and secondly, when it comes to cake, I have always enjoyed simple ones far more than fancy ones.


Nothing beats a nice thick slice of a Lemon Drizzle Cake with a hot cuppa on a cold drizzly day.  And when you are talking about Mary Berry's Lemon Drizzle Cake you know you are talking about the best Lemon Drizzle cake ever!


So, a drizzle cake for a drizzly autumn day.  Something bright and sunny to lift the spirits. Eaten tucked up in a chair next to the fire with a nice hot cup of herbal tea.  It doesn't get much better than that! 


I used to think that Lemon Loaf and Lemon Drizzle were the same cakes, but that's not quite true.  Lemon Loaf is the cake that I grew up with and it is more like a quick bread than a cake, with a muffin-like texture.  


Mary Berry's Lemon Drizzle Cake


It did have a lemon juice and sugar topping, but this was spooned over the cake almost as soon as it came out of the oven. You poked holes all through the cake with a fork so that it would be absorbed and you spooned it on slowly so that each spoon-ful was absorbed before the next spoonful.


With Lemon Drizzle Cake, it has a much lighter, cake-type of texture.  The drizzle is spooned over the cake all at once while it is warm, not hot . . . and allowed to pool over top creating a crunchy lemon crackle topping.


Mary Berry's Lemon Drizzle Cake


 Both are wonderfully delicious.  Both have moreish qualities. One I would serve thinly sliced and spread with butter, the other I would not.


Because one is definitely more a cake than the other and I am sure you know which one I am talking about!


Mary Berry's Lemon Drizzle Cake


 This is one of those cakes that improves upon standing.  I left this overnight before I cut into it. I was not feeling very well yesterday and so any cutting and photographing got put off until today.


Turns out that was probably the right thing to do.  The cake had settled into something magnificent upon sitting over night.  I didn't wrap it in anything. I just had it laid on the cooling rack with a clean tea towel thrown over top.


Mary Berry's Lemon Drizzle Cake


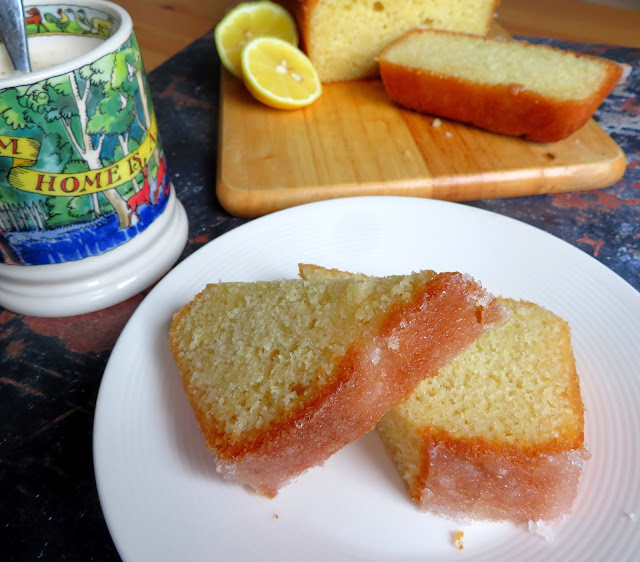
Just look at how beautifully, and how precise it cut.  The knife crunches down through that crisp sugar coating. You can hear it cracking as it moves down into the cake.


And then it glides through the rest of the cake beautfully. This is a cake with a beautiful texture.


Mary Berry's Lemon Drizzle Cake


Look at that beautiful crisp crunchy topping.  You use castor sugar in the cake base, but you use granulated sugar in the topping.


One reason caster sugar is used in the cake itself is because of its melting properties.  Caster sugar is a finly granulated sugar.


Mary Berry's Lemon Drizzle Cake


 The reason it is preferred for baking is because it melts beautifully into batters and doughs. Have you ever seen a cake that seems to be speckled on top after baking?  That is because you used granulated sugar and it didn't melt/dissolve properly in the batter.


You can easily make your own caster sugar by whizzing regular granulated sugar in a food processor for about 30 to 45 seconds.


Mary Berry's Lemon Drizzle Cake


Its resistance to melting is what makes regular granulated sugar perfect for the topping. Because it doesn't melt easily it maintains loads of crunch, which makes it ideal for this purpose.  


Its almost like a lemon layer of candy snow on top of the cake.  Speaking of snow, I remember when I was a child living in Northern Manitoba, the winters would be so cold that there would be a "crust" on top of the snow.


Mary Berry's Lemon Drizzle Cake


You would have to "punch" down into it with your boots. You could actually walk on top of the snow without falling through the crust. 


That is like the lemon drizzle on top of a lemon drizzle cake. Exactly the same effect. And that's what you want. You would not get it with any other kind of sugar.


Mary Berry's Lemon Drizzle Cake


Another thing to think about when baking this cake is placement in the oven. Mary Berry recommends baking it on a middle shelf.


There is a reason for this. If you bake cakes on the top shelf, they will crack. The crust of the cake forms too soon and then cracks as the cake continues to rise!


Mary Berry's Lemon Drizzle Cake


Another suggestion is to resist the urge to open the oven door to check on the cakes progress. This can and will probably cause your cake to fall.


I remember learning this in Home Economics. When you open the oven door you cause cooler air to enter the oven and you really do risk your cake sinking in the middle.


Mary Berry's Lemon Drizzle Cake


You also don't want to be banging the door shut if you do happen to look in at it.  Your cake will surely fall then! 


Two good reasons for making sure your oven temperature is correct and that you have a working light in the oven!  Also do make sure your oven is properly pre-heated before you even put the cake in.


Mary Berry's Lemon Drizzle Cake


This can, and will make a difference.  Did you know when your oven is heating up the temperature is fiercer?  The heating element is blasting heat into the oven to bring it up to temperature.


This means that it can actually be hotter than you think it is!  For success it is just best to wait until the ideal and recommended temperature has been reached!


This is a proper weekender of a cake.  Perfect to enjoy at the weekend with hot drinks or even with a scoop of vanilla ice cream,  This is a cake that everyone is sure to enjoy!  I guarantee! I chose to decorate the top with two slices of lemon I had dipped into granulated sugar. I thought it looked quite nice!!


Well unless you hate lemon, that is.  I know some people do. (Not me!) This lovely cake will keep perfectly for up to three days and will freeze well, properly wrapped, for up to 2 months unsliced. If freezing it, you may have to redo the drizzle topping. Just saying  . . .


Mary Berry's Lemon Drizzle Cake
Print

Mary Berry's Lemon Drizzle Cake

Yield: Makes one loaf cake
Author: Marie Rayner
prep time: 10 Mincook time: 40 Mintotal time: 50 Min
Everyone's favourite cake. Its a Mary Berry recipe so you know its fool proof and delicious!

Ingredients

  • 3/4 cup + 1 TBS (175g) softened butter
  • 1 1/4 cups (175g) self raising flour (see notes)
  • 3/4 cup (175g) castor sugar (finely granulated sugar
  • 3 large free range eggs
  • the finely grated zest of one lemon
  • 1/2 tsp lemon extract (my addition)
  • 3/4 level tsp of baking powder
For the drizzle topping:
  • The juice of one lemon
  • 1/2 cup (100g) granulated sugar

Instructions

  1. Preheat the oven to 180*C/350*F/ gas mark 4.  Butter a 9 X 5 inch loaf tin and line with baking paper, leaving an overhang to lift it out with.
  2. Using an electric mixer beat all of the cake ingredients together in a bowl  until smooth. Spoon into the baking in and smooth the top over.
  3. Bake for 40 to 45 minutes until risen, golden brown and shrinking away a bit from the sides of the tin. The top should spring back when lightly touched.
  4. Whisk the lemon juice and sugar for the drizzle topping together and spoon it over top of the warm cake.
  5. Leave to cool a little then lift out of the pan using the baking paper and set on a wire rack to cool completely.

notes:

To Make Self Raising Flour: Just add 2 teaspoons of baking powder for each 150g/6oz/1 cup plain flour. Sift the flour and baking powder together into a bowl before using, to make sure the baking powder is thoroughly distributed (or you can put both ingredients into a bowl and whisk them together).
Did you make this recipe?
Tag @marierayner5530 on instagram and hashtag it #EnglishKitchen
Created using The Recipes Generator
Mary Berry's Lemon Drizzle Cake


So what is your favourite kind of a cake? I love simple cakes myself and Lemon Drizzle Cake fits the bill perfectly. Especially this one! 


This content (written and photography) is the sole property of The English Kitchen. Any reposting or misuse is not permitted. If you are reading this elsewhere, please know that it is stolen content and you may report it to me at: mariealicejoan at aol dot com Thanks so much for visiting. Do come again! 
 

Follow my blog with Bloglovin


Thursday, 29 October 2020

Cauliflower & Broccoli Cheese


I adore cauiflower and broccoli. They are actually my favourite of the cruciferous vegetable family and never more so than when I combine the two in a tasty bake such as Cauliflower & Broccoli and Cheese.


Another thing I love is The Big Bang Theory.  I actually had never watched it until I spent a few weeks in my brother's company a number of years back.  


We had both flown home to be with my mother when she had her lung cancer operation.  We spent about a week or so alone in my mom's house with only each other for company. 


Cauliflower & Broccoli Cheese


It was quite a pleasant time for us as we got reacquainted with each other after not having seen each other for a number of years. In the evenings we watched the Big Bang Theory. It was a television program which I had always avoided for some reason and a show he wasn't allowed to watch at home.


I don't know why I had avoided it really. I guess I thought it might be a bit silly.  In any case I fell in love with the show and have been watching it ever since.


The characters in it actually reminded me very much of my brother and his friends when they were in high school in many ways. They were all science nerds!


Cauliflower & Broccoli Cheese


One of my favourite episodes is where Sheldon decides he is going to prolong his life by taking certain steps. One of them was declaring that every Thursday night is going to be cruciferous vegetable night!  As one might suppose this does not exactly go to plan! 


Cruciferous veggies are a diverse group that includes broccoli, cauliflower, cabbage, kale, bok choy, arugula, Brussels sprouts, collards, watercress and, surprisingly, radishes.


Cauliflower & Broccoli Cheese


While these all may seem quite different in size, shapes and colours, they do share quite a few health benefits.Most cruciferous vegetables are rich in vitamins and minerals such as folate and vitamin K.


Dark green cruciferous veggies also are a source of vitamins A and C and contain phytonutrients. Phytonutrients are plant-based compounds that may help to lower inflammation and reduce the risk of developing cancer.  


Cauliflower & Broccoli Cheese


They are also rich in fibre and low in calories, a quality which helps you to feel full and satisfied without overly indulging!  Of course adding a rich cheese sauce somewhat adds a bit in fat and calories but what a delicious way to go!  


Most cruciferous vegetables go very well with a lovely cheese sauce. I am not sure about radishes.  Somehow the thought of radishes in a cheese sauce doesn't really appeal, but that's not to say that it wouldn't be delicious.


Cauliflower & Broccoli Cheese


 They are awfully good in salads however, which does go for most cruciferous vegetables I have to say. When it comes to cheese however, I don't think you can get much better than Cauliflower  or Broccoli Cheese! 


Or, in this case, Cauliflower & Broccoli Cheese!  Yummo!!


Cauliflower & Broccoli Cheese


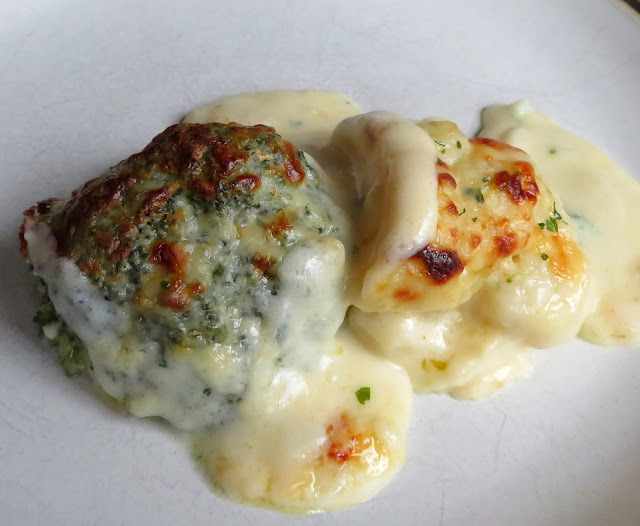
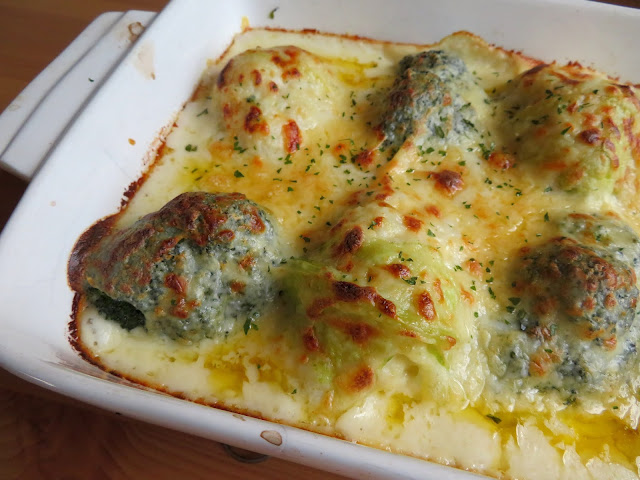
Crispy tender pieces of cauliflower and broccoli, bathed in a lush cheese sauce and baked until the whole thing is bubbling and golden brown. What could be bad about that! 


Today I used these little mini heads of both.  They're so cute. They look just like baby heads of broccoli and caulifower!


Cauliflower & Broccoli Cheese


I cooked them until just tender to the tip of a knife in some lightly salted boiling water. Then I drained them well and cut each in half. DO make sure you drain them well or you will end up with a soggy result.


It doesn't take long.  Pop them into the water. Bring back to the boil and then cook for just a few minutes longer maximum. You want them to still have a bit of a bite.


Cauliflower & Broccoli Cheese


For the cheese sauce you want to use a really good cheddar. I use a nice strong farmhouse cheddar. It is the kind of cheese you won't mind eating on its own  with some crackers and it is excellent in a sauce such as this.


The important thing is to use a cheese that is well flavoured. You won't want to use a mamby pamby cheese. You want to be able to taste it. 


Cauliflower and Broccoli have strongish flavours. You will want a sauce that is equal to it in strength when it comes to flavours.  


I think the colours of the two in this dish look very well together.  The green and the white. I alternate them in the baking dish like a checkerboard.


Cauliflower & Broccoli Cheese


 I always add a touch of mustard and cayenne to my cheese sauces. It truly makes a difference.


These two ingredients make cheese sauces taste even cheesier. I am not sure how that works, but it works very well, just like magic.


Cauliflower & Broccoli Cheese


Of course you can use just broccoli or just cauliflower in this. It does not have to be both. It will truly be delicious either way.


Cauliflower & Broccoli Cheese


This makes for a very lush side dish for any main meal and an excellent  main dish for a vegetarian.  Its delicious and lush no matter how you serve it.


Cauliflower & Broccoli Cheese
Print

Cauliflower & Broccoli Cheese

Yield: 4
Author: Marie Rayner
prep time: 40 Mincook time: 15 Mintotal time: 55 Min
An old British favourite. This dish makes a tasty side dish, light main course, or delicious alternative for a Vegetarian Sunday lunch.

Ingredients

You will need:
  • 2 very  small cauliflower, trimmed
  • 2 very small broccoli crown, trimmed
  • salt and pepper
For the cheese sauce:
  • 1 clove
  • 1 bay leaf
  • 1 small onion, peeled
  • 2 1/2 cups (600ml) of milk
  • 2 TBS butter
  • 2 TBS all purpose flour
  • 2/3 cup (150ml)of single cream 
  • 1/2 tsp dry mustard powder
  • 1/4 tsp cayenne powder
  • 1 2/3 cup (7 ounces) grated strong cheddar cheese
  • Salt and pepper to taste
To top:
  • 4 TBS grated strong cheddar cheese

Instructions

  1. First make the cheese sauce. Attach the bayleaf to the onion with the clove, pressing the clove through the bayleaf and into the onion. Place in a saucepan along with the milk and the cream. Warm the milk mixture slowly to a simmer. Remove from the heat, cover and allow to infuse with the flavours of the studded onion for 15 minutes. At the end of that time, strain the onion out. (reserve the onion)
  2. Melt the butter for the sauce in a clean saucepan. Whisk in the flour and dry mustard powder, and cook over low heat for several minutes. Whisk in the warm milk, a little at a time, until the mixture forms a smooth bechamel sauce.
  3. Add the onion again and allow to cook, over low heat for 20 to 25 minutes. At the end of that time it should be lovely and thick and rich. Scoop out the onion and discard.
  4. Season to taste with some salt and pepper, and the cayenne.  Whisk in the cheese until it melts. Set aside and keep warm.
  5. Bring a pot of lightly salted water to the boil. Add the cauliflower and broccoli. Cook just until tender. This should only take a few minutes, leaving a slight bite. Drain off the water. Season with some salt and black pepper.
  6. Preheat the oven to 200*C/400*F/ gas mark 6. Spoon a little of the cheese sauce into an ovenproof dish. Arrange the cauliflower and broccoli on top. Pour the remaining cheese sauce over top to coat. Sprinkle with the additional cheese.
  7. Place in the oven to melt and colour for 10 to 15 minutes. It should be nicely browned and bubbling. Enjoy!
Did you make this recipe?
Tag @marierayner5530 on instagram and hashtag it #EnglishKitchen
Created using The Recipes Generator
Cauliflower & Broccoli Cheese


I could quite happy sit down with a plate of this and nothing else. If you are not fond of cauliflower, simply use all broccoli. If you don't like broccoli, use all cauliflower. If you cannot find the miniature heads of these vegetables use a small sized head of each, broken into florets.  You can add buttered breadcrumbs to the top if you wish. 


With the leftovers I made a delicious soup. Simply add the leftovers to a saucepan with chicken or vegetable stock to barely cover.  Bring to a simmer and heat through. Puree with an immersion blender or in a regular blender (carefully). Enjoy!  


This content (written and photography) is the sole property of The English Kitchen. Any reposting or misuse is not permitted. If you are reading this elsewhere, please know that it is stolen content and you may report it to me at: mariealicejoan at aol dot com 


Thanks so much for visiting. Do come again! 


 Follow my blog with Bloglovin