Saturday, 29 February 2020

Pain Perdu with Mixed Berries


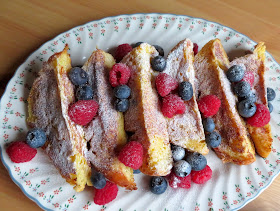
What is Pain Perdu.  Translated from French into English, the words mean Lost Bread.  It is a fancy name for French Toast, which was a great way of using up stale bread in the past. French toast is normally seen as a breakfast dish, and this certainly could be served for breakfast, but when you choose to make it with Brioche bread it becomes a bit more special and actually makes for a very fine dessert.


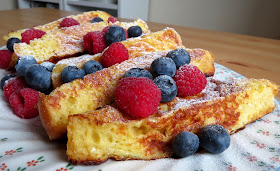
Brioche bread is rich and sweet and lends itself beautifully to dishes like this.  Soaked in the egg and milk it takes on an almost custard-like texture, very similar to bread pudding  . . .


But of course, cooking it this way is a lot faster than making a bread pudding.  So,  if you are looking for a hearty dessert that is quick and easy, as well as being delicious, this is the dessert for you! 


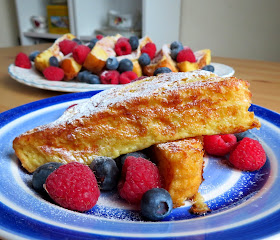
Our Brioche bread here in the UK is actually only about 4 inches square in size, so when sliced the slices are not overly large.  I cut my slices about 1 inch thick to use, which was absolutely the perfect size of thickness for this.


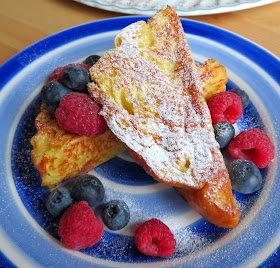
They were dipped in a simple mixture of eggs, milk and vanilla paste. I toasted each triangle on both sides in foaming butter, and I confess,  I also toasted the cut edges as well, along the centre, for an even nicer finish. Not necessary of course, but I thought it looked pretty.


You could serve this with syrup or chocolate sauce if you wanted to.  Chocolate sauce with vanilla ice cream would be very nice. In that case I would use sliced bananas instead of berries.


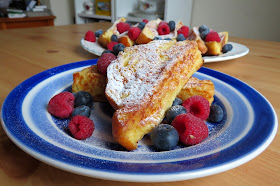
We enjoyed it just plain with a dusting of icing sugar and a mix of blueberries and raspberries.


You could use sliced peaches and a raspberry coulis sauce, which you could call Peach Melba Pain Perdu.


Caramel sauce would also be nice, again with bananas,  resulting in an almost  Banoffee-like  touch!


Of course a dusting of icing sugar really sets it off nicely.


I can't think of too many people that would turn their noses up at this dessert. Of course, it goes without saying that it is a semi-hearty dessert, which makes it the perfect dessert to serve after a light supper.


And yes, it would also make for an excellent breakast.  Personally speaking, I coud eat this any time of day or night.


You can save any leftovers, wrapped up, and stored in the refrigerator, simply reheating them briefly in the toaster.  You can also freeze them for serving at a later date.  Just thaw and warm through gently in a frying pan. Easy peasy.
Pain Perdu with Mixed Berries

Pain Perdu with Mixed Berries

Yield: 4
Author:
Pain Perdu makes a great breakfast but with a scoop of ice cream or a dollop of Greek yogurt and some fresh berries, it also makes a great dessert!

ingredients:

  • 4 thick slices of sweet brioche bread
  • 2 large free range eggs
  • 6 TBS whole milk
  • 1 tsp vanilla paste
  • butter for cooking
To serve:
  • Icing sugar to dust
  • vanilla ice cream or Greek yogurt (optional)
  • fresh berries
  • Maple syrup (optional)

instructions:

How to cook Pain Perdu with Mixed Berries

  1. Cut each slice of brioche in half diagonally into triangles.  Beat together the eggs, milk and vanilla paste in a shallow bowl with a fork.
  2. Heat a knob of butter in a large skillet or griddle pan until it starts to foam. Working quickly, dip each side of the brioche bread into the egg milk mixture and then pop them onto the hot griddle pan.  (Mine fits all of it at once, if yours is smaller you will have to work in batches.)  Cook until golden brown on the bottom side, then carefully flip over and cook until the other side is golden brown.
  3. Arrange two triangles on each dessert plate, top with some yogurt or ice cream if using, sprinkle with berries and  dust with icing sugar.  Serve immediately.

NOTES:

For a delicious variation: Simmer 1 cup (150g) ready to eat dried apricots with the juice of one orange and 120ml of water (1/2 cup) for 10 minutes until tender.  Cut the bread as above.  Add 1/2 tsp ground cinnamon to the egg mixture.  Dip and fry as above. Serve hot with Greek yogurt and a spoonful of Apricot compote.

Did you make this recipe?
Tag @marierayner5530 on instagram and hashtag it #EnglishKitchen
Created using The Recipes Generator


We are bracing ourselves for yet another wind and rain storm this weekend. My heart goes out to all who are affected and living in flood zones. I am not sure how much more we can cope with this.  Thankfully where I live in Chester we are quite high up.  My back yard however is a quagmire. I am not complaining.  Better that than that our house be under water.


Thursday, 27 February 2020

BBQ Flat Chicken Tacos for Two


I am sitting here as I write this and I am trying to think back to when I first tasted Mexican Food. (Not that this recipe is very Mexican by any stretch of the imagination.)  

I think it was when I had moved to London, Ontario and we discovered a restaurant called Chi Chi's.  I believe it was a chain restaurant.


We used to go there every now and then and treat ourselves to Chimichangas and fahitas, and yes, (at that time) margaritas.  I liked the strawberry ones. They were so yummy.  


The Fajitas were probably not overly loaded with fat and calories but those Chimichangas could probably  be considered heart attack specials.


But we were young and did not think of such things. They fed you hot tortilla chips and salsa while you waited for your order. 


 If it was your birthday they would don Sombreros and come and sing Happy Birthday to you at your table.  Horror of all horrors. 

As a person who did not and does not like to be the centre of attention, this was a fate worse than death.


My sister taught me how to make Nachos.  I learned how to make Enchiladas from an old Sunset cookery book.  My love of all things Tex Mex was born. 


Up to that point the only thing even remotely resembling Tex Mes in my experience was my mother's Chili Con Carne and she got that recipe from off a can of tomato soup.  Not exactly authentic, lol.


Of course when you have five growing and hungry children, it can get to be rather expensive to eat out and so you learn to make things you like at home and that is what I did.  


I think I got rather good at making Enchiladas and Nachos, Tacos and Chili.


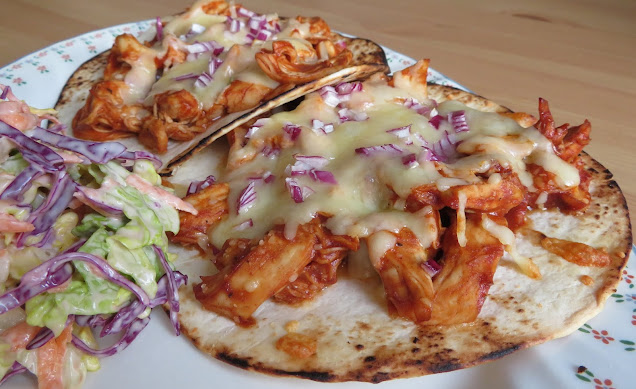
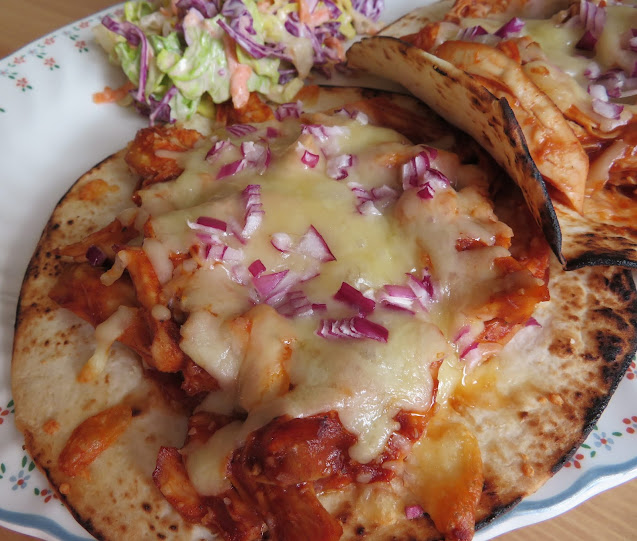
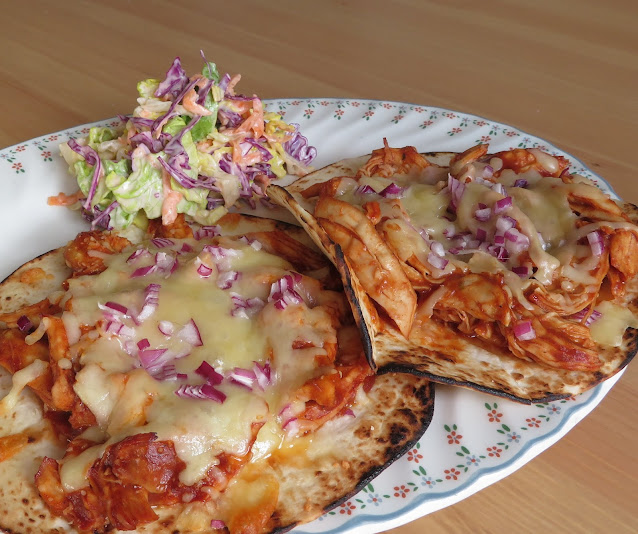
These Flat Chicken Tacos resemble real tacos only in the sense that they are served with flour tortillas.  We like soft tacos in this house.  


You can eat them flat with  knife and fork (my husband's preference) or folded up like a real taco. (My bohemian preferral!)


I simply toast some six inch soft flour tortillas over my gas burners until blistered and blackened on the edges and then I top them with shredded poached chicken that I have mixed with my own special sauce.


My sauce is tangy and smoky and spicy. I add some heat by using Spanish smoked paprika, this also adds a smoky touch . . .  I do use tomato ketchup. It works well.


I add brown sugar, cider vinegar, Worcestershire sauce and mustard. I use Dijon, but you use whatever kind of mustard you like.


I add a full teaspoon of Green Tabasco sauce. Oh, I simply adore Green Tabasco sauce. I could eat it with a spoon.  


Its not quite as hot as the regular one and has a green chili flavour.


I use a bit of seasoning and some garlic powder.  This gets cooked for a short time to really meld the flavours and then I stir it into the poached and shredded chicken.


The chicken then gets piled onto the tortillas, topped with a four cheese blend, sprinkled with red onions and baked until the chicken is hot and the cheese has melted. 


You don't want them to brown. You want the tortillas to stay fairly pliable.  Served hot with your favourite toppings, they are really quite delicious.


Today I accompanied them with a quick slaw that I threw together by grating a carrot, shredding a head of baby gem lettuce, and hand shredding a bit of red cabbage.  

This I dressed with a mix of Mayonnaise, Ranch dressing, a squirt of Lime juice and a pinch of sugar.  It was quite yummy if I don't say so myself, and I know I just did!


BBQ Flat Chicken Tacos for Two

BBQ Flat Chicken Tacos for Two

Yield: Makes 4 flat tacos
Author:
These are so simple to make and incredibly delicious. I like to serve them with a lime dressed coleslaw on the side.

ingredients:

For the sauce:
  • 120g tomato ketchup (1/2 cup)
  • 1 TBS soft light brown sugar
  • 1 TBS apple cider vinegar
  • 1 TBS Worcestershire Sauce
  • 1/2 TBS Dijon mustard
  • 1 tsp green Tabasco sauce
  • 1/2 tsp smoked paprika
  • 1/4 tsp garlic powder
  • 1/4 tsp rubbed dry oregano
  • salt and black pepper to taste
You will also need:
  • 2 boneless, skinless chicken breasts, poached and shredded
  • 4 (6-inch) soft flour tortillas
  • 120g grated four cheese blend
  • 1/2 small red onion, finely chopped
  • any garnishes as desired (lettuce, chopped tomatoes, spring onions, sour cream, etc.)

instructions:

How to cook BBQ Flat Chicken Tacos for Two

  1. Mix all of the ingredients for the sauce in a microwave safe beaker.  Microwave on medium for about 3 minutes, stirring every minute.  Set aside.
  2. Preheat the oven to 180*C/350*F/ gas mark 4.  Have ready a large baking sheet that will hold all of the tacos in one layer, or two smaller baking sheets.
  3. Turn on a gas burner if you have gas and using a pair of tongs, toast the tortilas on both sides and then place them in a single layer on the baking sheet.
  4. Shred the chicken into the bowl and then add enough of the sauce mixture to moisten well, or to your taste.  Divide the chicken mixture between the four toasted tortillas.  Divide the cheese and sprinkle one fourth of it on top of each taco. Sprinkle with the chopped red onions.
  5. Bake in the heated oven until the chicken is hot and the cheese has melted. Sit back and enjoy with your favourite toppings.

Did you make this recipe?
Tag @marierayner5530 on instagram and hashtag it #EnglishKitchen
Created using The Recipes Generator


Oh boy but these were some good.  I was quite full up after eating two one and a half of them.  When I think of how much I used to be able to eat when I was younger I am quite amazed.  Somewhere along the way my appetite has drastically changed.  


We used to be able to eat a pizza in the evening for a snack or a box of Kraft dinner, and this was after having had a full dinner earlier on.  Mind you back then we didn't go to bed until gone midnight most nights and nowadays we are all tucked in by 9 o'clock at the latest!  I guess we have officially become old fogies!


Wednesday, 26 February 2020

Angel Food Cake for two


On thing I have always missed over here is Angel Food Cake. There is something really special about a proper Angel Food Cake.  

It is very difficult to get an Angel Food Cake tin here in the UK, and if you do find a proper one, it costs an arm and a leg.  

I was always going to bring one back from Canada when I went home to visit, but it just never happened.


The other day I spied a recipe for a mini angel food cake that is baked in a loaf tin on Pinterest.  It is attributed to recipe the site, Dessert for Two.  

This is the recipe I used today and I have adapted it to use British measurements as well as North American.


The best thing about the recipe is that you don't need anything other than a metal loaf tin to bake it in.  No Angel Food Cake tin needed! 

You must not use a non-stick loaf tin, as the cake mixture needs to be able to grip the sides of the pan to bake up properly.  I just used my metal loaf tin as you see above (this is after baking and I am hanging the cake upside down to cool.) 


YOU MUST NOT grease or butter the pan.  It must be left as is.


Don't worry about it.  Your cake will not stick to the pan and you will be able to release it properly at the end once it is cold.


This is the perfect size for us and as you can see it baked up lovely.


You can also see that it released perfectly from the pan. It is beautifully light and has a wonderful consistency.  

It is every bit as perfect as a proper angel food cake baked in a full sized tin.


Just look at how beautiful the consistency of the cake is. 

It has even holes and is soft and spongy as a slice of white bread. 


Its light and fluffy, not rubbery at all.  

You do need to cut it with a serrated knife, using a sawing motion without pressure. If you press too hard you will squash your cake.


I was so very excited to discover this recipe.  There are lots of desserts that I used to make using angel food cake. 

 I make one in the summer with whipped cream and strawberries. It  immediately sprang to mind!  It has been ever so long since I have enjoyed it.  I can't wait!


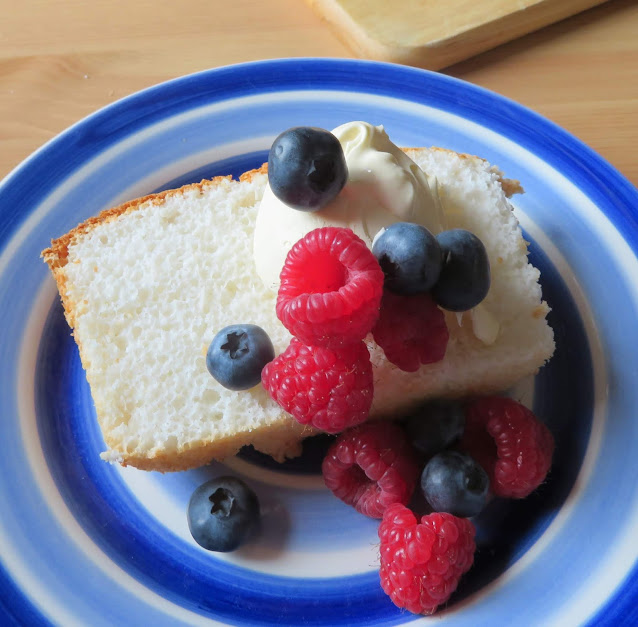
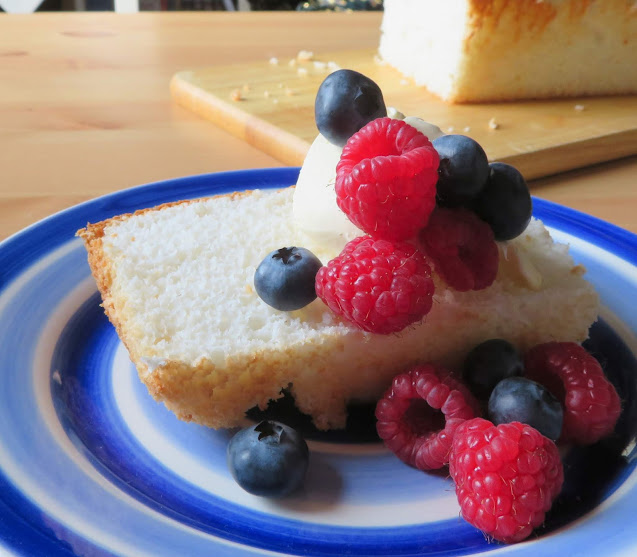
Today we enjoyed it simply cut into slices, topped with a dollop of thick Jersey cream that I happened to have in my refrigerator along with some fresh raspberries and blueberries.


 This was so yummy.  I love Angel Food Cake. 

There is no fat in it, just basically egg whites, a bit of sugar and some flour.  It is the dieter's dream dessert.


I used to bake angel food cake often for my boss down south  It was a favourite  to serve when the ladies were coming for lunch!


Its lovely served with a scoop of vanilla ice cream and drizzled with chocolate sauce. Its also pretty incredible toasted!


I would call this a winning recipe and I think you will enjoy it as well!

Yield: Makes one loaf sized cake
Author:

Small Batch Angel Food Cake

Small Batch Angel Food Cake

All of the deliciousness of a full sized cake, perfectly sized for two.

ingredients:

  • 150g granulated sugar, divided (3/4 cup)
  • 70g plain flour (1/2 cup all purpose)
  • 1 TBS cornflour (cornstarch)
  • 210g  free range egg whites (7 large)
  • 2 tsp vanilla extract
  • 3/4 tsp cream of tartar
  • 1/4 tsp salt
To serve:
  • whipped cream, or thick cream, or clotted cream
  • fresh berries or fruit

instructions:

How to cook Small Batch Angel Food Cake

  1. Preheat the oven to 165*C/325*F/ gas mark 3.  Have ready a 9 by 5 inch loaf tin.  Make sure that is is NOT a non-stick pan. Also please do not line the pan or grease it in any way.  Angel food cake needs a ungreased ordinary tin pan in order to rise properly.
  2. Measure 50g of the sugar into a bowl (1/4 cup) along with the flour and cornflour.  Whisk together and set aside.
  3. Put the egg whites into a large grease free bowl, along with the vanilla, cream of tartar and salt.  Beat with an electric whisk on medium speed just until the whites become foamy.  Continue to beat whilst adding the remainder of the sugar 1 tablespoon at a time.  Beat on high until it forms soft peaks. This will take about 3 to 4 minutes.
  4. Fold 1/3 of the dry ingredients into the egg whites using a rubber spatula. Be gently and use a straight up and down in the centre, over to the side motion. You don't want to deflate the whites or release any of the air you have beaten into them.
  5. Repeat, adding the remainder of the flour in two lots  Make sure no lumps of flour remain and take care to do everything gently so that the egg whites don't deflate.
  6. Pour the cake batter into the plain loaf tin, leveling it off.  Place onto a baking sheet and bake in the preheated oven for about 40 minutes. When it is done the top will no longer be sticky to the touch and if it cracks the cracks will also not be sticky.
  7. Have two tin cans laid on a level surface, with a space between measuring the length of you loaf tin. Invert the loaf tin as soon as you remove it from the oven on these tin cans, making sure that either edge of the loaf tin rests on the edges of the tin cans. (see above)
  8. Leave to cool upside down for at least an hour.  I left mine for a couple hours.
  9. Once your cake is completely cold, using a sharp knife, run it around the inside edge of the loaf tin all the way around to loosen the cake.  Gently tip the cake fall onto a cutting board on its side.
  10. Use a serrated knife to cut the cake into slices, taking care not to squash the cake and using a gentle sawing motion.
  11. Serve in slices garnished with the cream and berries.  Delicious!

Did you make this recipe?
Tag @marierayner5530 on instagram and hashtag it #EnglishKitchen
Created using The Recipes Generator


I did ask the other day if there were any recipes that you would be interested in seeing me downsize for the smaller family.  Have you been able to think of any?  I do like a challenge!  Happy Wednesday! 

Small Batch Angel Food Cake 
This content (written and photography) is the sole property of The English Kitchen. Any reposting or misuse is not permitted. If you are reading this elsewhere, please know that it is stolen content and you may report it to me at mariealicejoan at aol dot com. 

Follow my blog with Bloglovin