Thursday, 31 October 2013

Some nice little books


 photo SAM_1583_zpscff26957.jpg

I do get sent the cutest things.    I was recently sent these cute little cookery books published by hachette Printworks ltd.   They each contain 30 recipes.

The first one uses French's Mustard. 

 photo SAM_1585_zpsf4977f0e.jpg

This recipe in it for Crabcakes looks really tasty!  There are a total of 30 different recipes for salad dressings, casseroles, sandwiches and dips etc.  All looking very delicious.

Next is one for French's BBQ sauce

 photo SAM_1586_zpsfa9c0524.jpg

This recipe is for Braised BBQ Pork!  Doesn't that look delish??   I think it does!

  photo SAM_1587_zpsef4408ad.jpg

I have never thought of using BBQ sauce in a vinaigrette salad dressing before, but they have!
And it looks really tasty.  There are also recipes in this little book for stuffed peppers and steaks and chops, casseroles, etc.   A beautiful compendium.

In the third book the recipes use Frank's Redhot Sauce.  I always have a bottle of that in the cupboard and like to add a splash to lots of things.

 photo SAM_1588_zpsf7376c5d.jpg

These Chicken Satay Skewers look absolutely delicious . . .

  photo SAM_1589_zpsf67dd30e.jpg

Next up I am going to try the Spicy Cheese Toasts.   It sounds like a tasty version of Welsh Rarebit!  Watch this space!

 photo issue1_zps0dbead3c.jpg

They are actually a part of a series of books being put out by Best Loved Recipes.  You can sign up for a subscription.   You get the first two for only 99p.   You can subscribe and pick up some free gifts for doing so, or you can pick them up at newsagents.  If you subscribe you get some free gifts with the first four deliveries.   You can read more about them here. 


Bread, Cheese and Tomato Omelet

   photo SAM_1504_zps1b74da05.jpg
   
I was wanting something very simple for supper one night this week.  Something which didn't require a lot of time, or effort, or ingredients.

 photo SAM_15041_zpse51e5199.jpg

Something which would use what I had to hand in the house, and yet at the same time, I wanted it to be delicious and filling, and pleasing in every way . . . eye, smell, taste etc.

 photo SAM_1505_zpsd759c004.jpg

If you have eggs in the house, you always have a simple supper in the making.  They are so very versatile, and most people like them.   Well, that's been my experience at any rate.   We only ever very seldom have eggs for breakfast.   I would say we more often than not have them for supper if we are having them.

 photo SAM_1506_zps92e67ce8.jpg

They are a wonderful and inexpensive source of protein.  I only buy free range organic eggs, because I think this is an area where these types of things truly matter.  I refuse to support an industry that cages hens, and at the end of the day, when it comes to egg, free range and organic do taste better.

 photo SAM_1507_zps3491b04a.jpg

This is a great way to use up some stale bread as well.   When I told my sister what I was having she said, bread in an omelet??  I said, why not??  You eat toast with an omelet, this is just saving a step!  Because the bread is toasted like croutons first, it does not get soggy.  Scrummo!

 photo SAM_1508_zpse290c88a.jpg

I have used sliced tomatoes, because they go really well with eggs and cheese, but you could use anything else you wanted to.  Maybe spinach, or even leftover cooked broccoli, and cauliflower, or even peppers. 

 photo SAM_1513_zpsf177834d.jpg

Did you know you should never refrigerate your tomatoes??  Tomatoes are one fruit which continues to ripen after it is picked.  I always keep mine in a bowl on the counter.  They taste much, much better for having stood that way for a few days.  They are always so hard and tasteless when you try to eat them as soon as you bring them home from the shops.

In any case, I do hope you will give this simple supper a try.   I just know you will love it!  Sometimes it is the simplest of things which bring us the most joy!

 photo SAM_1501_zpsa6d7ce47.jpg

*Bread, Cheese and Tomato Omelet*
Serves 1
Printable Recipe

Simple supper fare.  It's amazing what you can do with a few simple ingredients, a stale slice of bread, a couple of eggs, some onion, some cheese and a tomato.  Gorgeously delish!

a little butter
1 thick slice of farmhouse style bread
(remove crusts and cut into 1/2 inch cubes)
2 large free range eggs
1 TBS cold water
dash of white pepper
salt to taste
1 spring onion, finely chopped
2 TBS grated strong cheddar cheese
1 small ripe tomato, thinly sliced

Melt a knob of butter in a small frying pan.  Add the bread and cook, stirring occasionally until golden and crispy brown.  Remove with a slotted spoon to some paper toweling and keep warm.

Beat the eggs with a little cold water, some white pepper and some of the onion.  Melt some more butter in the heated pan.  Once it begins to foam, tip in the egg mixture.  Add the fried bread and grated cheese.  Cook gently until set, and the bottom is lightly browned. Top one half with the thinly sliced tomatoe.  Fold in half and slide onto a warm dish.  Garnish with a bit more chopped onion if desired.  


Happy Halloween from our house to yours.  I hope you have a Spooktacular time!!

Wednesday, 30 October 2013

Herbed Mushroom Mac & Cheese

  photo SAM_1470_zpsc8065656.jpg  

 We have been trying to eat less meat in this house lately, and much more in the way of vegetables.   Partly for economics and partly for other reasons.  You may have noticed . . .

  photo SAM_1473_zpscffa66a3.jpg

I had some chestnut mushrooms that needed using up the other day and so I thought to corporate them into a macaroni and cheese casserole.    It ended up being really, really delicious!

 photo SAM_1474_zps7432d22a.jpg

I did an herbed cheese sauce, using two types of cheese along with some tarragon.  I love the flavour of tarragon.  It goes really well with cheeses and mushrooms actually . . .

 photo SAM_1479_zpsbb3ffb37.jpg

I also added some chives and thyme.  Both for flavour and colour.  You could use fresh herbs, but I think when they are being incorporated into a sauce like this, it doesn't really matter.  I always use the Bart Freeze Dried Herbs though . . . they hydrate really well, so it's almost like fresh herbs.  Change your herbs often.   I change mine at least twice a year.

  photo SAM_1480_zpsb65dde97.jpg

The Toddster always says he doesn't like pasta, but then he has two helpings of whatever it is I make.  Methinks he doth protest too much!  In any case, I hope you'll make this.  It's really, really, really good!

 photo SAM_1471_zpsc62694ee.jpg

*Herbed Mushroom Mac & Cheese*
Serves 6
A deliciously different kind of macaroni and cheese, using a combination of herbs, shallots, fried mushrooms and two kind of cheese!  Not exactly diet food however, but very tasty.

For the sauce:
4 TBS butter
4 TBS plain flour
675ml of whole milk (3 cups), warmed
1 tsp freeze dried chives
1 tsp freeze dried tarragon
1 tsp dried thyme
fine sea salt and freshly ground black pepper to taste
1/2 pound of grated gruyere cheese, divided
1/2 pound grated strong white cheddar cheese, divided

For the mushrooms:
3 TBS butter
1 shallot peeled and minced
1 pound chestnut mushrooms, trimmed and sliced
2 TBS good white wine vinegar
You will also need:
1 pound of macaroni, uncooked
2 sliced of bread made into crumbs
(Or the equivalent in cracker crumbs)
1 TBS butter, melted

First cook the mushrooms.   Melt the butter in a large skillet.  Add the mushrooms and shallots.  Cook, stirring occasionally over medium high heat until the mushrooms are golden brown, about 8 to 10 minutes.  Season to taste with salt and black pepper.  Add the vinegar all at once and cook, stirring until it has evaporated.   Remove from the burner and set aside.

To make the cheese sauce, melt the butter in a large saucepan.   Whisk in the flour and cook for one minute.  Slowly whisk in the warm milk whisking constantly, Continue to whisk until the mixture bubbles and begins to thicken.  Turn out the heat and stir in the herbs and 3/4 of each amount of cheese.  Stir to melt the cheese.   Season to taste with some salt and black pepper.  Stir in the mushroom mixture.   Set aside and keep warm.

 photo SAM_1482_zpsb80e23f8.jpg

Cook the macaroni according to the package directions until al dente.  Drain well and then stir this into the mushroom cheese sauce.  Spread into a shallow buttered casserole dish.

 photo SAM_1481_zps0fe41ea0.jpg

Preheat the oven to 200*C/400*F/ gas mark 6. 
Combine the bread or cracker crumbs and melted butter.  Sprinkle the remainder of the cheeses over top of the macaroni mixture then top with the buttered crumbs.  Bake in the heated oven for 15 to 20 minutes.   Allow to stand for 10 minutes before serving.  Delicious!

Tuesday, 29 October 2013

Spiced Tomato Soup


  photo SAM_1604_zpsd3972034.jpg


I am such a lucky girl.  I often get sent the nicest things.  I have always wanted an Emma Bridgewater Mug.  My ex boss had several in her mug drawer in the kitchen and I always loved using them.  I have been known to go to the Emma Bridgewater Page and drool for hours at a time, wishin' and hopin' . . .   I know Susan Branch loves them too and she shared her visit to the plant with us in her latest book.  (Which I devoured from cover to cover!)

 photo SAM_1542_zps54c5ab33.jpg

Imagine my excitement when this box arrived in the post late last week.  I could hardly wait to open it!  What did I find inside????  Well . . .

 photo SAM_1543_zpscab3859a.jpg

None other than their brand new 2013 Halloween half pint mug!!  I know!!!  So excited!   A Halloween celebration of the ghoulish gourd and hand decorated with beautifully coloured hand-sponged pumpkins!!   It's generous size makes it just perfect for a warming brew or cup of soup on All Hallows’ Eve.    I love the colours!  It's so perfectly pretty, and decorated both inside and out with these beautifully painted gourds and blossoms!

 photo SAM_1545_zps6d212a88.jpg

British to the Core, Emma Bridgewater Pottery is all created from warm, cream-coloured earthenware  and hand decorated at their factory in Stoke-on-Trent.  In a day and age where a lot of the things we buy are created and manufactured in foreign countries it is nice to see a  British company selling British creation.  To me that only makes them even more special.  I love them.  Do take a gander over to their page and see what they create.  I guarantee you will fall in love like I did.   I now have my eye on a Peter Rabbit mug and have fallen completely head-over-heels in love with her robins.  Who knows, maybe the Toddster will indulge me this Christmas!      

 photo SAM_1602_zps10c7740e.jpg  

It was the perfect mug to enjoy this new soup which I created as a Halloween warmer this year.  I thought about doing pumpkin or sweet potato, but then settled on a warming spiced tomato soup.  I always have tons of tinned tomatoes in my larder and I wanted to use what I had to hand . . . and that way you would be sure to have those ingredients to hand as well . . . or at least I hope that you do!  

 photo SAM_1606_zps122f6d07.jpg  

Sweet onions, tinned tomatoes, red chillies for heat, some garlic and stock and a bit of herbs is all you need to make this delicious soup.  You can adjust the amount of chillies according to how much heat you do or do not enjoy!  Obviously the more you add the spicier it will be.  I am a chilli wimp myself . . . I don't like things too overly hot . . . 

 photo SAM_1607_zps9c36605e.jpg  

Mind you, the garnish of sour cream helps to cool it down a bit.  I got a bit fancy and piped it on with a baggie and dragged a toothpick through it so that it looked incredibly spider-webbed Halloween Ghoulishly frightful!  

☺     

 photo SAM_1609_zps47e5bbde.jpg 
  
It worked beautifully.  Mind you, then I got all common (as my ex boss would say) and crumbled my crackers into my soup but that is just me!  Not a pretentious bone in my body!  Enjoy!

  photo SAM_1601_zpsfa561b48.jpg  


*Spiced Tomato Soup*
Serves 4 to 6  

A deliciously easy soup which uses store cupboard ingredients for the most part.  Very quick to put together!  

a splash of olive oil
2 400g tins of good quality chopped tomatoes in tomato juice (2 14oz tins)
450ml of good quality chicken stock
2 TBS good quality balsamic vinegar
1 medium onion, peeled and chopped
1 small clove of garlic, peeled and minced
1 tsp brown sugar
1 tsp salt
1/2 tsp fennel seeds
1/4 tsp black pepper
1 small red chilli, trimmed, seeded and finely chopped
(wear gloves and don't touch your face!)  

To serve:
sour cream      

Heat a splash of olive oil in a deep saucepan.  Add the onion and red chilies,  and cook, stirring occasionally, until the onion has softened without browning.  Stir in the garlic and fennel seed.  Cook and stir for about a minute.  Add the vinegar.  Cook, until the vinegar has reduced and almost evaporated.   Tip in the tinned tomatoes, the chicken stock, seasoning and brown sugar.  Bring to the boil, then reduce to a low simmer and cook for 15 to 20 minutes.   Remove from the heat and blitz until smooth with an immersion blender.   Reheat gently.   Ladle into hot bowls, and garnish each serving with a dollop of sour cream. 

Many thanks to Emma Bridgewater for sending me this mug.   I just love it!

Monday, 28 October 2013

Spicy Baked Chicken

 photo SAM_1575_zpsb2dc747f.jpg

We love chicken in this house and it is a meat which I serve often as it is not only affordable but something which readily adapts itself to many flavours and cooking methods.  

 photo SAM_1579_zps54ea608b.jpg


Sometimes I stuff it and roast it whole, which is very, very nice.  Not to mention you then have the leftovers to turn into delicious casseroles and lets not forget a tasty soup from the bones.

 photo SAM_1580_zps6fbf4133.jpg

More often than not though, I like to use pieces, either breasts or leg quarters, sometimes boneless, and at others bone in . . .any way you cut it, chicken is our favourite protein of choice.

 photo SAM_1581_zps78d0db3e.jpg

Today I chose to use chicken leg quarters, which I rubbed with a spice mix, drizzled with olive oil and then simply roasted in the oven until the skin was nicely crisped, whilst leaving the flesh tender and juicy.  It's one of the Toddster's favourite meals, served up with potato of some sort and vegetables.  You can't go wrong.  Kiddos love this too!  And best of all it's quick, easy, economical and tasty!

 photo SAM_1578_zps8cc459d8.jpg


*Spicy Baked Chicken Quarters*
Serves 6

Simple.   Chicken thigh and leg quarters, rubbed in a spicy rub, drizzled with olive oil and then baked until they crispy tender and tasty tasty!  

6 chicken leg quarters (thigh and drums)
1/2 tsp fine sea salt
1/2 tsp black pepper
1/2 tsp paprika
1/2 tsp mustard powder
1/2 tsp onion powder
1/2 tsp garlic powder
(If you use onion and garlic salt, omit any other salt)
1/2 tsp dried thyme
1/2 tsp dried marjoram
2 TBS olive oil
Hot sauce to finish (optional)
Parmesan Cheese (optional)  


The day before you want to cook your chicken pieces, remove them from their packaging and place them into a baking dish, leaving space between each one and place them in the refrigerator to dry overnight.  This helps to ensure a nice dry surface for the spices to cling to.   It's not absolutely necessary to do this, but I do it this way.  You also get nice crisp skin.  Delicious! 
 The next day when you are ready to cook them remove your chicken from the fridge.  Using a sharp knife cut several slashes into the meat on the diagonal.   Mix together all of your herbs and spices and rub this mixture into the chicken pieces, coating them well and equally.  Allow to stand for half an hour before proceeding.

Preheat the oven to 220*C/425*F/ gas mark 7.  

Drizzle the chicken pieces with the olive oil and then put them into the heated oven.  Bake for 45 to 60 minutes, flipping them occasionally with tongs, until the meat easily separates from the bone and any juices run clear.  The skin should be nice and crisped and the meat tender and moist.  If you are wanting extra zip you can brush them with some hot sauce or sprinkle lightly with a bit of finely grated Parmesan cheese prior to serving.
Note:  This recipe is easy to adapt to other flavours.  Wanting a Mexican feel???  Try combining mild chili powder along with the salt, pepper, onion, garlic.  Change out the mustard powder to ground cumin and add some coriander flakes instead of the marjoram.  For an Indian feel, leave out the paprika and herbs and use ground tumeric, ground coriander, ground cumin and ground cardamom along with a touch of cinnamon and cloves.

Pear and Apple Spice Cake

  photo SAM_1557_zps3af4203d.jpg  

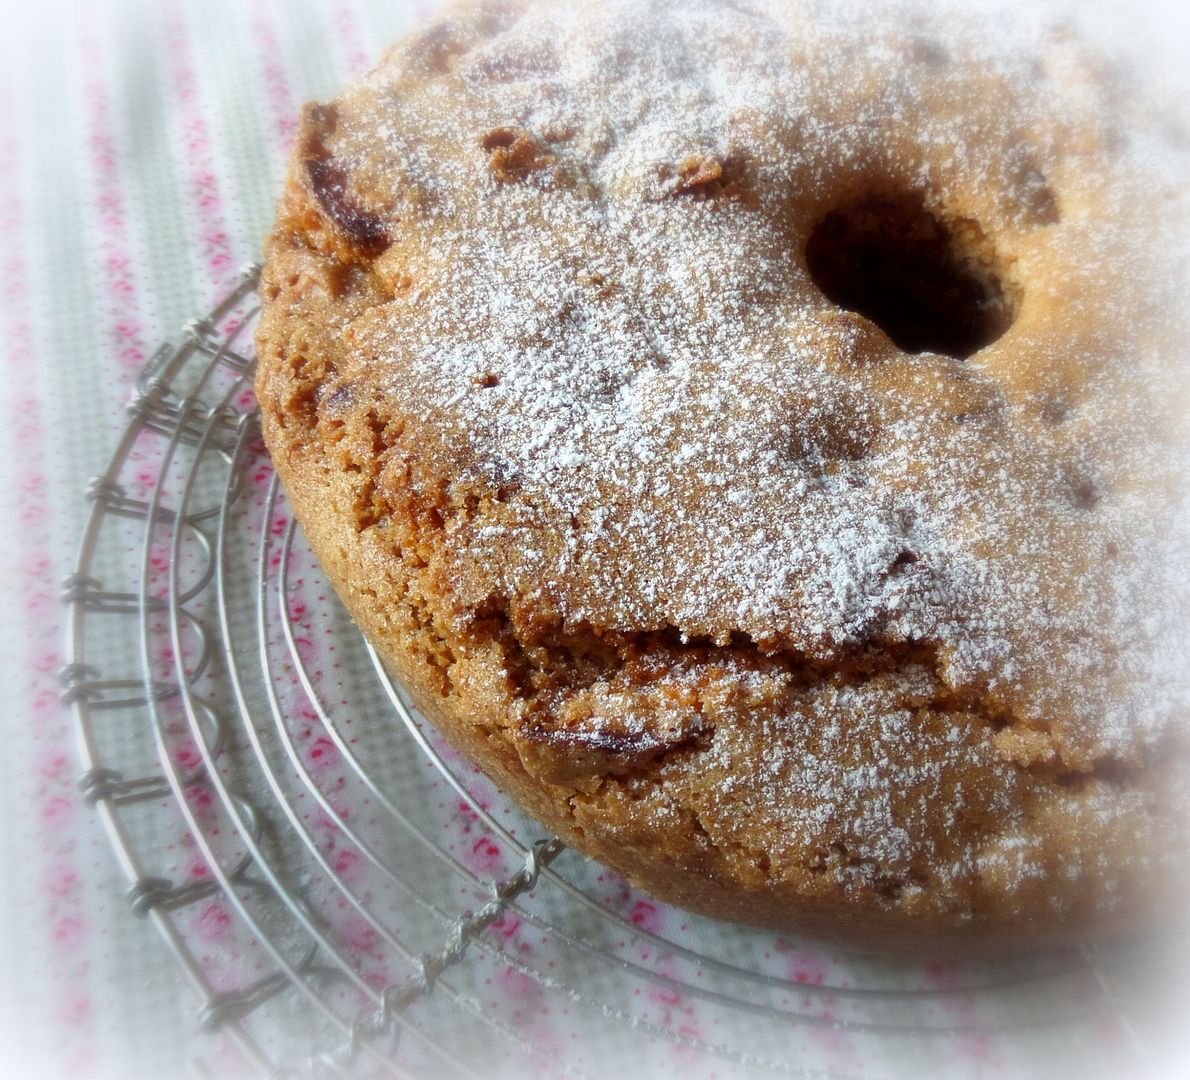
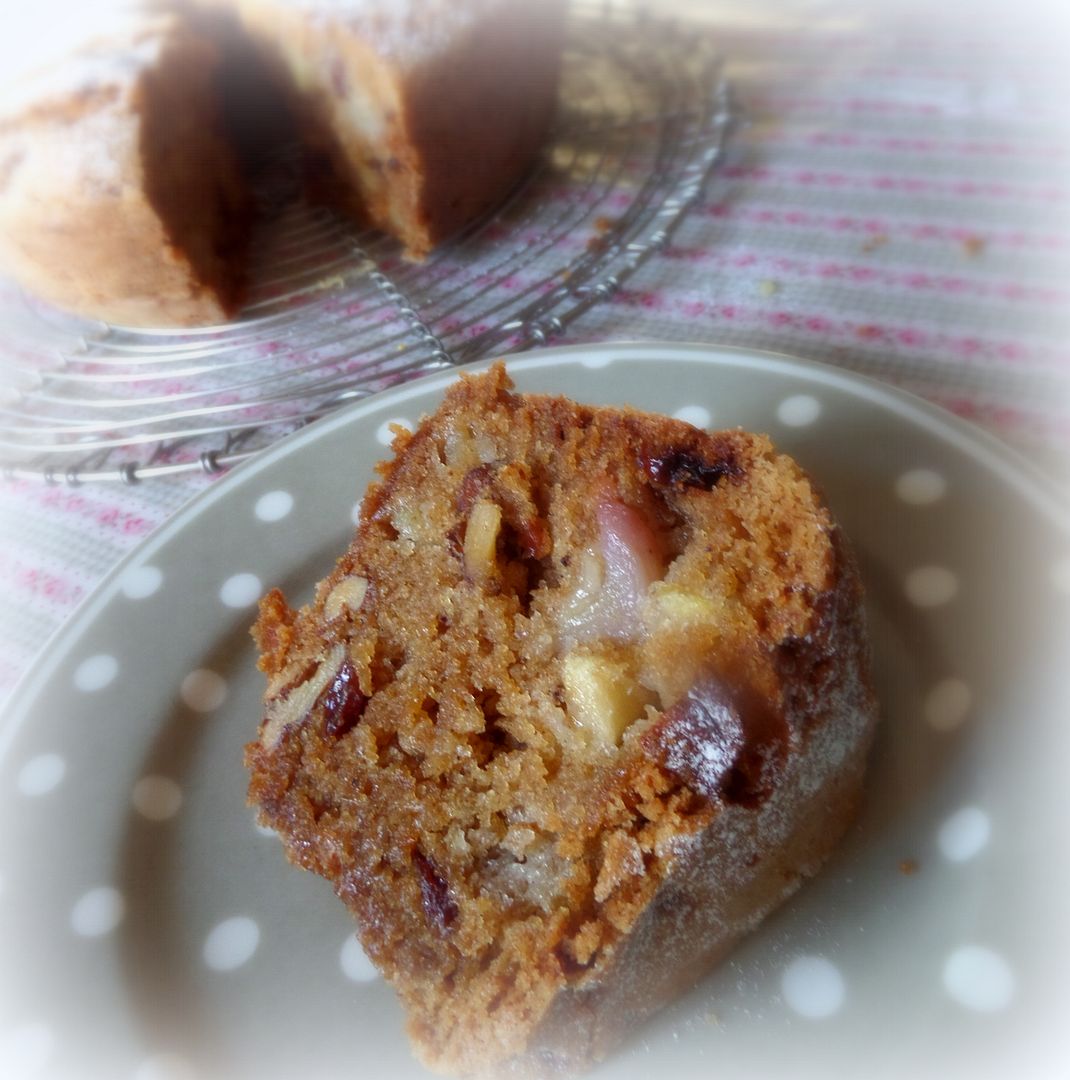
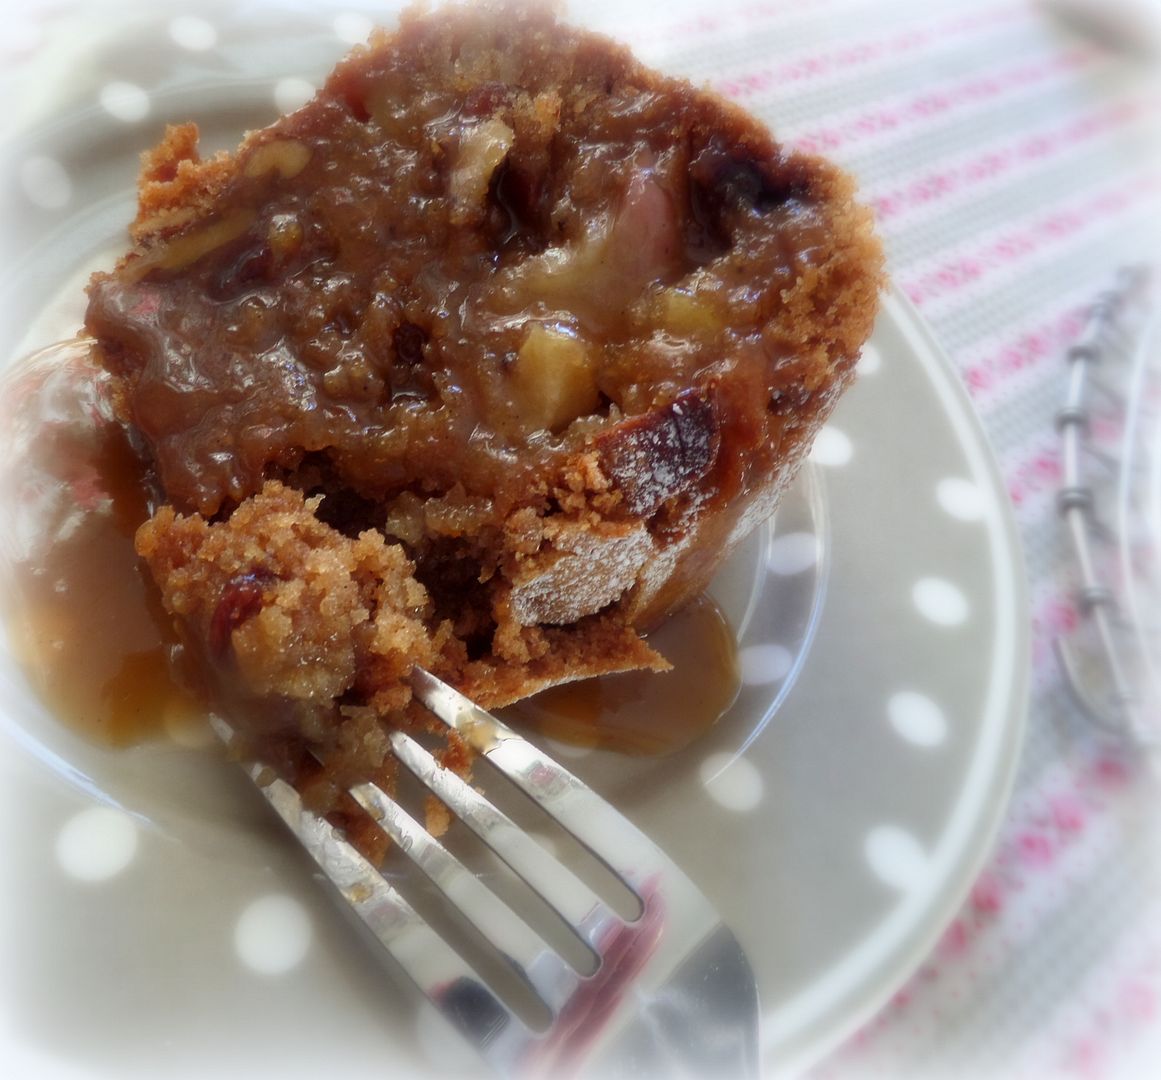
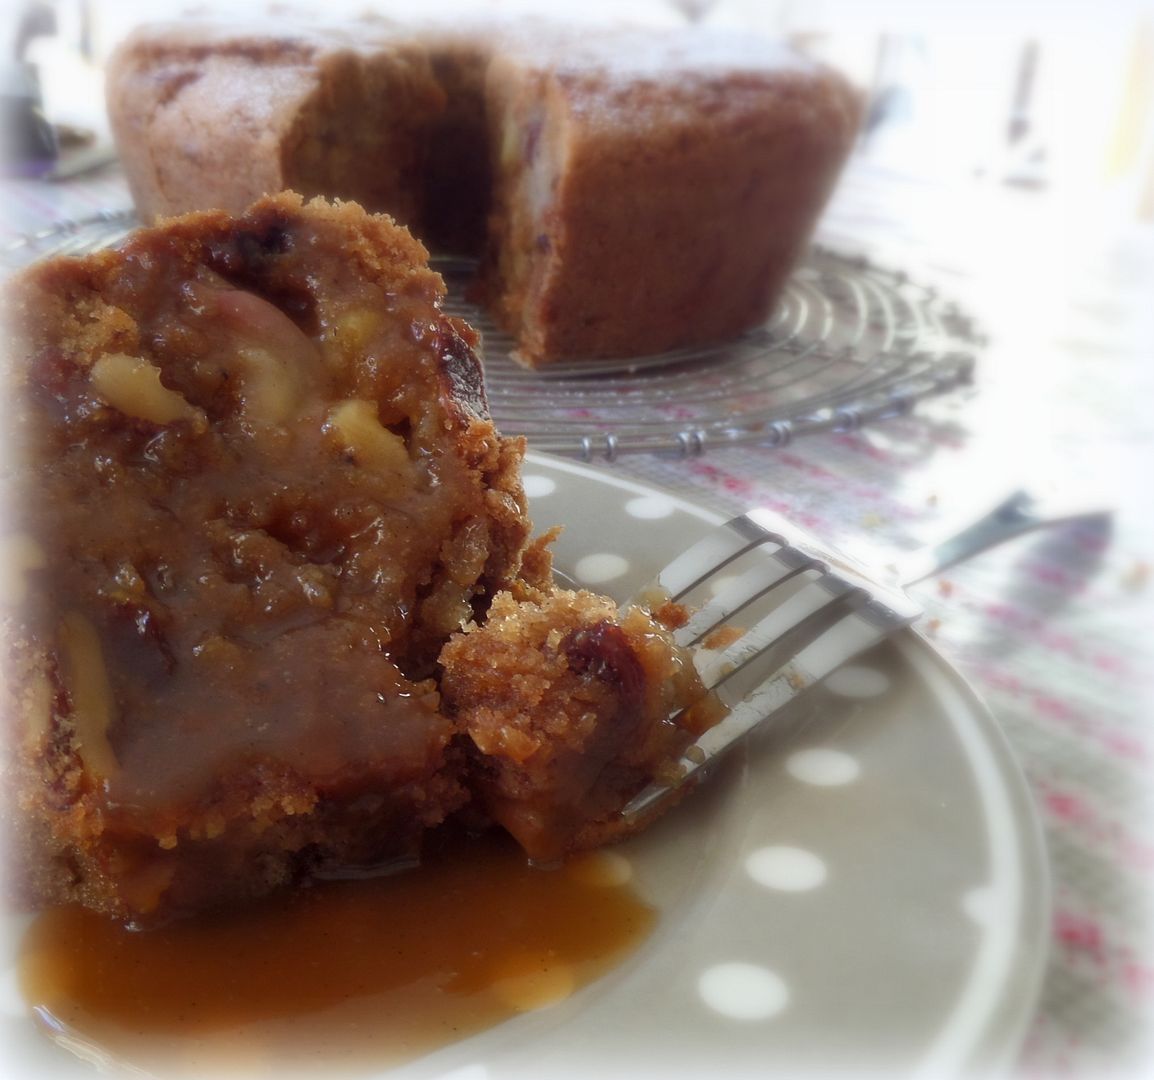
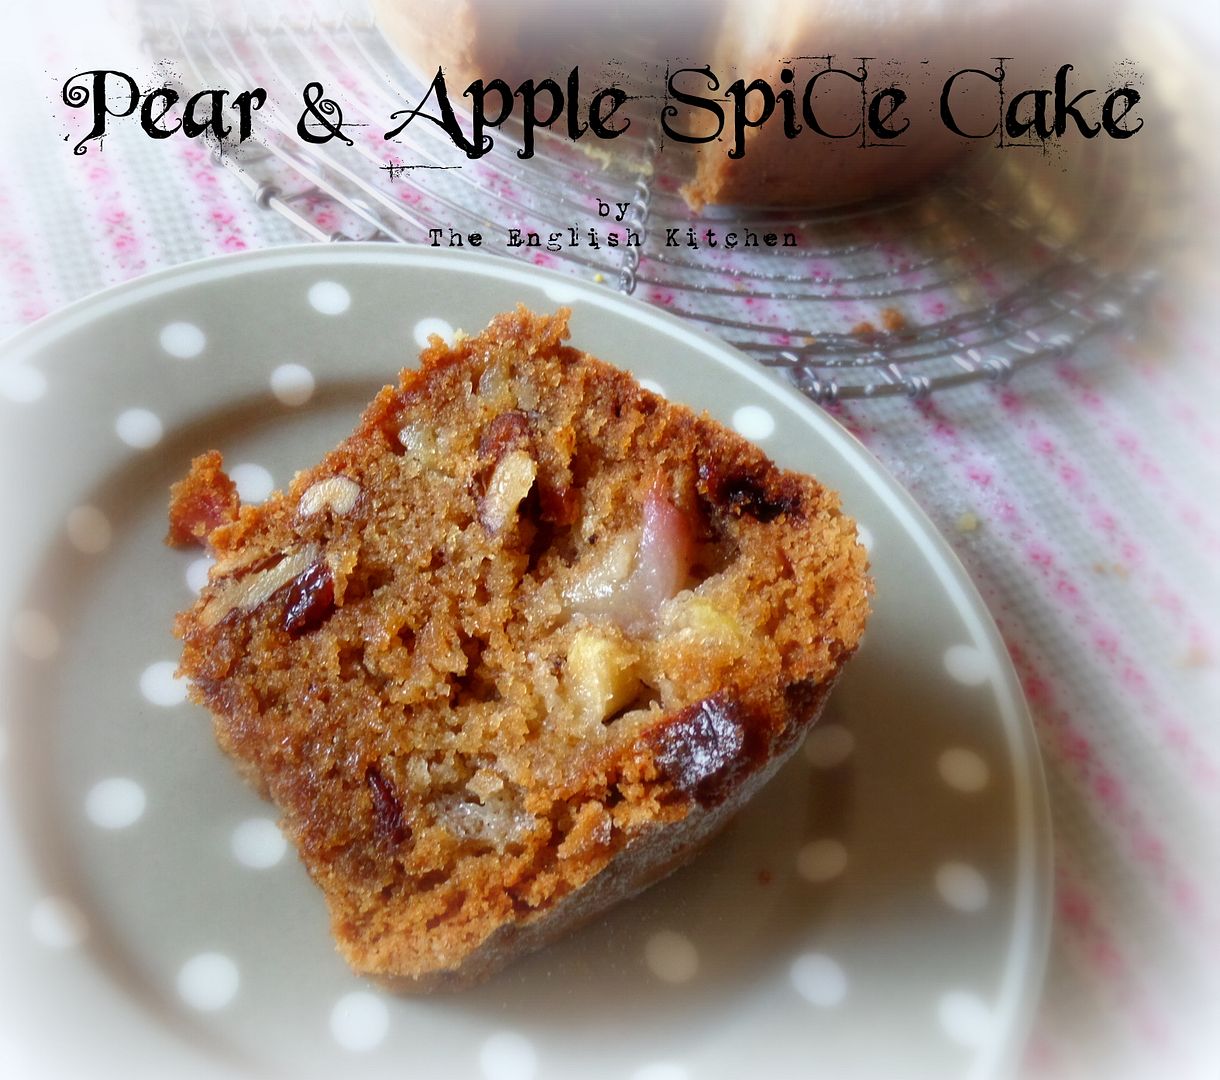
This is a lovely cake that I always used to make using just apples.   They almost melt into the cake, making it beautifully moist.   The other day I had some pears that I wanted to use as well, and so I used half pears and half apples with the most delightful results!!    

 photo SAM_1559_zps384c6465.jpg

I kicked up the spice a bit.  Normally I use only cinnamon, but pears go so very well with cardamom . . . and nutmeg is a warm spice that goes well with most fruits, and so I added some of each of those.

  photo SAM_1560_zpsc75043c9.jpg

WHAT A BEAUTIFUL CAKE.  No, not to look at, it's actually kind of ugly to look at, but flavour-wise, this cake cannot be beat.  It's just gorgeous!    

 photo SAM_1561_zpsb3988744.jpg

I added some toasted walnut pieces for a bit of crunch.  I do like a cake that is interesting and has different bits in it, don't you???  But fear not, if nuts are not your thing, you can easily leave them out, no problem.  Likewise the sultanas.    

 photo SAM_1564_zps9f52e96f.jpg

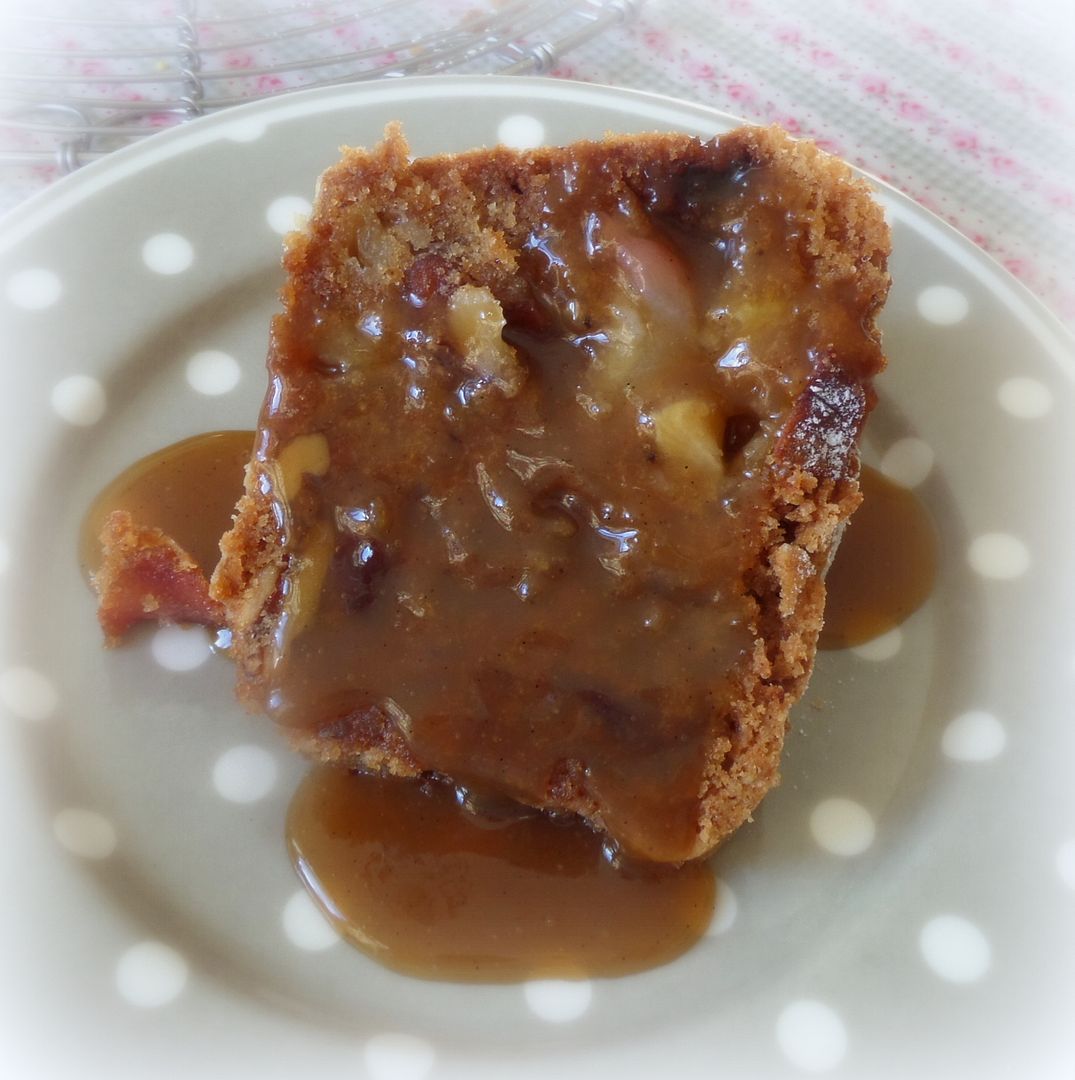
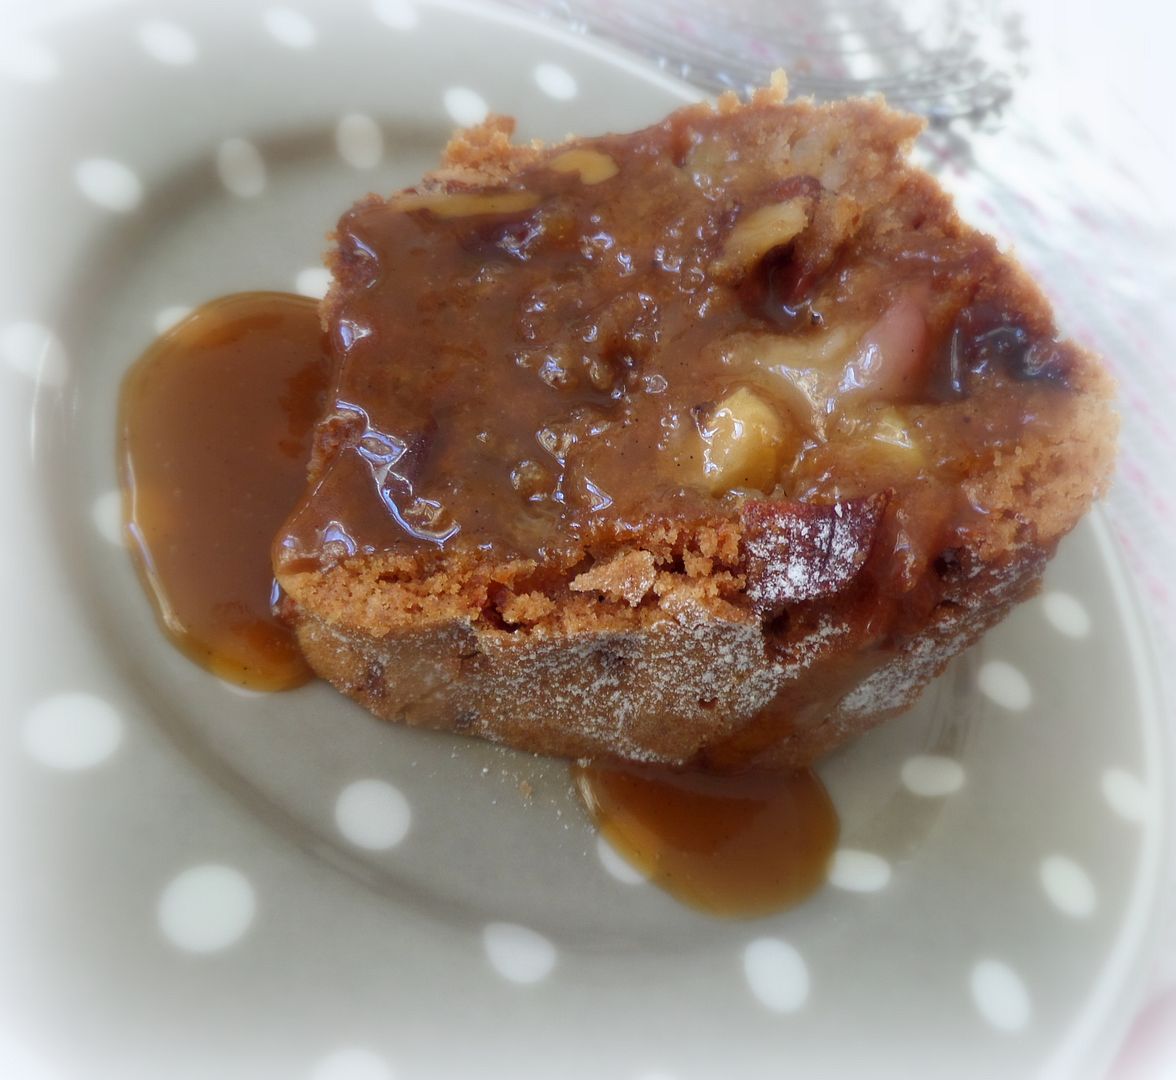
I had some caramel sauce left from the  other day when I made those pumpkin fritters.  A bit of that warmed up and spooned over top went down a real treat.  It was absolutely perfect with this cake.  It almost tasted like a candy apple cake then . . .   

 photo SAM_1566_zps0db400bf.jpg

Of course, vanilla ice cream would go very well also . . . or custard, for what is icecream but frozen custard anyways.  Oh heck, why not go whole hog and have clotted cream.  Now that would be fantabulous!

 photo SAM_1558_zps07c9b988.jpg
*Pear and Apple Spice Cake*
Makes one large tube cake  

Moist and spicy and stogged full of fruit, raisins and nuts.  Delicious served warm with some caramel sauce.  Feel free to leave out the raisins and nuts if you don't like them.

420g of plain flour, plus more for dusting the pan (3 cups)
354ml of vegetable oil (1 1/2 cups)
380g of granulated sugar (2 cups)
3 large free range eggs
1 tsp salt
1 tsp ground cinnamon
1/2 tsp ground cardamom
1/4 tsp freshly grated nutmeg
1 tsp bicarbonate of soda
1 tsp vanilla paste
3 cups of peeled and thinly sliced pears and apples (I used cox's apples and conference pears
from our own trees) (355g)
115g of chopped toasted walnuts (1 cup)
150g of sultana raisins (1 cup)

Preheat the oven to 180*C/350*F/ gas mark 4.  Grease a 9 inch tube pan with some shortening and dust lightly with flour, shaking out any excess.  Set aside.

Sift together the flour, spices, salt and soda.  Set aside.  Put the oil and sugar into a large mixing bowl.   Beat together with an electric mixer, or a stand mixer (using the paddle blade) for five minutes, until thick.  Beat in the eggs, one at a time and continue to beat until creamy.   Stir the dry ingredients into the batter.  Fold in the fruit and nuts.   Spread this batter into the prepared pan, smoothing the top over.   Bake for 1 hour and fifteen minutes, or until a toothpick inserted in the centre comes out clean.

Allow to cool completely in the pan before turning out.   Serve at room temperature with or without ice cream and some caramel sauce, if desired.

 photo SAM_1423_zpsd0c0658f.jpg

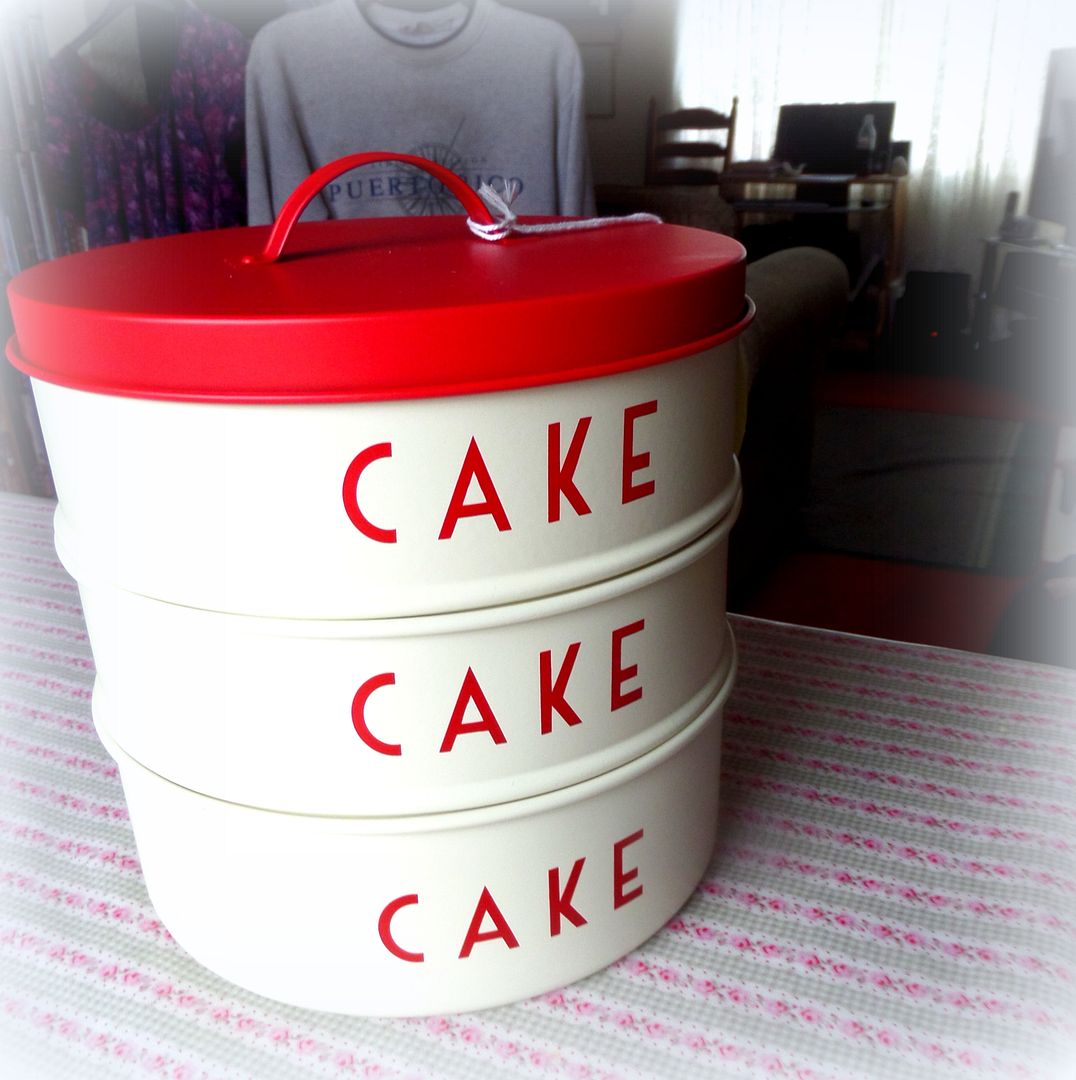
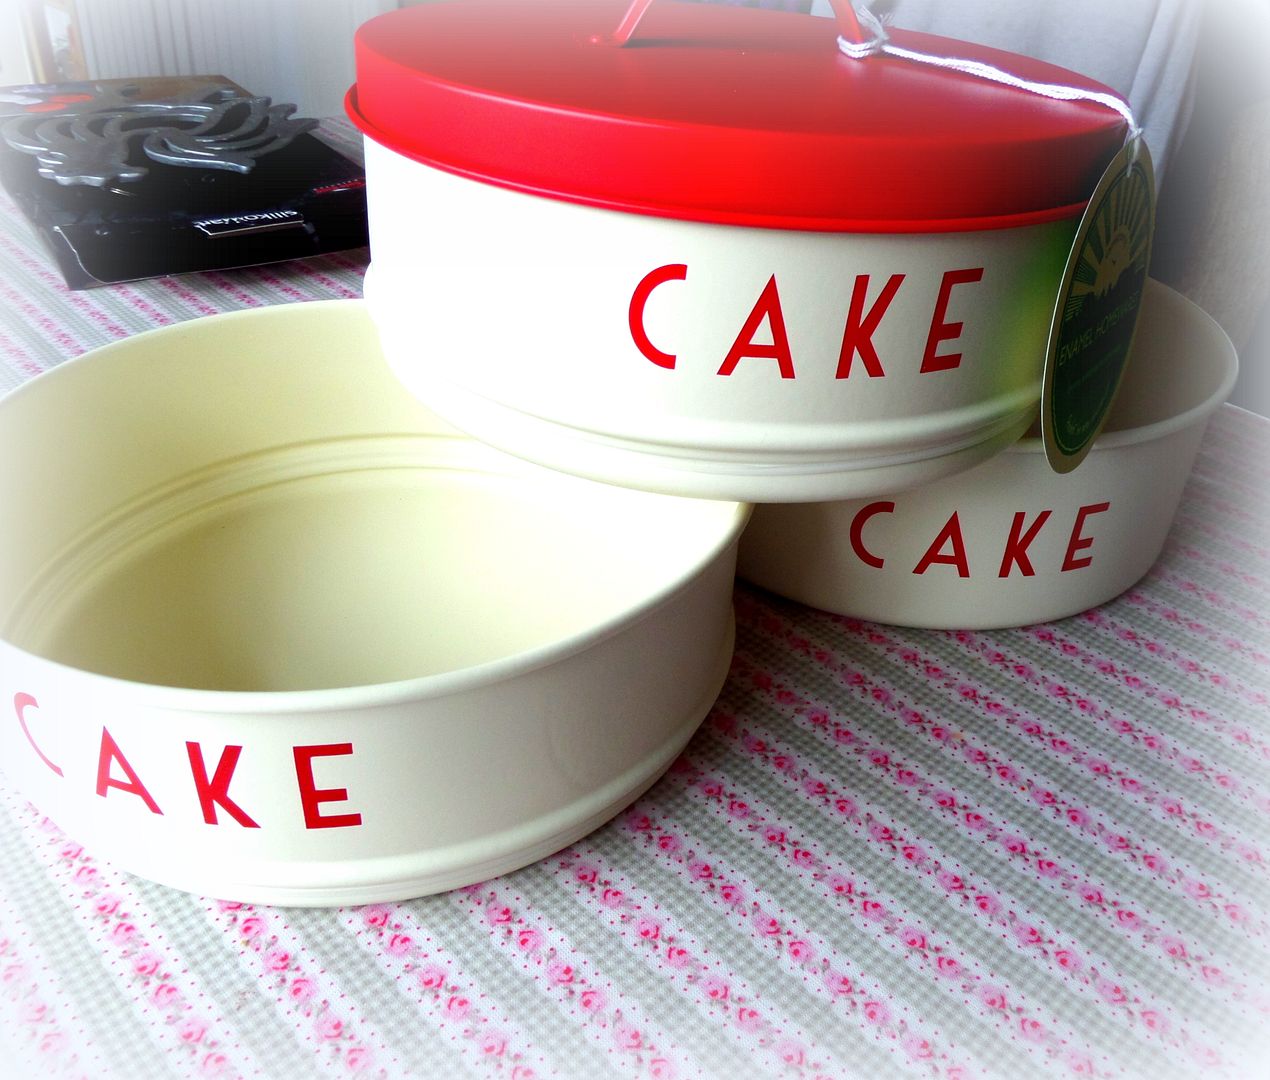
Speaking of cakes, it's always nice to have a nice tin to store all of your baked goodies in.  I was recently sent this lovely cake tin from  Rex London.  I fell right in love with it.  This Three Tier Red and Cream Cake Tin has a lovely vintage look which I just adore.

  photo SAM_1424_zps8988aa9e.jpg

Made from sturdy enamel coated tin, all three compartments are ample in size and close air tight to help keep things fresh.  It would make a wonderful Christmas gift for that baker in your life who also adores anything vintage looking.  It sells for £34.95.  Its a beautiful way to keep three separate baked goodies stored properly without taking up a lot of counter space!  It gets a 10 out of 10 from me!  I love the colours and the vintage look of it.

 photo 24756-hi_zpsce1acef0.jpg

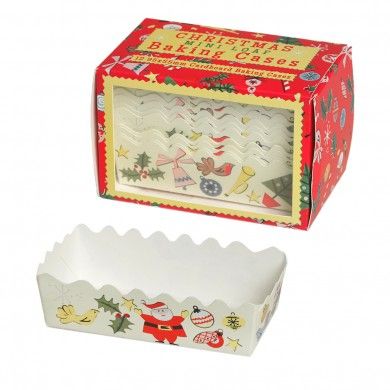
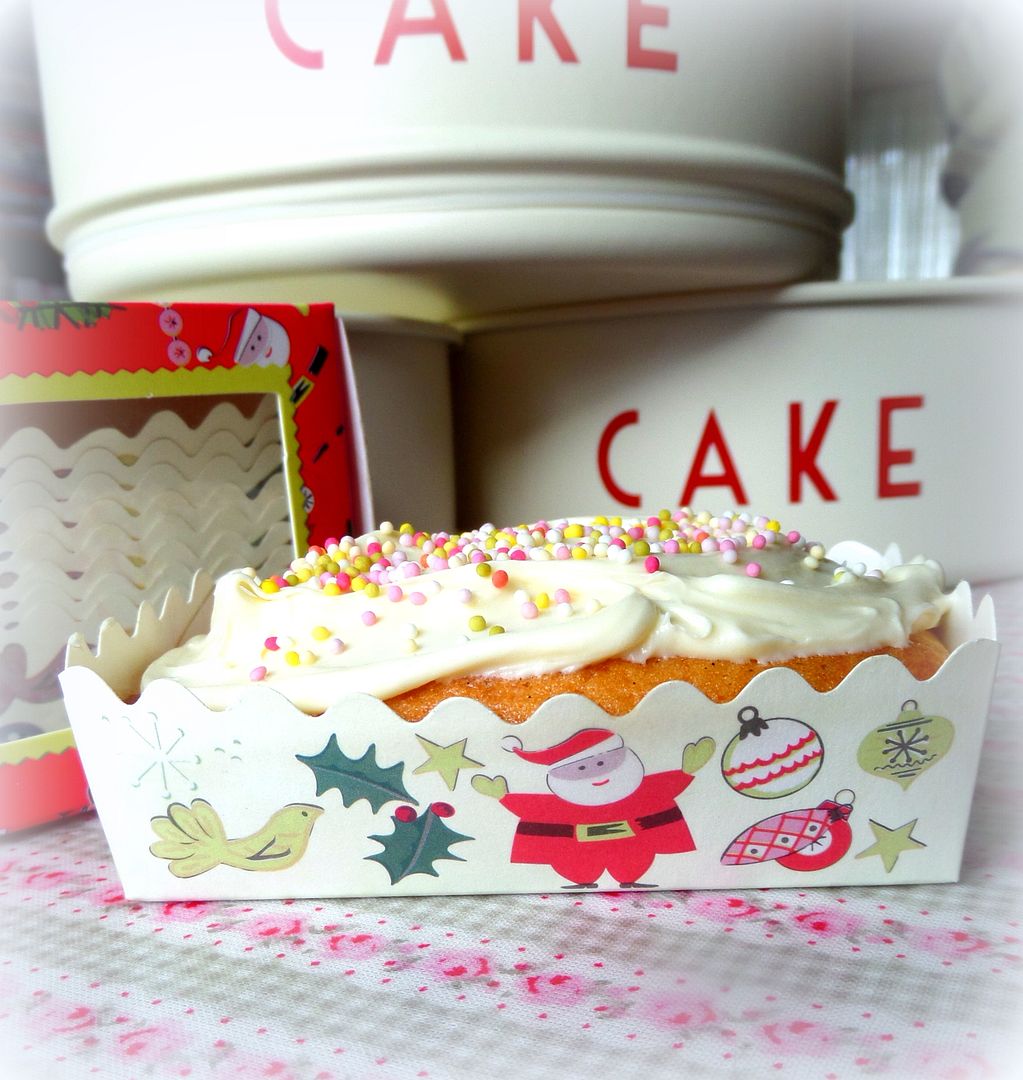
I was also sent this adorable set of 12 Christmas Carnival Mini Loaf  Baking Cases, also from  Rex London. Made from sturdy card and beautifully decorated in a vintage Christmas images they are the perfect size for individual loaves, perfectly sized for gift giving.   I would buy three sets and then bake three different loafs in each set and then present  12 lucky elderly neighbors and friends or singletons with a gift of one of each, wrapped and tied up in a pretty bow for the holidays.   I can't think of one person that would turn that down.

 photo SAM_1429_zpsd7928b3d.jpg

They held up very well in baking without discolouring or going all floppy.  How cute is that?   These are also very reasonably priced at only £1.95 for the set of 12, which I think is great!  They also have alot of other types of baking cases for the holidays as well as a whole array of different items in the Christmas Carnival Design!

Many thanks to  Rex London for sending me these!!  I highly recommend both!

Note:  Although I was sent these to try, any and all opinions are my own.

Sunday, 27 October 2013

Cookies and Cakes and Pies . . . oh my!

   photo img_girl-talking-on-phone_superstoc.jpg 

I had baked a delicious spiced apple and pear cake today to share with you, but the day got away from me and before I knew it, it was too dark to take photographs.   I like taking my food photographs in natural light if I can, which means I will have to wait until tomorrow.  In the meantime I am moving a few scrummy bits over from my other blog.  I think it would be nice to have all my recipes in one place.  The photography on these is not that great as it was eons ago and I was not that practiced at using my camera or taking photos!  They're all good solid recipes however.  There isn't a clanger in the bunch!  Tasty tasty!  I'll be back tomorrow with the apple cake!


*Cinnamon Oatmeal Cookies*
Makes about 36
Printable Recipe

Oh my but these are delicious fresh out of the oven with a tall glass of cold milk.  Each bite brings you the sweet crunch on the outside with the chewiness of the inside, and full oaty flavour.  I think these are fast becoming my favourite.

1/2 cup butter, softened
1 1/4 cup sugar
1 large egg
1 TBS molasses
1 tsp vanilla
1 1/2 cups flour
1 1/4 cup old fashioned rolled oats, (Do NOT use instant)
1 tsp baking powder
1/2 tsp baking soda
1/2 tsp salt
1 tsp ground cinnamon
3/4 cup demerara sugar (to roll the cookies in)

Pre-heat the oven to 180*C/350*F.  Line two baking sheets with baking parchment.  Set aside.

Cream the softened butter together with the sugar, until light and cream.  Beat in the egg, molasses and vanilla.  Whisk together the flour, baking powder, baking soda, salt and cinnamon.  Stir this into the creamed mixture, blending in well.  Stir in the oats.  Put the demerara sugar into a bowl.

Roll bits of the dough into walnut sized pieces and then roll each ball in the demerara sugar to coat.  Place on the baking sheets, leaving about 2 inches between.   Bake, one tray at a time, placing them on the centre rack of the oven, for 10 to 12 minutes, or until lightly browned.  Remove to a wire rack to cool.  Repeat until all the dough has been used up.  Store in an airtight container.


*Chocolate Chip Cake*
Makes one 8 inch square cake
Printable Recipe

This is a tasty amd moist white cake, just stogged full of delicious milk chocolate chips.  If you are feeling really indulgent you can replace the chocolate chips with the same amount of good quality milk chocolate cut into bits. My favourite it Green and blacks.  The icing does call for raw egg yolk, so if you are making this cake for the elderly or the very young, I would replace it with a plain vanilla buttercream icing.

for the Cake:
1/2 cup butter, softened
3/4 cup sugar
2 cups flour
3 tsp baking powder
1 tsp vanilla
3 egg whites, beaten stiff along with 1/4 cup sugar
3/4 cup milk
3 ounces milk chocolate chips (Or an equivalent amount of good quality milk chocolate,
such as Green and Black's, chopped into small bits) (Remove 1 TBS of the flour before mixing it with the
baking powder and stir this into the chocolate chips so that they don't sink when baking)
for the Icing:
1/2 cup butter, softened
1 1/2 cup icing sugar
3 egg yolks
1 tsp vanilla

Pre-heat the oven to 180*C/350*F.  Grease an 8 inch square pan and then line it with parchment paper.  Grease again and then set it aside.

Cream the butter and sugar together until light and fluffy.  Whisk together the dry ingredients.  Add them to the creamed mixture, alternately, beginning and ending with the dry.  Carefully fold in the beaten egg whites.  Fold in the chocolate chips, along with any flour residue.  Spread the batter into the prepared pan and then bake for 30 to 35 minutes, or until the centre springs back when lightly touched and a toothpick inserted in the centre comes out clean.  Be careful not to overbake it.  Let sit in the pan for about 10 minutes before removing it completely to a wire rack to cool  before icing.

To make the icing, cream the butter until light.  Beat in the remaining ingredients, beating until light and fluffy.  Spread on top of the cooled cake.


*Gingerbread Pudding Cake*
Serves 12, but can be successfully halved
Printable Recipe

I just love pudding cakes, and this one is a spicy delight!  Serve warm with ice cream for a realy tasty treat!

2 1/2 cups flour
1 1/2 tsp baking soda
2 1/4 tsp ground ginger
1 tsp ground cinnamon
1/2 tsp salt
1/2 tsp ground allspice
1/4 tsp freshly ground nutmeg
1/4 tsp ground cardamom
1/2 cup butter, softened
1/2 cup sugar
1 large egg, beaten
1 cup molasses
(mild and in the uk you can use 1/4 cup dark treacle mixed with 1/4 cup golden syrup)
1 cup water
3/4 cup firmly packed brown sugar
1 1/2 cups hot water
1/3 cup butter, melted

Pre-heat the oven to 180*C/350*F.  Whisk the flour, baking soda, ginger, cinnamon, salt, allspice, nutmeg and cardamom together in a bowl.  Set aside.

Cream the butter and sugar together until creamy.  Beat in the egg.  Mix the molasses and water together and then beaet that into the creamed butter, alternately with the flour mixture, beating only until blended.  Do not over beat.  Pour batter into an ungreased 13 by 9 inch baking pan. Sprinkle the brown sugar evenly over top.  Stir together the hot water and melted butter and carefully pour this over top of the batter.  Do not stur.  Bake for 40 to 55 minutes, or until the gingerbread looks all cracked on top and a toothpick inserted into the centre comes out clean.

Serve warm with some ice cream.  Delicious!!


*One Bowl Chocolate Cake*
Makes 2 9-inch layers
Printable Recipe

This is a rich and moist chocolate cake which goes together in a jiffy, all in one bowl.  Frost as desired with your favourite frosting.

2 cups sugar
1 3/4 cups all purpose flour
3/4 cup unsweetened cocoa powder
1 1/2 tsp baking powder
1 1/2 tsp baking soda
1 tsp salt
2 2ggs
1 cup whole milk
1/2 cup sunflower oil
2 tsp vanilla extract
1 cup boiling water

Pre-heat the oven to 180*C/350*F.  Grease and flour two nine-inch round cake tins.  Set aside.

Place all the cake ingredients,except for the boiling water into a large bowl.  Beat for 2 minutes on the medium speed of an electric mixer.  Stir in the boiling water and divide the batter amongst the prepared cake tins.  The batter will be thin.  Don't worry, this is normal.

Bake for 30 to 35 minutes.   The cake is done when a toothpick inserted in the centre comes out clean.  Cool in the pans for 10 minutes before removing to wire racks to finish cooling.

Frost and decorate as desired.


 *Strawberry Toffee Tart*
Serves 6
Printable Recipe

A crispy, buttery and oaty crust covered with a tangy cream and a plethora of sliced strawberries, this is truly moreish. A final drizzle of toffee sauce is it's crowning glory. Easy, quick and pleasing on all levels this is a true winner!

170g of hobnob biscuits (a buttery oatmeal cookie)
(Scant two cups of crumbs)
85g (1/3 cup) butter
400g of ripe strawberries (scant 3 cups)
385ml of double cream ( 1 2/3 cup)
5 soft toffees (such as Werther's original soft toffees)
200g tub of Greek Yoghurt (1 2/3 cup)
icing sugar for dusting


Line an 8 inch tart tin with baking parchment. Crush the biscuits to fine crumbs either in your food processor, blender or by bashing them in a plastic bag with a rolling pin. Tip them into a bowl and mix together with the melted butter. Press this mixture evenly in the base of the tart tin. Place in the refrigerator for 30 minutes or so until it feels firm. Once firm, remove the biscuit base from the tin and carefully slide it onto a flat serving plate.

Slice the strawberries and set aside.

Take 2 TBS of the cream and put it into a small bowl. Whip the rest of the cream until it holds soft peaks. Fold in the yoghurt and then spoon this mixture over the top of the biscuit base and cover with the sliced strawberries.

Add the toffees to the cream and place in the microwave. Cook on medium heat for 30 seconds to 1 minute. Stir until they form a sauce. Drizzle this sauce over the berries. Dust with icing sugar just before serving.


*Sticky Topped Gingerbread*
Makes one 8 inch square cake
Printable Recipe

I am a gingerbread connoisseur. I have tried many recipes through the years and this is the ultimate version that I have come up with. Dark, spicy and moist with a lovely and stickily decadent topping, this version wins on all counts!

1 1/2 cups flour
1 tsp baking soda
1/2 tsp salt
1 tsp ground cinnamon
1/4 tsp ground cloves
2 1/2 tsp ground ginger
2 tsp unsweetened Dutch process cocoa powder
2 large eggs, at room temperature
1/2 cup firmly packed soft dark brown sugar
1/2 cup sour milk
(or buttermilk)
1/2 cup dark molasses
1/2 cup slightly salted butter, melted and cooled
For the Topping:
3 TBS butter
1/3 cup firmly packed dark brown sugar
2 TBS double cream (heavy or whipping)

Pre-heat the oven to 180*C/350*F. Lightly grease and flour an 8 inch square baking dish, tipping out any excess flour. Set aside.

Whisk the flour, soda, salt, cinnamon, cloves, cocoa and ground ginger together in a medium sized bowl. Set aside.

Beat the eggs in a large bowl until foamy. Beat in the brown sugar, beating it until the mixture is smooth and lump free. Beat in the sour milk (or buttermilk), molasses and melted butter. Beat until well blended, scraping down the sides of the bowl as necessary. Fold in the flour mixture, mixing it in only until just blended in and no dry mixture remains. Scrape the batter into the prepared pan. Give the pan a gentle smack down on the counter a couple of times to release any air bubbles and then bang it into the oven and bake for 30 to 40 minutes, until the top springs back when lightly touched and the edges have pulled away a bit from the sides. Transfer to a rack to cook for several minutes while you make the topping.

Pre-heat the grill or broiler of your oven.

Place all the topping ingredients in a small saucepan. Heart over medium heat, stirring constantly until the mixture bubbles and thickens. Remove from the heat.

Take a fork and poke a few holes here and there across the top of your gingerbread. Pour the hot topping mixture evenly over top of the warm gingerbread, allowing it to seep down the sides. Place under the grill and broil until the topping is bubbling, about 40 seconds or so. (watch carefully so it doesn't burn!) Remove from the broiler.

Serve warm with sweetened whipped cream if desired.


*Baked Apples with Mincemeat and Cream*
Serves 4
Printable Recipe

I love baked apples. They are so easy to do and always taste so good when they are done. For a little something extra special try baking them stuffed with mincemeat. These are truly delicious!


1 medium bottle of sparkling apple cider or apple juice (about 3 1/2 cups)
2 dessert spoons of cranberry jelly
2 TBS unsalted butter
4 large baking apples (I used Blenheim Orange Suffolk)
4 dessert spoons of mincemeat
a small handful of chopped and toasted walnuts
a small handful of dried tart cherries
1 TBS chopped crystalized ginger
250 ml container of double cream for serving (about 1 1/4 cup)

Pre-heat the oven to 200*C/400*F/gas mark 6. Lightly butter a baking dish and set aside.

Put the apple cider, cranberry jelly and butter into a large skillet and bring to a boil. Boil until it is reduced to about 1 1/4 cups. This should take about 12 to 15 minutes.

In the meantime, cut a cone shaped piece from the stem end of each apple, about 2 inches wide at the tip and 1 inch deep. Using a melon baller, remove the core, leaving the apple intact at the bottom. Take a sharp knife and cut a slight slit around the middle of each apple, about halfway up. Try not to cut in too deeply. This will help to prevent the apple from exploding in the oven and help it to keep it's shape.

Mix the mincemeat, walnuts, cherries and ginger together in a bowl. Spoon this mixture into the apples, filling and mounding it up in the centre.

Arrange the apples in the baking dish and then spoon the cider over and around them. Bake for about 45 minutes, until the apples are tender. Serve warm in shallow bowls with a spoonful of cream or two drizzled over each.